


The tmux utility, a terminal multiplexer, lets you treat your terminal as a multi-paned window into your system. You can arrange the configuration, run different processes in each, and generally make better use of your screen. We introduced some readers to this powerful tool in this earlier article. Here are some tips that will help you get more out of tmux if you’re getting started.
This article assumes your current prefix key is Ctrl+b. If you’ve remapped that prefix, simply substitute your prefix in its place.
Set your terminal to automatically use tmux
One of the biggest benefits of tmux is being able to disconnect and reconnect to sesions at wilI. This makes remote login sessions more powerful. Have you ever lost a connection and wished you could get back the work you were doing on the remote system? With tmux this problem is solved.
However, you may sometimes find yourself doing work on a remote system, and realize you didn’t start a session. One way to avoid this is to have tmux start or attach every time you login to a system with in interactive shell.
Add this to your remote system’s ~/.bash_profile file:
if [ -z "$TMUX" ]; then
    tmux attach -t default || tmux new -s default
fi
Then logout of the remote system, and log back in with SSH. You’ll find you’re in a tmux session named default. This session will be regenerated at next login if you exit it. But more importantly, if you detach from it as normal, your work is waiting for you next time you login — especially useful if your connection is interrupted.
Of course you can add this to your local system as well. Note that terminals inside most GUIs won’t use the default session automatically, because they aren’t login shells. While you can change that behavior, it may result in nesting that makes the session less usable, so proceed with caution.
Use zoom to focus on a single process
While the point of tmux is to offer multiple windows, panes, and processes in a single session, sometimes you need to focus. If you’re in a process and need more space, or to focus on a single task, the zoom command works well. It expands the current pane to take up the entire current window space.
Zoom can be useful in other situations too. For instance, imagine you’re using a terminal window in a graphical desktop. Panes can make it harder to copy and paste multiple lines from inside your tmux session. If you zoom the pane, you can do a clean copy/paste of multiple lines of data with ease.
To zoom into the current pane, hit Ctrl+b, z. When you’re finished with the zoom function, hit the same key combo to unzoom the pane.
Bind some useful commands
By default tmux has numerous commands available. But it’s helpful to have some of the more common operations bound to keys you can easily remember. Here are some examples you can add to your ~/.tmux.conf file to make sessions more enjoyable:
bind r source-file ~/.tmux.conf \; display "Reloaded config"
This command rereads the commands and bindings in your config file. Once you add this binding, exit any tmux sessions and then restart one. Now after you make any other future changes, simply run Ctrl+b, r and the changes will be part of your existing session.
bind V split-window -h
bind H split-window
These commands make it easier to split the current window across a vertical axis (note that’s Shift+V) or across a horizontal axis (Shift+H).
If you want to see how all keys are bound, use Ctrl+B, ? to see a list. You may see keys bound in copy-mode first, for when you’re working with copy and paste inside tmux. The prefix mode bindings are where you’ll see ones you’ve added above. Feel free to experiment with your own!
Use powerline for great justice
As reported in a previous Fedora Magazine article, the powerline utility is a fantastic addition to your shell. But it also has capabilities when used with tmux. Because tmux takes over the entire terminal space, the powerline window can provide more than just a better shell prompt.
If you haven’t already, follow the instructions in the Magazine’s powerline article to install that utility. Then, install the addon using sudo:
sudo dnf install tmux-powerline
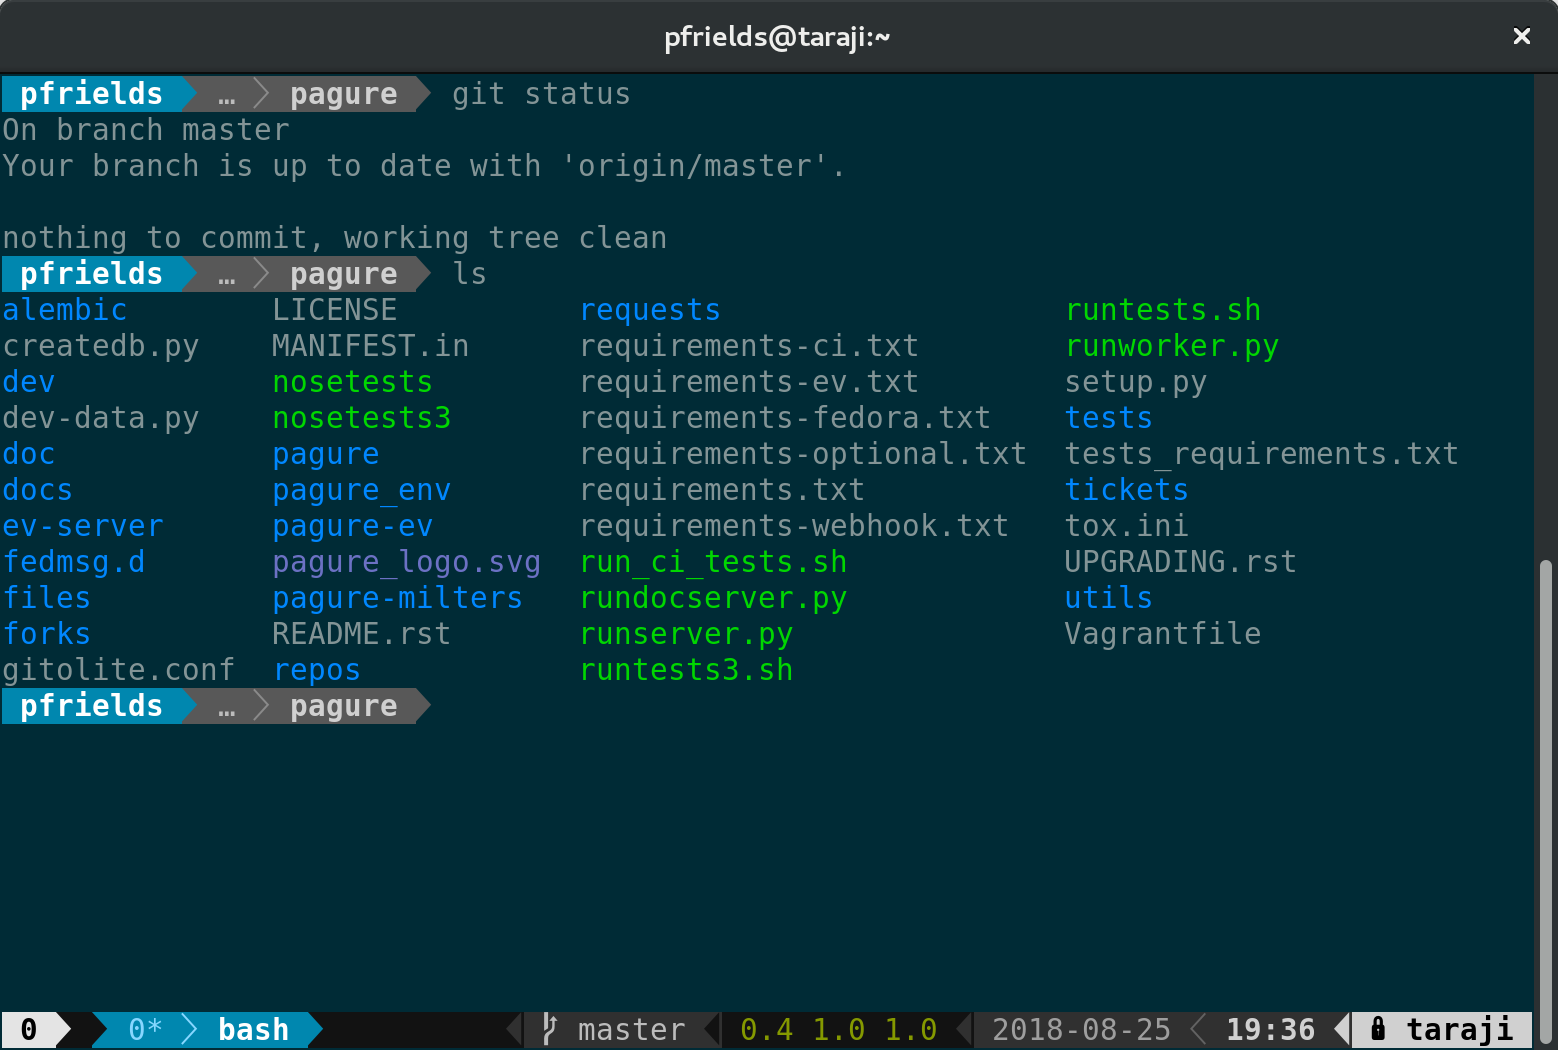
Now restart your session, and you’ll see a spiffy new status line at the bottom. Depending on the terminal width, the default status line now shows your current session ID, open windows, system information, date and time, and hostname. If you change directory into a git-controlled project, you’ll see the branch and color-coded status as well.
Of course, this status bar is highly configurable as well. Enjoy your new supercharged tmux session, and have fun experimenting with it.
Photo by Pamela Saunders on Unsplash.

dac.override
Tmux is great especially if you do not have access to a GUI, and these are great tips for making the experience better.
But it does to me also make a good point. By default traditional terminal multiplexers do not integrate as well as they could. There are some downsides to using it . For example nesting TMUX instances, but also its unawareness of SSH and a terminal emulator if applicable.
TermySequence Termy-server is a “TMUX” server implementation and TermySequence Qtermy is a QT client implementation that works alone and with Termy-server. Qtermy is a modern terminal emulator that leverages SSH as well as termy-server.
The downside of TermySequence compared to TMUX is that you need a GUI-client (Qtermy is a reference implementation of that). So it is not a solution for the command line. The benefit of TermySequence is that you get a more integrated and modern experience.
It is available on COPR:
https://copr.fedorainfracloud.org/coprs/ewalsh/termysequence/
Website:
https://termysequence.io/
Pieter
Thanks Paul. Setting my terminal to automatically use tmux is a great tip. For splitting a window I use shift+| and shift+_ but I definitely like your H for the horizontal axis and V for the vertical axis. Should you ever consider a follow up article on tmux then please include how to setup copy and paste across vim instances in tmux as that seems to have many folks puzzled.
Mace Moneta
Even better, use a ssh-mosh client to connect. It establishes connections via SSH, then uses encrypted UDP and maintains connections even across sleep, switching access points, or hopping between WiFi and LTE and back again. There are clients for ChromeOS:
https://chrome.google.com/webstore/detail/mosh/ooiklbnjmhbcgemelgfhaeaocllobloj
and Android as well:
https://play.google.com/store/apps/details?id=com.server.auditor.ssh.client
In combination with tmux or screen, it allows me to maintain continuous connections to our servers.
Andreas
And if you haven’t discovered it yet.
There is tmate for pair-programming!
Demetrius Veras
nice
Tomas
You can also use tmux-top in your status to get some handy info about the host. It’s in Fedora repos.
https://github.com/TomasTomecek/tmux-top
Chiqo
TIL the zoom feature, thank you.
My status bar now looks like:
set-window-option -g window-status-current-format “#[bg=white]#[fg=colour166]| #I.#{?window_zoomed_flag,#[bg=colour166]#[fg=white],}#P#[bg=white]#[fg=colour166]:#W |”
Kyle R. Conway
Paul,
Had no idea you could use this is tmux. I’ve got this in my ~/.tmux.conf but I’m not seeing powerline function after installing tmux-powerline. Any ideas?
powerline_tmux_1.8.conf
tmux Version 1.8 introduces window-status-last-{attr,bg,fg}, which is
deprecated for versions 1.9+, thus only applicable to version 1.8.
set -qg window-status-last-fg “$_POWERLINE_ACTIVE_WINDOW_FG”
vim: ft=tmux
source “/usr/share/tmux/powerline.conf”
Steve
Hello Kyle,
There is a link mentioned above for an excellent article on setting up powerline. I personally don’t use tmux, preferring Terminal simply because that’s the first tabbed terminal I chose to use. Also, I am using zsh for my shell and the configuration file powerline in my case is therefore powerline.zsh, and can be found in /usr/share/powerline/zsh/
Stephan
Thanks for sharing. Really great. I just get to know the Zoom thing. Really Cool
Pierpaolo
As an alternative to Powerline, you can just add a few lines to your
to match the look of the popular Agnoster theme for Zsh https://github.com/i5ar/tmux-colors-solarized/blob/master/tmuxcolors-dark.conf
juanfgs
But then all our shell will belong to us (not to mention that it will move every single zig)