In our initial Inkscape tutorial, we covered the basic creation and manipulation of shapes such as stars, polygons, rectangles, spirals and circles. These objects in Inkscape allow us to create specific shapes in many different styles, based on tweaking a few variables of each object type. However, if you need to create a less than standard shape in inkscape, you will need to use Paths.
Using the pen tool to create a path
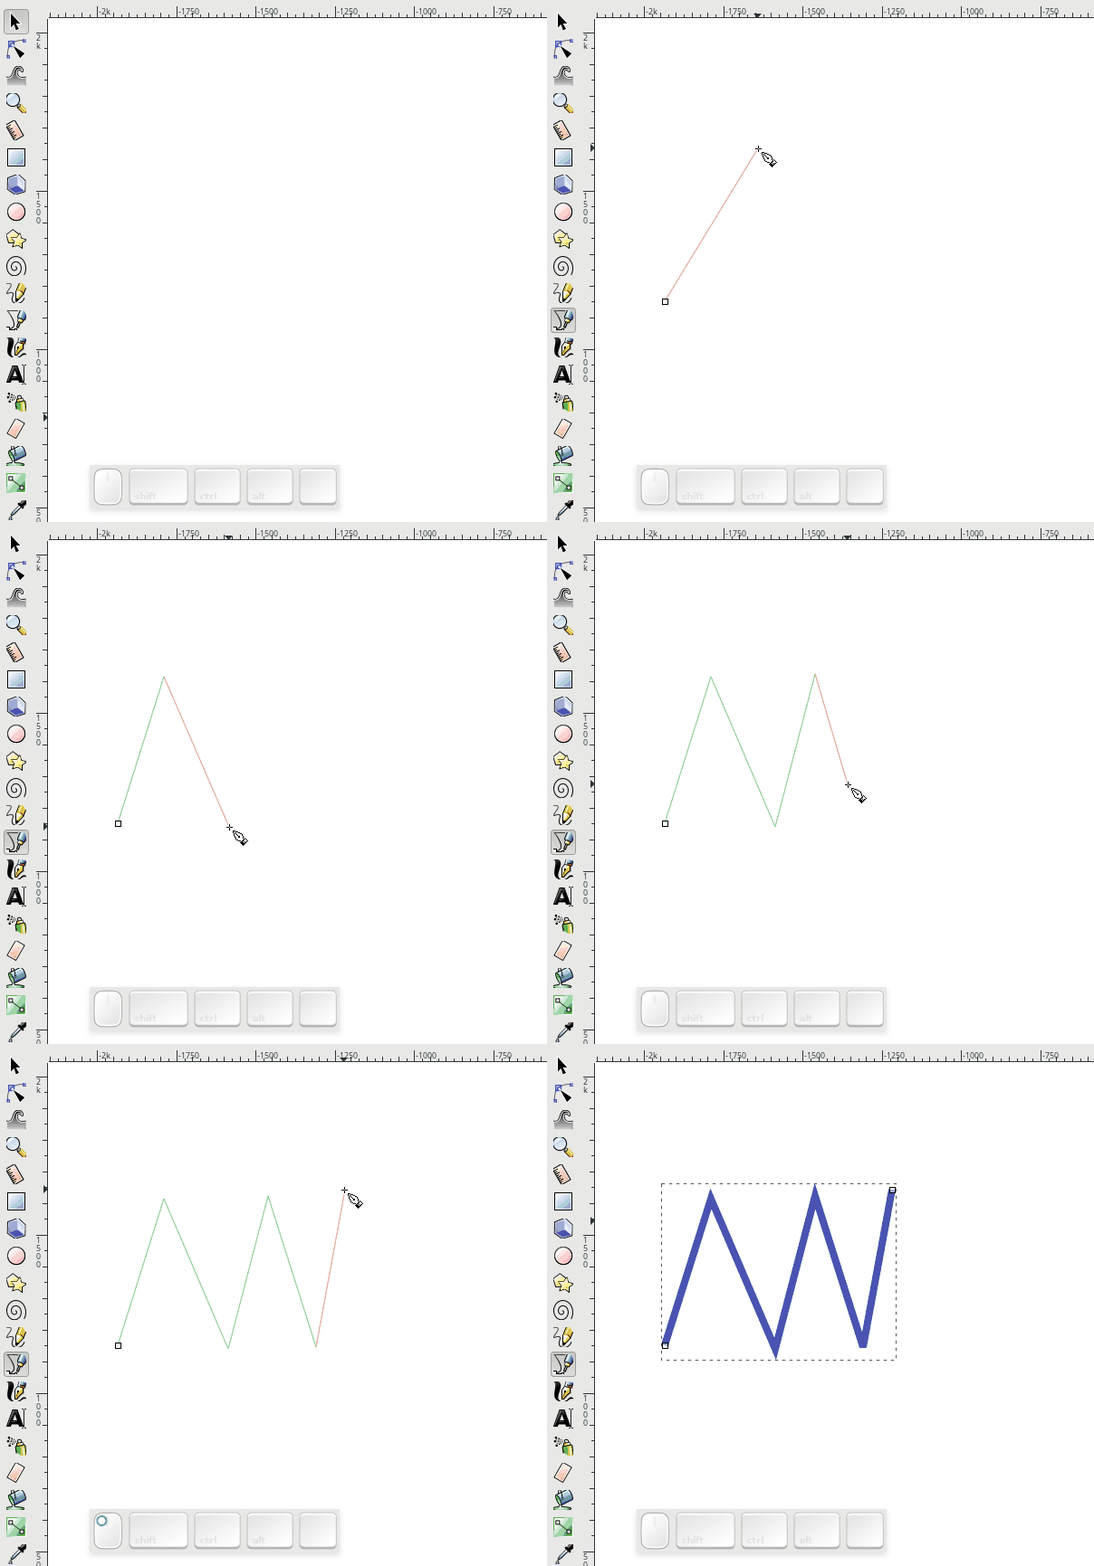
The pen tool is the quickest way to create a path with Inkscape. The default path type (and the one we are going to cover in this article) is the bezier path. To create a simple multi-line path segment in inkscape, choose the pen tool, and then left click on the canvas to create the points of your path. To stop adding points, right click anywhere on your canvas, and your path will appear:
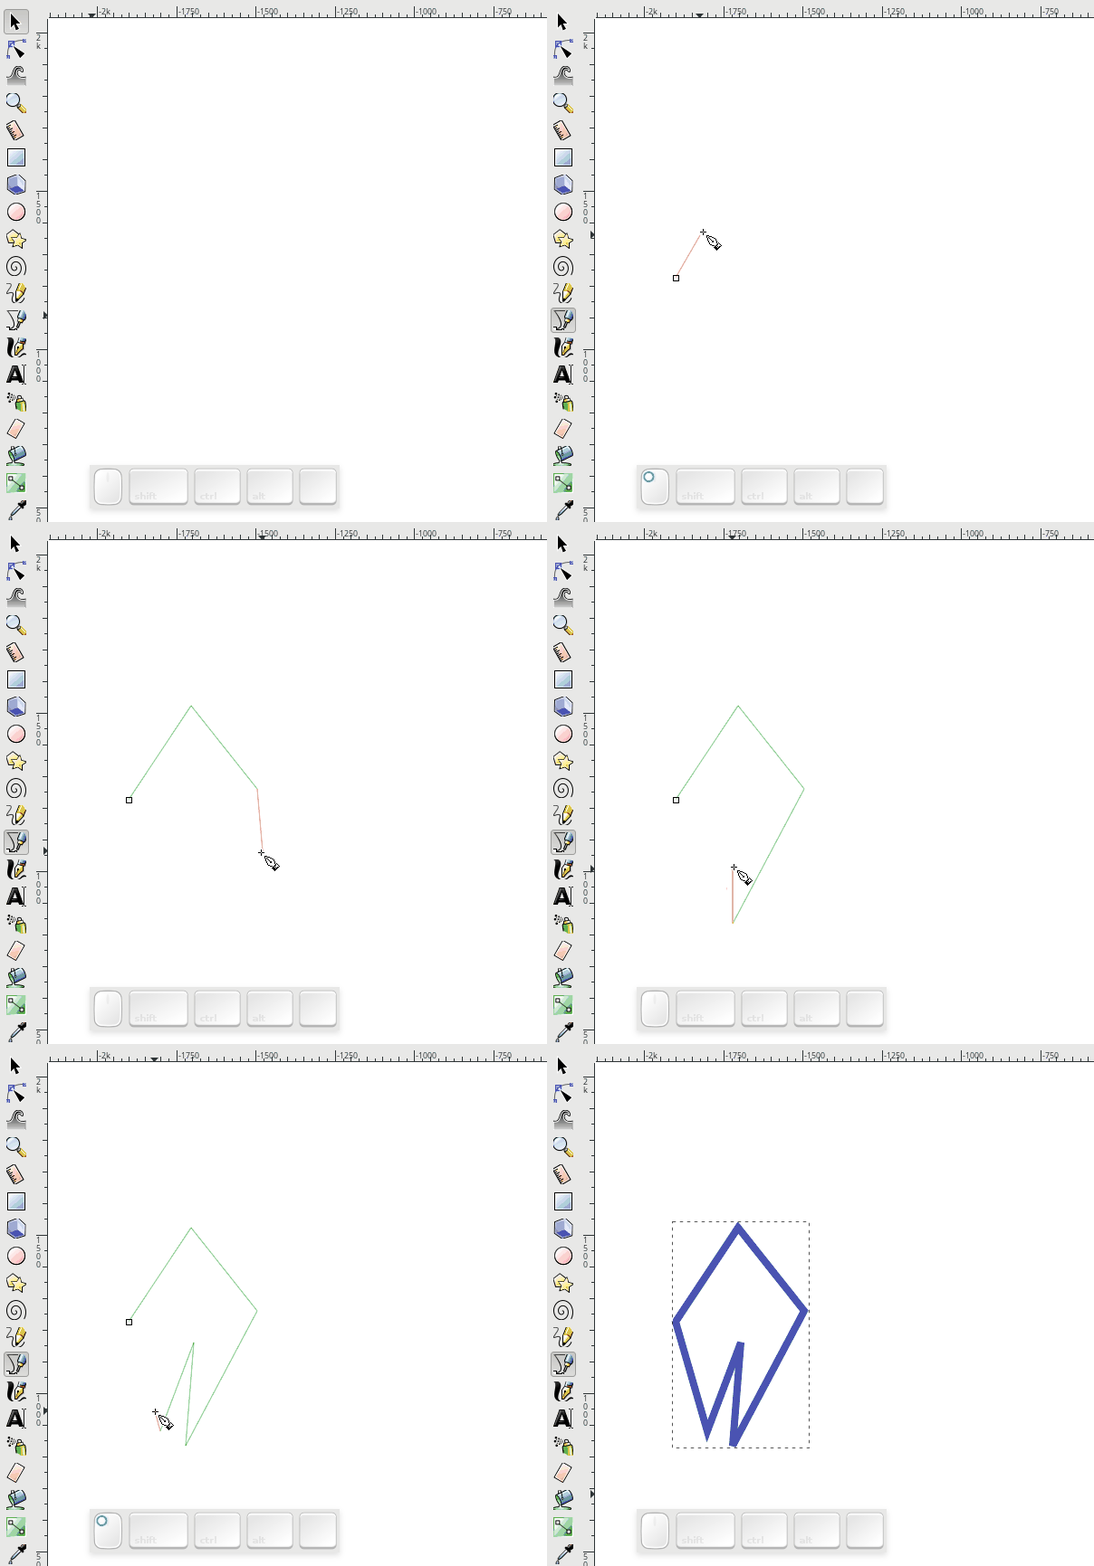
If you want to create and enclosed path, create your points by left-clicking the canvas, and then left click on the start-of-path control handle to close the path:
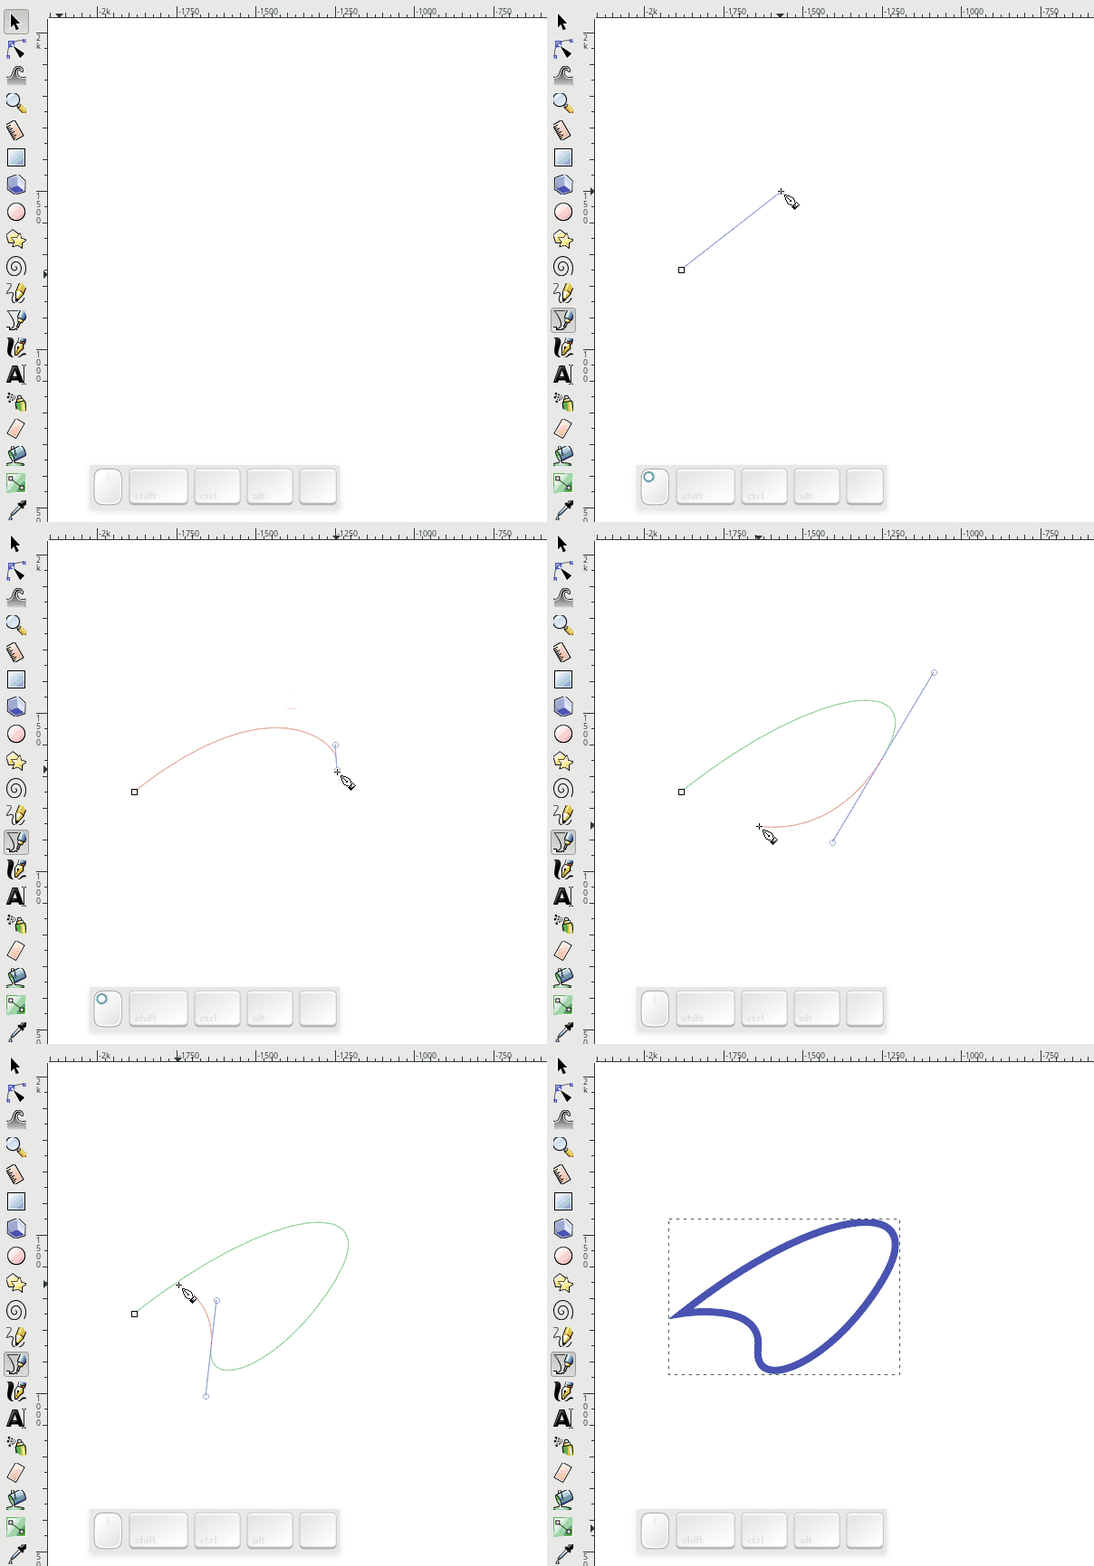
The previous two examples demonstrated paths with straight lines. To create segments in your path that contain curves, click and drag with the mouse when placing a point:
Editing a path with the Node Tool
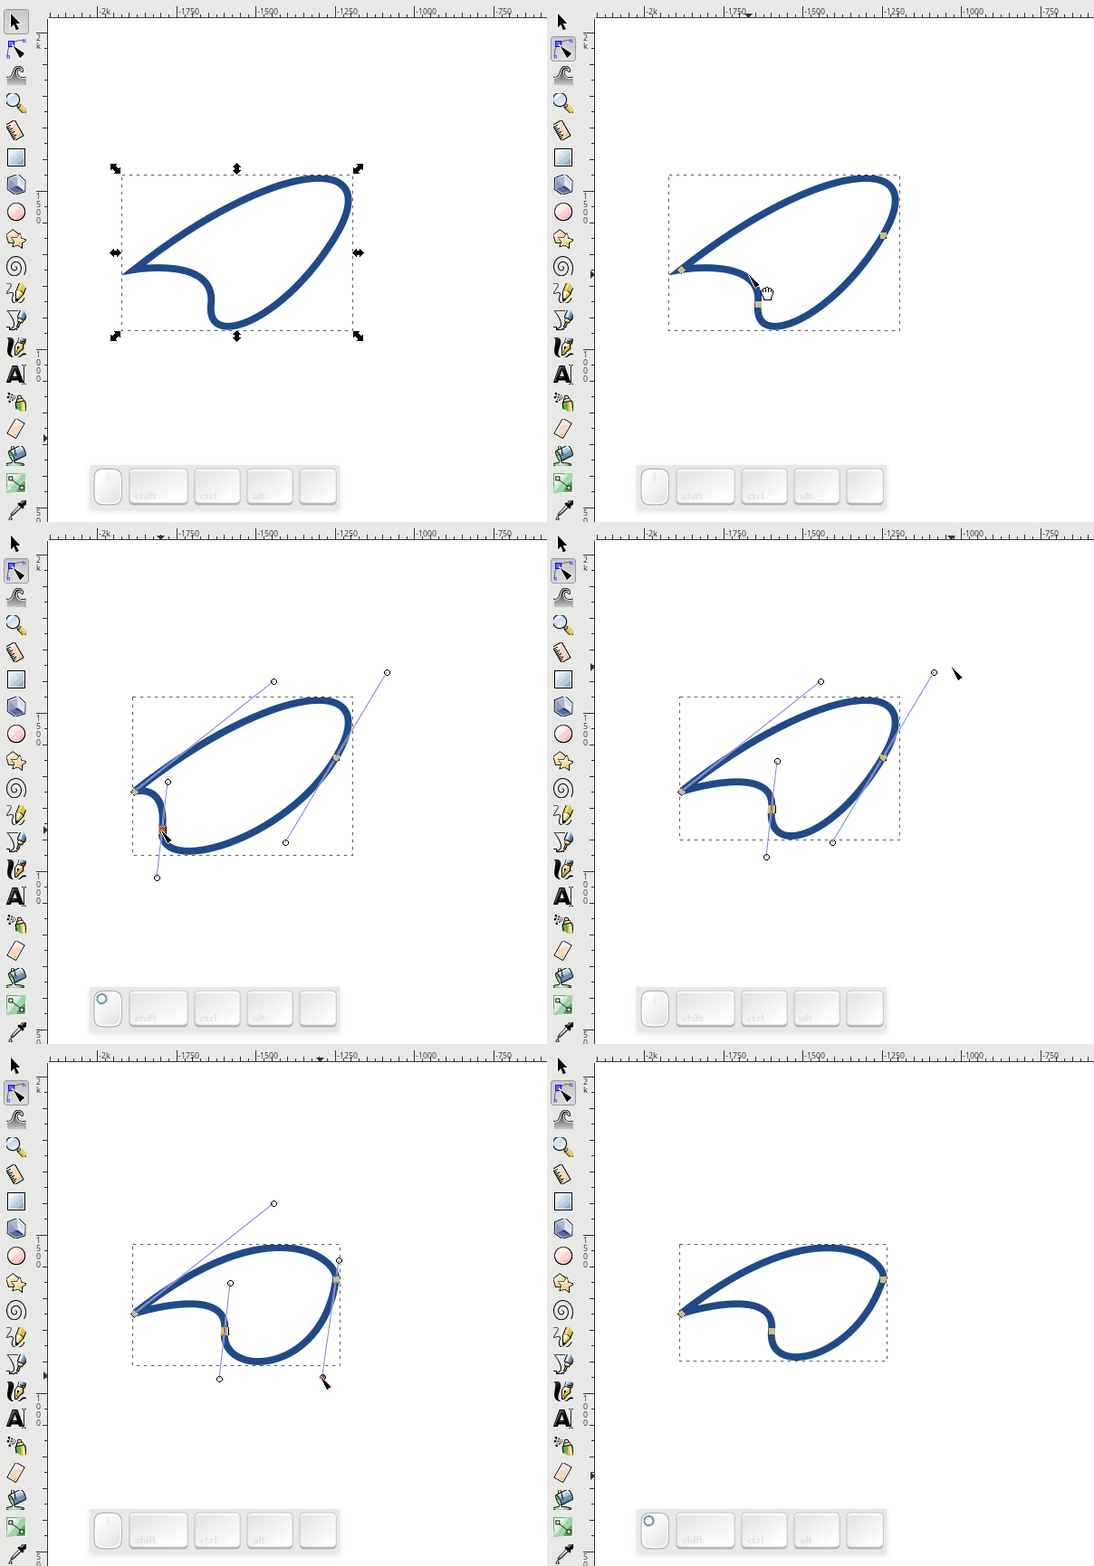
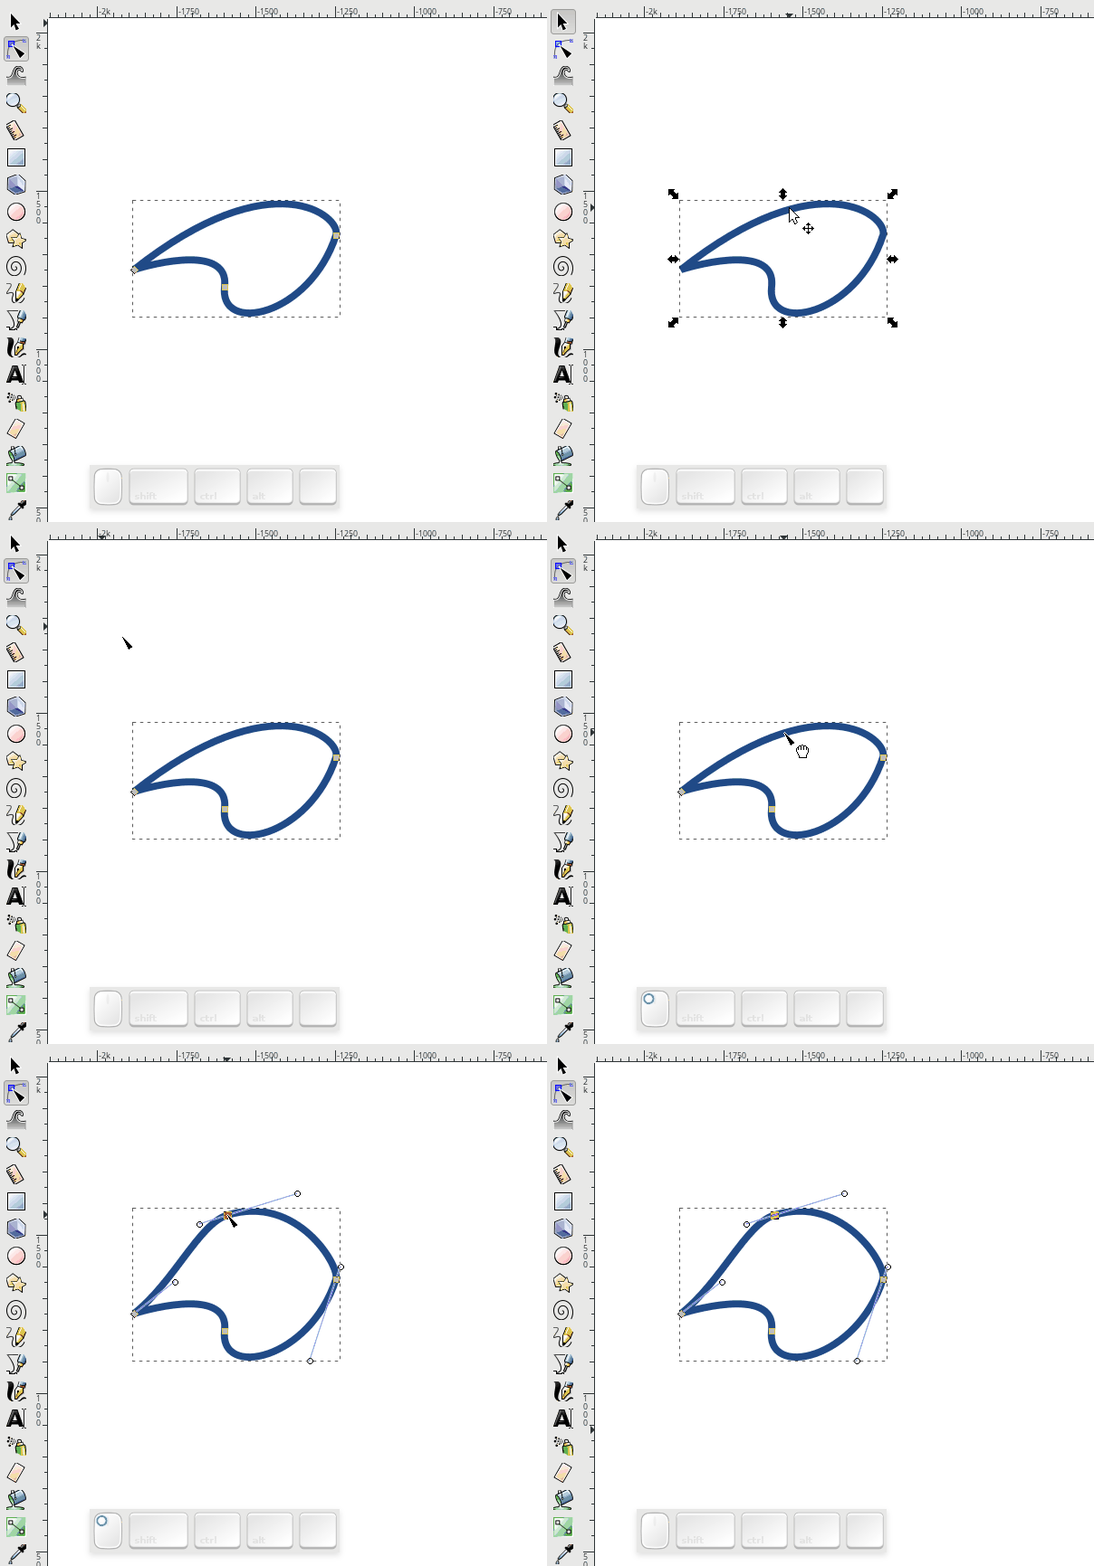
To edit paths further, you need to use the Node tool. When a path is selected, and the node tool is chosen, you will see all the nodes of the selected path. Left-click on a node to select it, and click and drag a node to move it around on the canvas. When you select a node, the curve handles of that node and the surrounding nodes will also appear. Click and drag these handles to edit the shapes of your curves:
With the node editing tool, you can also add nodes by double clicking the path, adding a node where you double click:
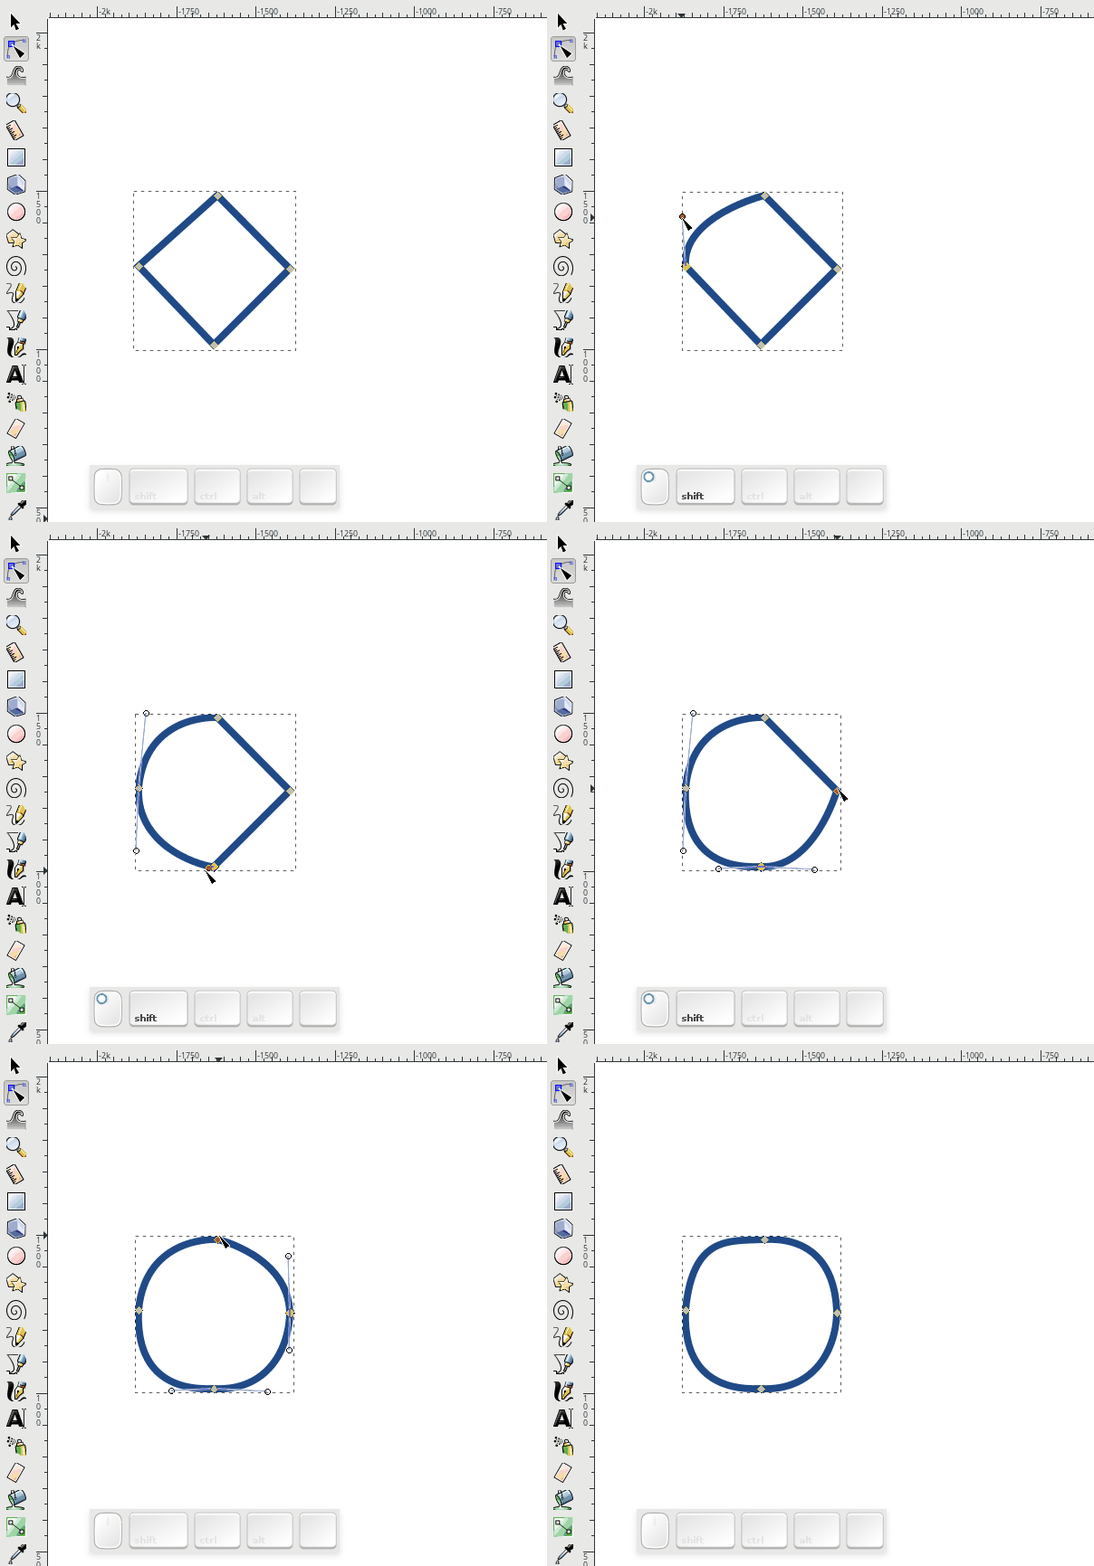
Finally, if you have a path that is just straight segments, you can convert a segment to a curve by first selecting the node, holding down shift, and dragging in the direction you want to add the curve:
The Node Tool also has many other options in the Tools Control Bar that we haven’t covered here, including different node types, and additional ways of adding and removing nodes. Check out the editing paths section in the Inkscape Book for detailed information on many of the ways to edit paths.
Converting objects to paths
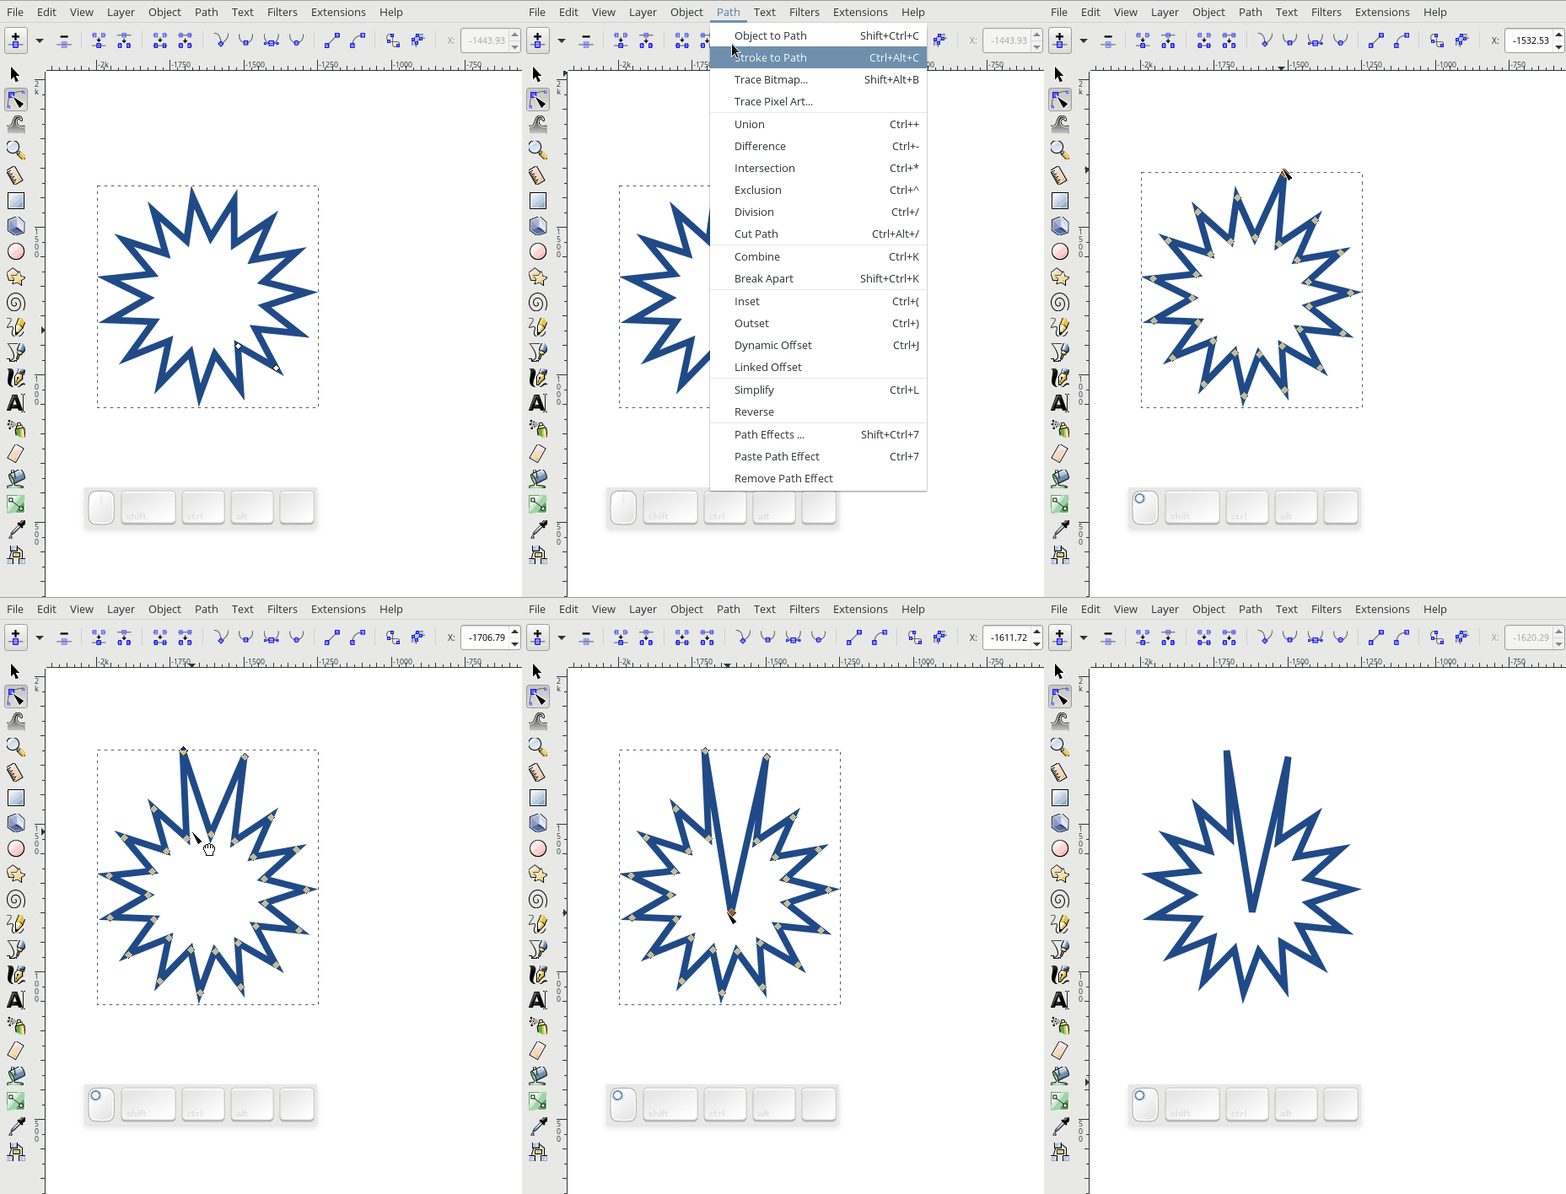
In Inkscape, you are also able to convert objects – like stars, rectangles, circles, and even text – to paths so you can manipulate them in ways the object does not allow you to do. To convert an object to a path, first select the object, then choose Path > Object to Path.
Once you have started to play and perfect the use of paths in inkscape, you will be able to illustrate just about anything in Inkscape.



Ivan Augusto
Awesome –
Yury
Which program was used to create these gif animations?
A. Seda
Chrome on android, the animations disappears after one play.
Oliver
The animations also disappear after a single play on Chrome under both Linux and Windows.