


Podman Desktop is an open-source GUI application for managing containers on Linux, macOS, and Windows.
Historically, developers have been using Docker Desktop for graphical management of containers. This worked for those who had Docker Daemon and Docker CLI installed. However, for those who used Podman daemon-less tool, although there were a few Podman frontends like Pods, Podman desktop companion, and Cockpit, there was no official application. This is not the case anymore. Enter Podman Desktop!
This article will discuss features, installation, and use of Podman Desktop, which is developed by developers from Red Hat and other open-source contributors.
Installation
To install Podman Desktop on Fedora Linux, head over to podman-desktop.io, and click the Download for Linux button. You will be presented with two options: Flatpak and zip. In this example we are using Flatpak. After clicking Flatpak, open it in GNOME Software by double clicking the file (if you are using GNOME). You can also install it via the terminal:
flatpak install podman-desktop-X.X.X.flatpak
In the above command, replace X.X.X with the specific version you have downloaded. If you downloaded the zip file, then extract the archive, and launch the Podman Desktop application binary. You can also find pre-release versions by going to the project’s releases page on GitHub.
Features
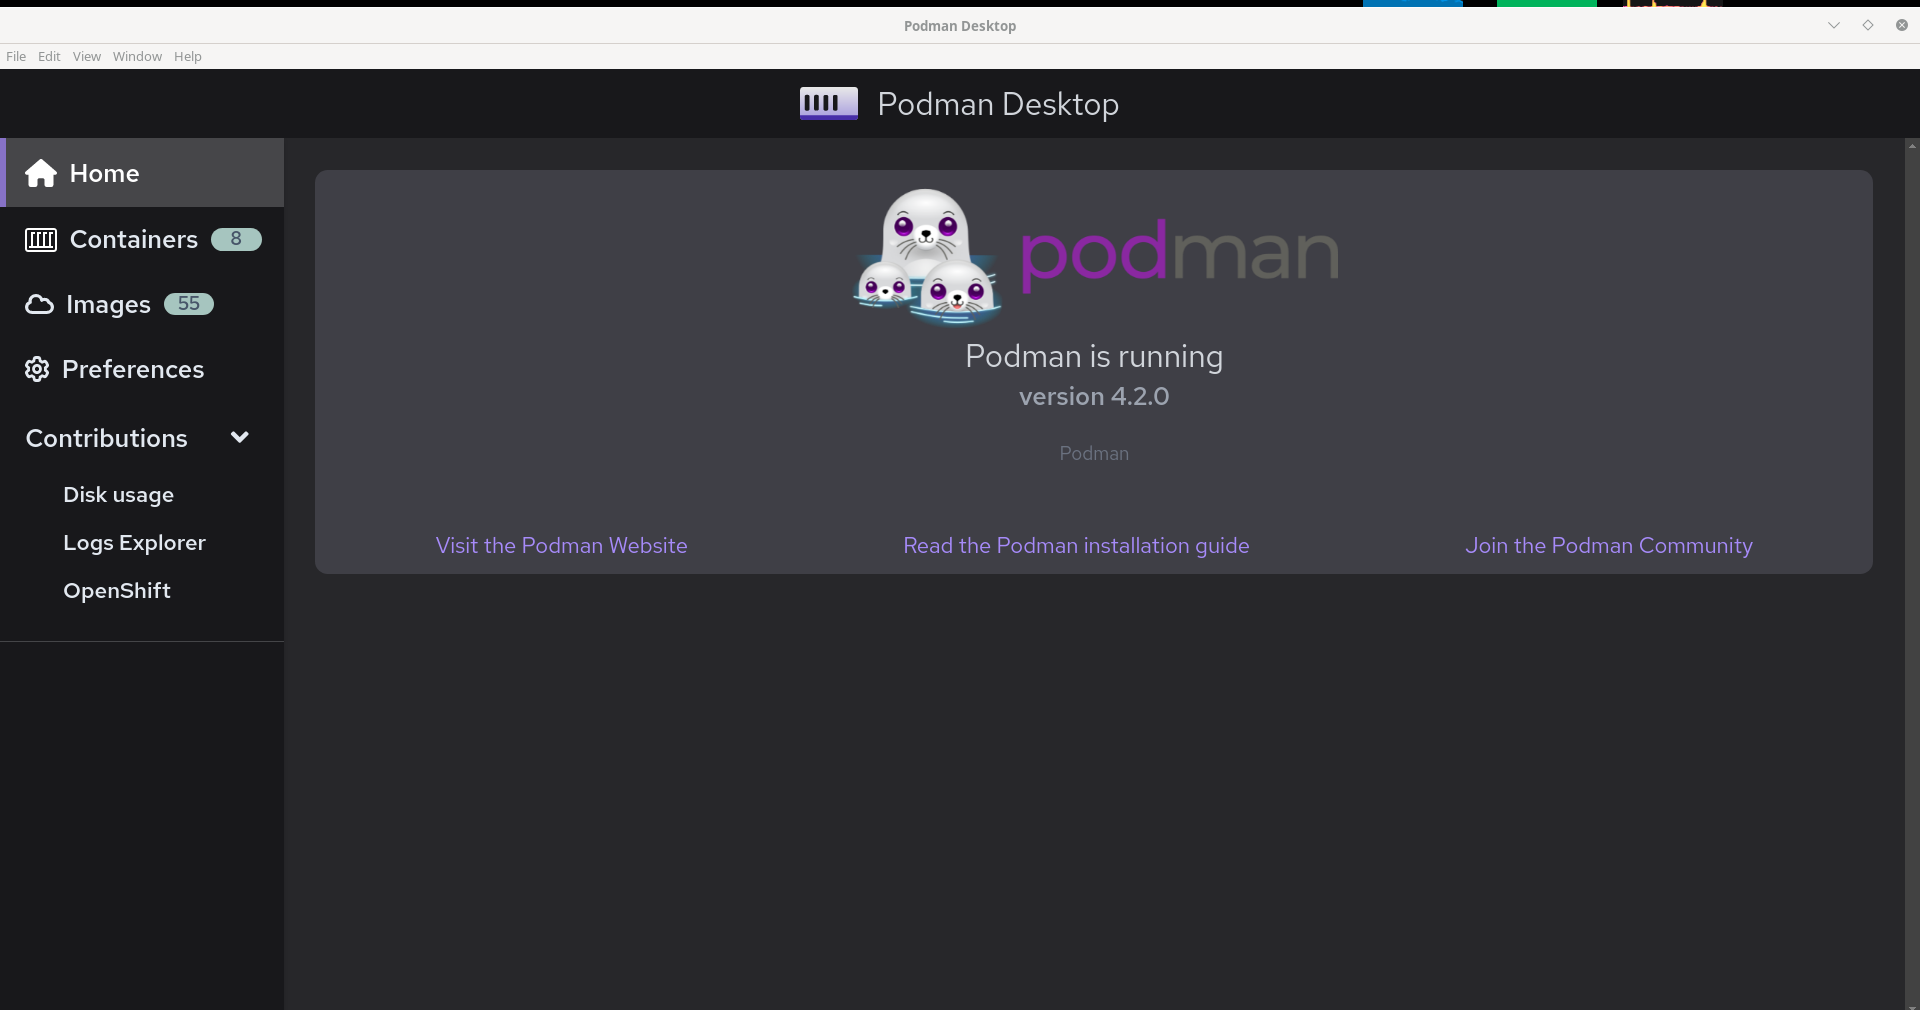
Podman Desktop is still in its early days. Yet, it supports many common container operations like creating container images, running containers, etc. In addition, you can find a Podman extension under Extensions Catalog in Preferences, which you can use to manage Podman virtual machines on macOS and Windows. Futhermore, Podman Desktop has support for Docker Desktop extensions.
You can install such extensions in the Docker Desktop Extensions section under Preferences. The application window has two panes. The left narrow pane shows different features of the application and the right pane is the content area, which will display relevant information given what is selected on the left.
Demo
To get an overall view of Podman Desktop’s capabilities, we will create an image from a Dockerfile and push it to a registry, then pull and run it, all from within Podman Desktop.
Build image
The first step is to create a simple Dockerfile by entering the following lines in the command line:
cat <<EOF>>Dockerfile
FROM docker.io/library/httpd:2.4
COPY . /var/www/html
WORKDIR /var/www/html

CMD ["httpd", "-D", "FOREGROUND"]
EOF
Now, go to the Images section and press the Build Image button. You will be taken to a new page to specify the Dockerfile, build context and image name. Under Containerfile path, click and browse to pick your Dockerfile. Under image name, enter a name for your image. You can specify a fully qualified image name (FQIN) in the form example.com/username/repo:tag if you want to push the image to a container registry. In this example, I enter quay.io/codezombie/demo-httpd:latest, because I have a public repository named demo-httpd on quay.io. You can follow a similar format to specify your FQIN pointing to your container registry (Quay, Docker Hub, GitHub Container Registry, etc.). Now, press Build and wait for the build to complete.
Push image
Once the build is finished, it’s time to push the image. So, we need to configure a registry in Podman Desktop. Go to Preferences, Registries and press Add registry.
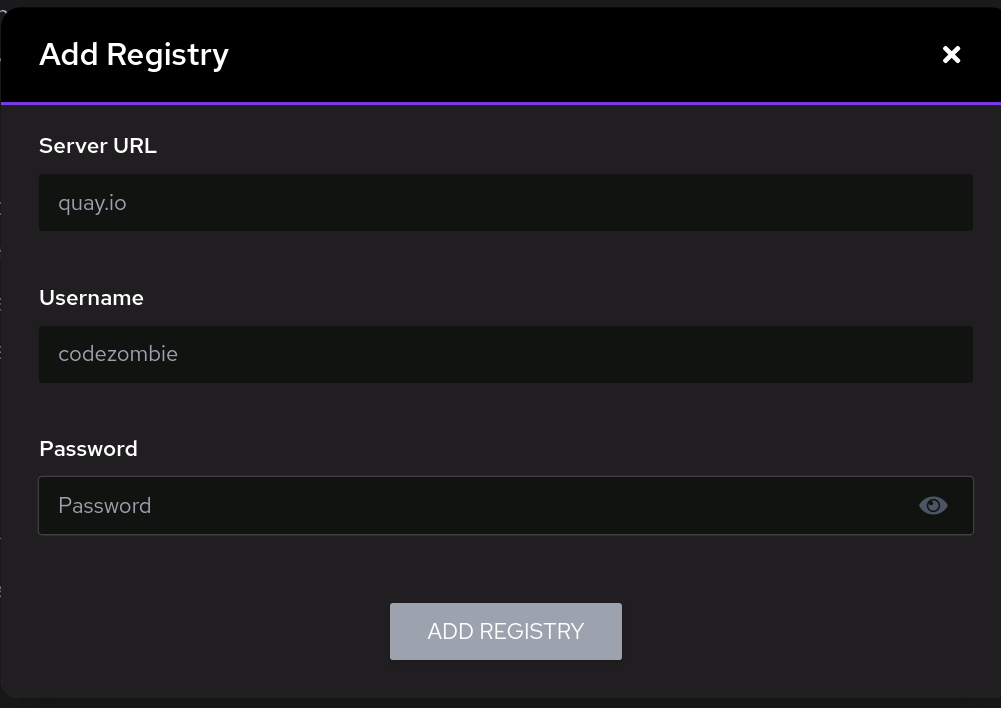
In the Add Registry dialog, enter your registry server address, and your user credentials and click ADD REGISTRY.
Now, I go back to my image in the list of images and push it to the repository by pressing the upload icon. When you hover over the image name that starts with the name of the registry added in the settings (quay.io in this demo), a push button appears alongside the image name.

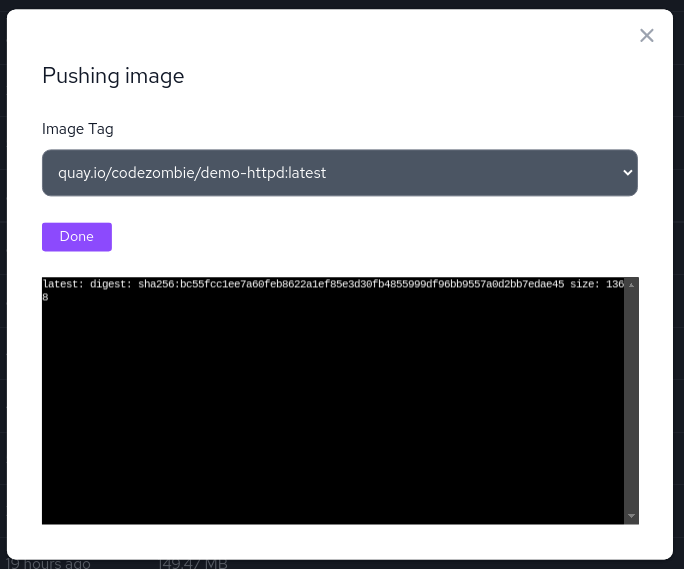
Once the image is pushed, anyone with access to the image repository can pull it. Since my image repository is public, you can easily pull it in Podman Desktop.
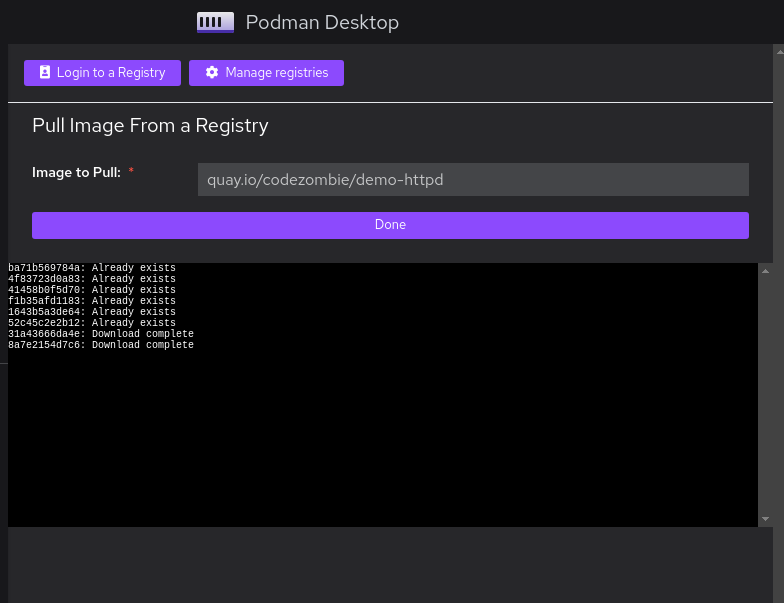
Pull image
So, to make sure things work, remove this image locally and pull it in Podman Desktop. Find the image in the list and remove it by pressing the delete icon. Once the image is removed, click the Pull Image button. Enter the fully qualified name in the Image to Pull section and press Pull image.
Create a container
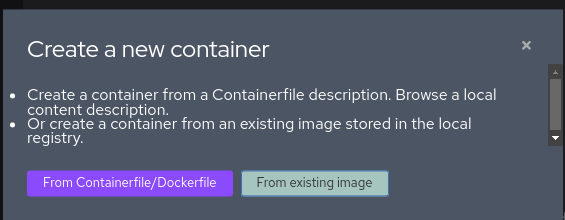
As the last part in our Podman Desktop demo, let us spin up a container from our image and check the result. I go to Containers and press Create Container. This will open up a dialog with two choices: From Containerfile/Dockerfile, and From existing image. Press From existing image. This takes us to the list of images. There, select the image we pulled.
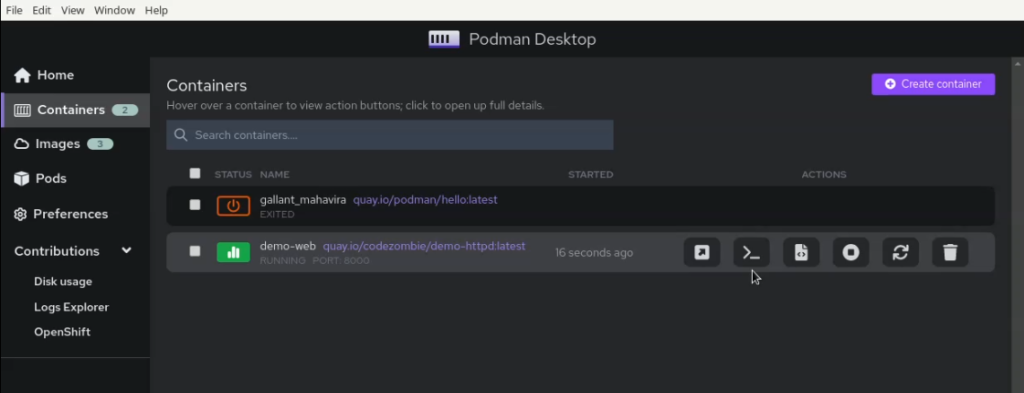
Now, we select our recently-pulled image from the list and press the Play button in front of it. In the dialog that appears, I enter demo-web as Container Name and 8000 as Port Mapping, and press Start Container.

The container starts running and we can check out our Apache server’s default page by running the following command:
curl http://localhost:8000

You should also be able to see the running container in the Containers list, with its status changed to Running. There, you will find available operations in front of the container. For example, you can click the terminal icon to open a TTY into the container!
What Comes Next
Podman Desktop is still young and under active development. There is a project roadmap on GitHub with a list of exciting and on-demand features including:
- Kubernetes Integration
- Support for Pods
- Task Manager
- Volumes Support
- Support fo Docker Compose
- Kind Support

Kevin Degeling
So cool.
I wrote an article about running Docker on Fedora, two years ago. Back then, there were many issues to work around, and Podman wasn’t really really ready for the spotlight. Now we have Podman Desktop and Rancher Desktop and suddenly we never have to look back at those dark times!
What is also very important about Podman Desktop, is that it’s cross platform. Don’t forget to migrate your entire team away from Docker Desktop… before they’ll make you pay a per-seat license 😉
Mehdi Haghgoo
Yeah it’s very nice!
I guess many developers have been waiting for Podman Desktop like us.
I’m hearing about Rancher Desktop for the first time, though.
Karlis K.
This is great! 🥳
Up until now I relied on Cockpit, but this just takes the cake!
Mehdi Haghgoo
Yeah, awesome.
Furthermore, Cockpit’s Podman plugin was quite limited.
Karlis K.
Also, you can install the Flatpak with just:
Mehdi Haghgoo
Sure, thank you.
However, pre-release builds should still be installed manually.
Scott
I believe the project below is much more interesting because it uses GTK4 and Libadwaita. By doing so, it really integrates nicely with the GNOME desktop.
Pods
https://github.com/marhkb/pods
Mehdi Haghgoo
I am not sure if Pods is cross-platform like Podman Desktop.
Scott
No, it’s only designed for the Linux (GNOME) desktop (it uses GTK4/Libadwaita).
Scott
A simple GUI application around Toolbx would also be very interesting!
Toolbx
https://containertoolbx.org/
Mehdi Haghgoo
Right, it would be nice to have a graphical interface to Toolbox on OSTree-based OSes. I don’have much experience with these distributions though. So, maybe someone more experienced can probably write a good article about using Toolbox on Fedora and if there are any GUI interfaces for it.
Scott
To criticize my own idea: it basically wouldn’t be much more than a wrapper around a terminal (because in the end, when you want to edit something, you will need a terminal).
But you could create a gui for creating, entering and deleting new toolboxes.
kaosine
Do wish it was possible to use toolbox or an alternative for that existed. Heck, I just wanted to use this to pull even just fedora official images, but it seems to think I’m not authorized after logging in to quay. I should be able to pull images no issue I would think that aren’t my own…
Mehdi Haghgoo
Did you use the latest version of Podman Desktop? You could also download the latest pre-release versions from https://github.com/containers/podman-desktop/releases.