In our previous Inkscape article, we covered the absolute basics of getting started with Inkscape — installing, and how to create basic shapes and manipulate them. We also covered changing the colour of inkscape objects using the Palette. While the Palette is great for quickly changing the colour of your objects from a pre-defined list, most times you will need more control over the colours of your objects. This is where we use one of the most important dialogs in Inkscape — the Fill and Stroke dialog.
A quick note about the animations in this post: some of the colours in the animations appear banded. This is just an artifact of the way the animations are created. When you try this out on Inkscape you will see nice smooth gradients of colour.
Using the Fill / Stroke dialog
To open the Fill and Stroke dialog in Inkscape, choose
>
from the main menu. Once opened, the main three tabs of this dialog allow you to inspect and change the Fill colour, Stroke colour, and Stroke style of the currently selected object.
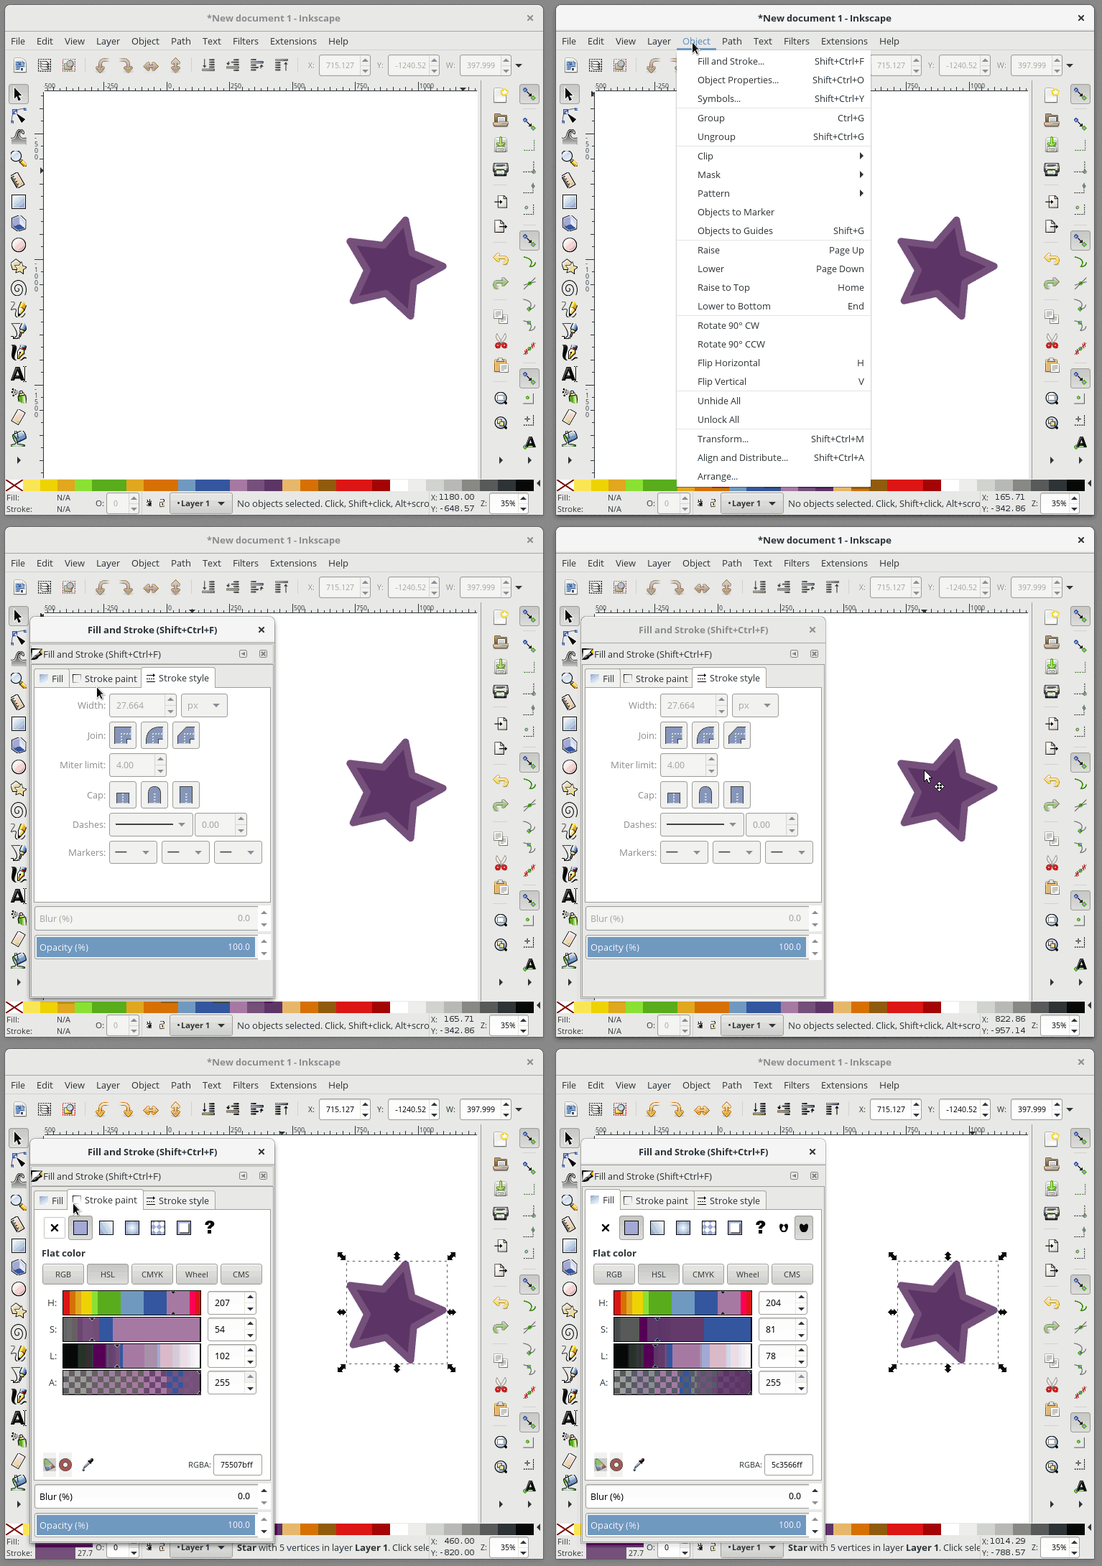
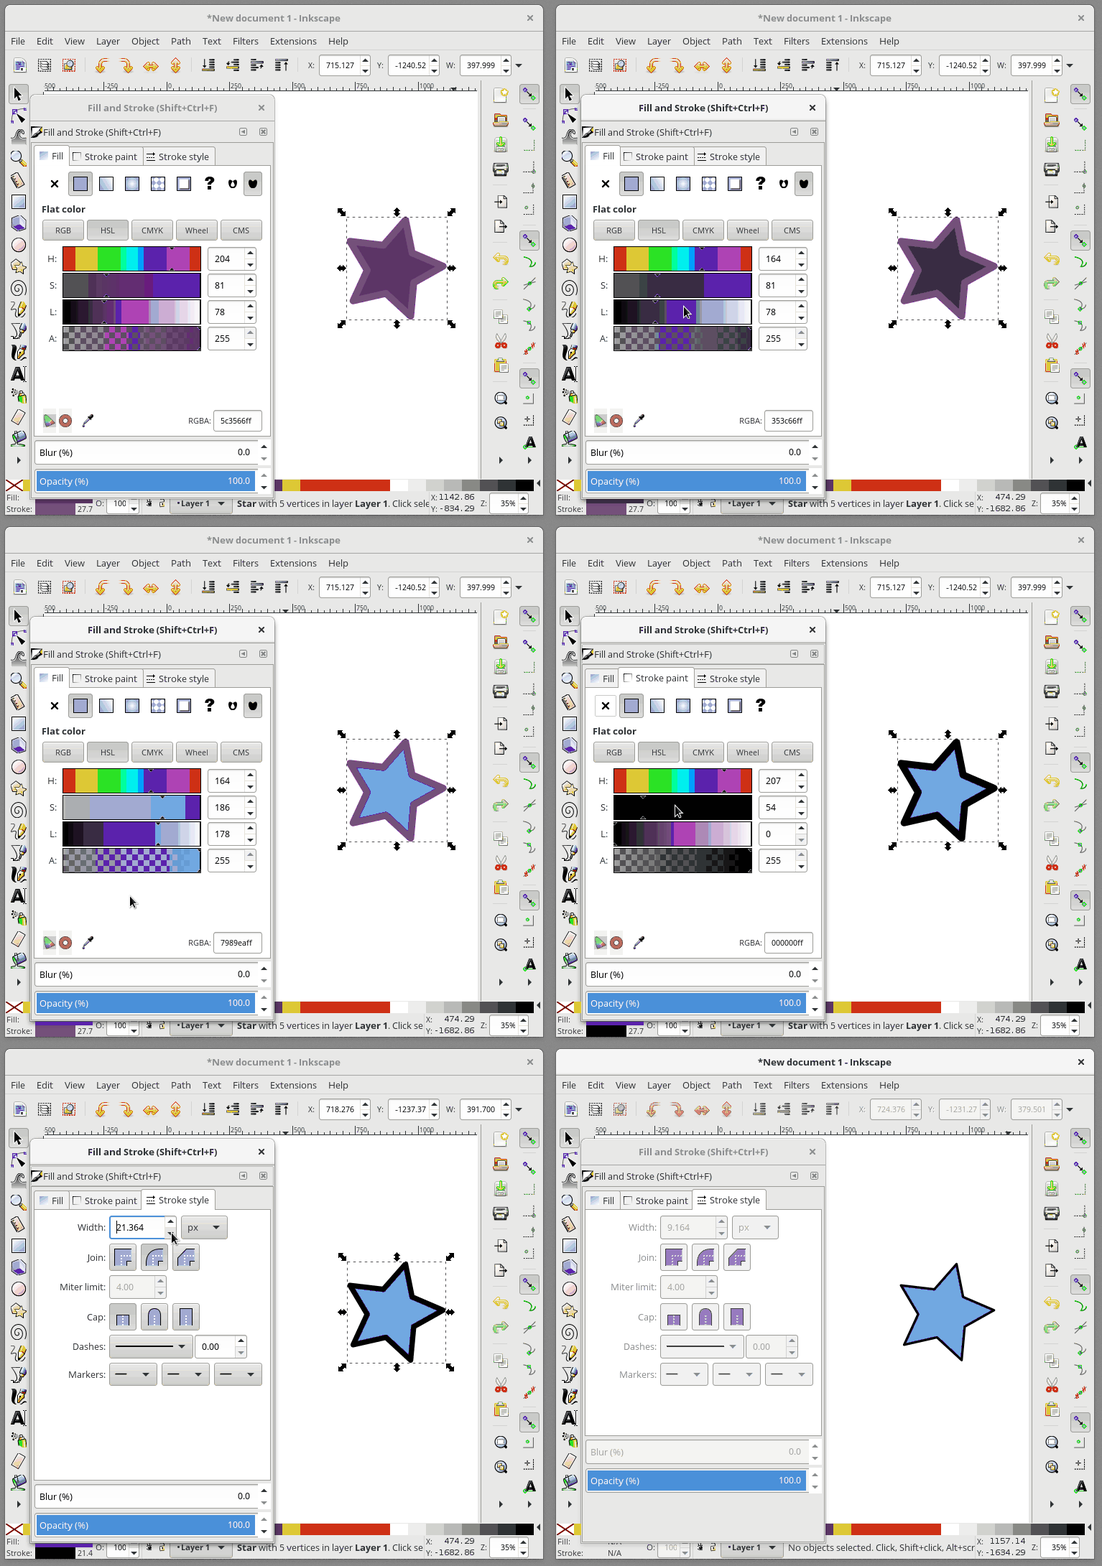
In Inkscape, the Fill is the main colour given to the body of an object. The stroke of the object is an optional outline of your object. The stroke of an object also has additional styles — configurable in the Stroke style tab — allowing you to change the thickness of the stroke, create a dotted outline, or add rounded corners to you stroke. In this next animation, I change the fill colour of the star, and then change the stroke colour, and tweak the thickness of the stroke:
Adding and Editing a gradient
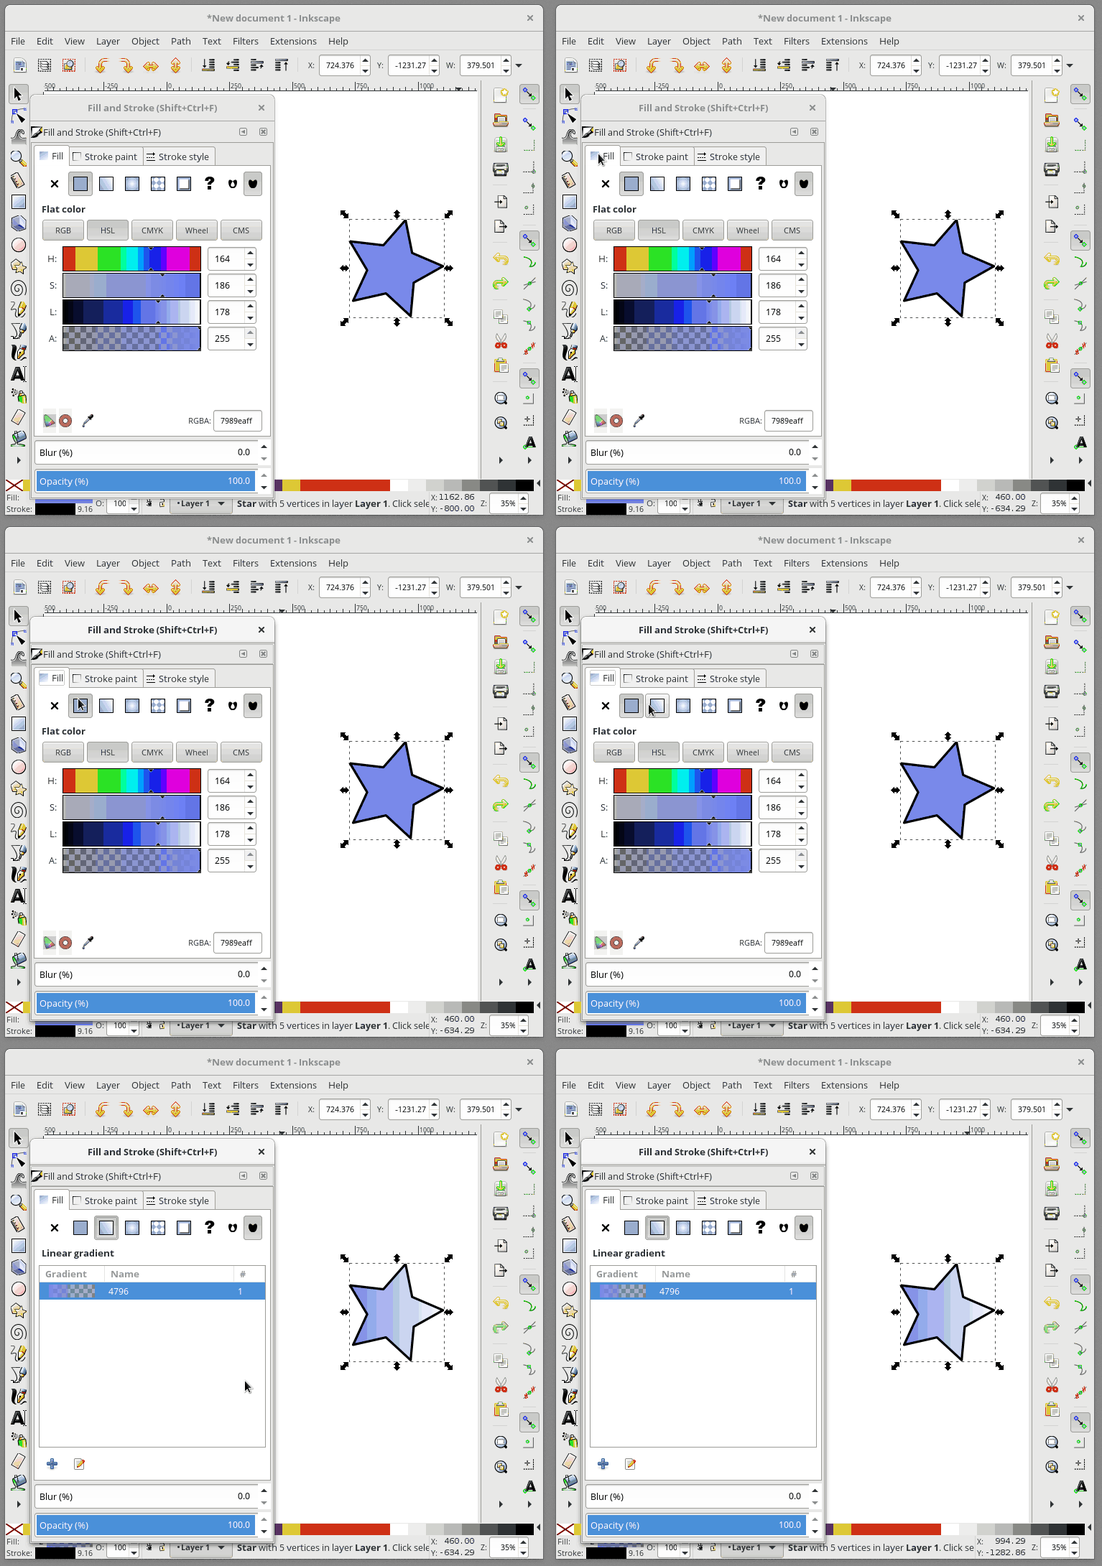
A gradient can also be the Fill (or the stroke) of an object. To quickly set a gradient fill from the Fill and Stroke dialog, first choose the Fill tab, then pick the linear gradient option:
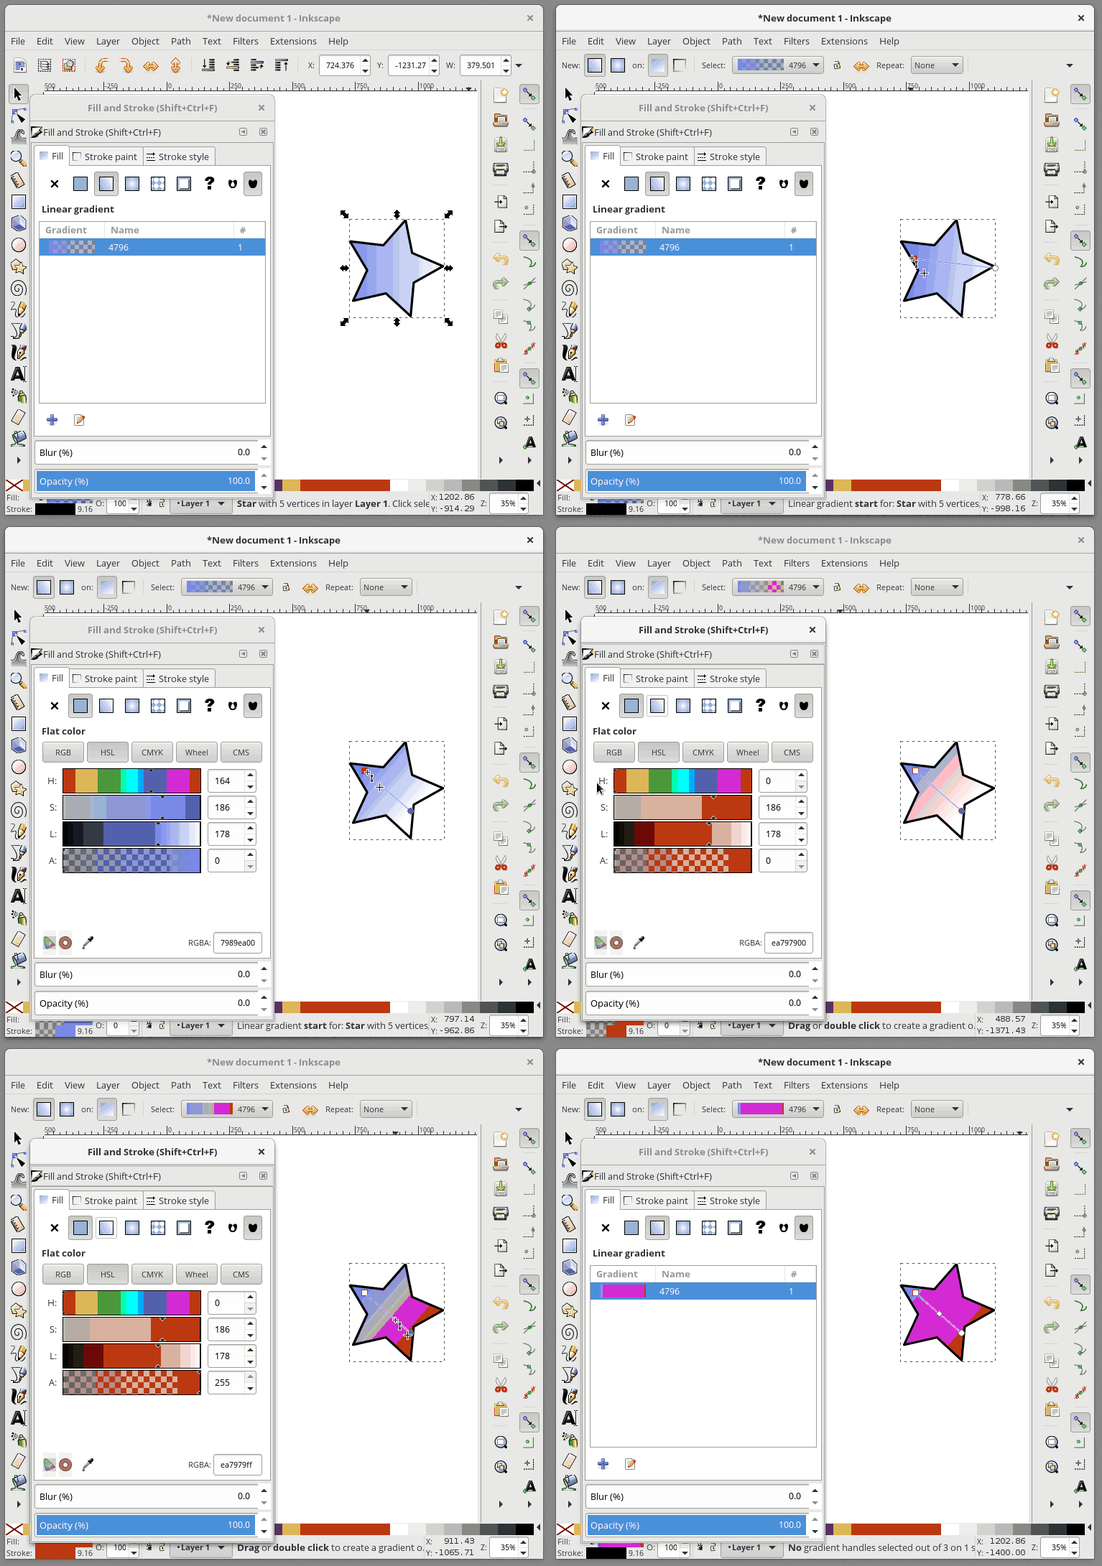
To edit our gradient further, we need to use the specialised Gradient Tool. Choose the Gradient tool from the toolbar, and some additional gradient editing handles will appear on your selected shape. Moving the handles around will change the positioning of the gradient. If you click on an individual handle, you can also change the colour of that handle in the Fill and Stroke dialog. To add an additional stop in your gradient, double click on the line connecting the handles, and a new handle will appear.
That covers the basics of adding some more colour and gradients to your Inkscape drawings. The Fill and Stroke dialog also has many other options to explore, like pattern fills, different gradient styles, and many different stroke styles. Also check out the additional options in the Tools control bar for the Gradient Tool to see how you can tweak gradients in different ways too.




Artem
How do you create these animations?
Rodrigo de Araujo
Very nice article series… Keep up the good work!
Lionel Lizee
I like this
Munis Isazade
Very good, and useful .
Michael George
Inkscape is awesome!!!!!!!
These articles are great work! Thank You!
Justin W. Flory
Glad to hear you’re enjoying the series, Michael. 🙂 We might have a few more coming in the queue, so keep an eye out! Thanks for your support.