


Welcome back to the OpenCV series where we explore how to make use of OpenCV on Fedora Linux. The first article covered the basic functions and use cases of OpenCV. In addition to that you learned about loading images, color mapping, and the difference between BGR and RGB color maps. You also learned how to separate and merge color channels and how to convert to different color spaces. This article will cover basic image manipulation and show you how to perform image transformations including:
- Accessing individual image pixels
- Modifying a range of image pixels
- Cropping
- Resizing
- Flipping
Accessing individual pixels
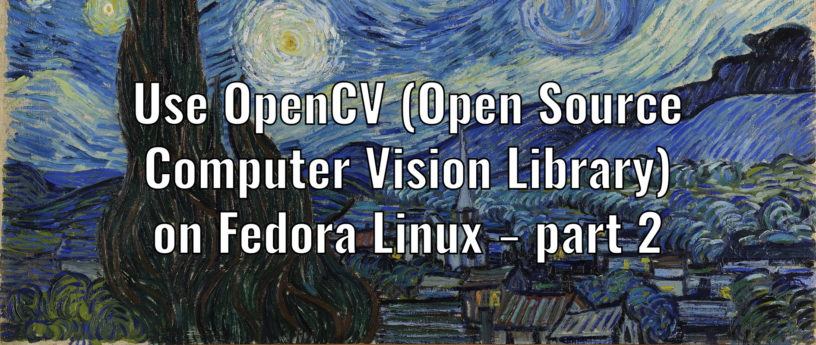
import cv2
import numpy as np
import matplotlib.pyplot as plt

# Read image as gray scale.
img = cv2.imread(cv2.samples.findFile("gradient.png"),0)
# Set color map to gray scale for proper rendering.
plt.imshow(img, cmap='gray')
# Print img pixels as 2D Numpy Array
print(img)
# Show image with Matplotlib
plt.show()
To access a pixel in a numpy matrix, you have to use matrix notation such as matrix[r,c], where the r is the row number and c is the column number. Also note that the matrix is 0-indexed. If you want to access the first pixel, you need to specify matrix[0,0]. The following example prints one black pixel from top-left and one white pixel from top-right-corner.
# print the first pixel
print(img[0,0])
# print the white pixel to the top right corner
print(img[0,299])
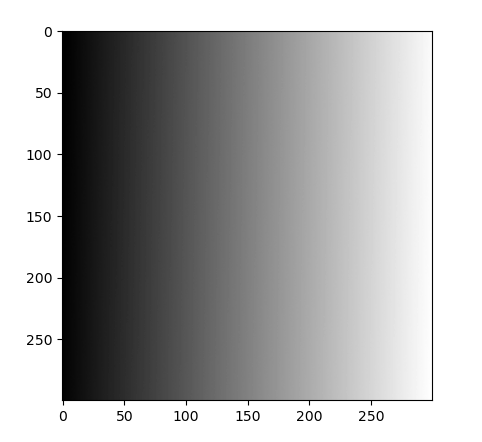
Modifying a range of image pixels
You can modify the values of pixels using the same notation described above.
gr_img = img.copy()

# Modify pixel one by one
#gr_img[20,20] = 200
#gr_img[20,21] = 200
#gr_img[20,22] = 200
#gr_img[20,23] = 200
#gr_img[20,24] = 200
# ...

# Modify pixel between 20-80 pixel range
gr_img[20:80,20:80] = 200

plt.imshow(gr_img, cmap='gray')
print(gr_img)
plt.show()
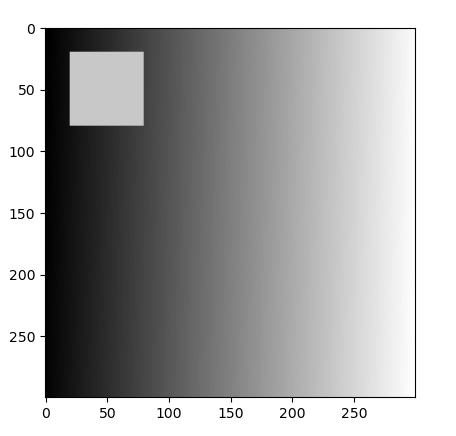
Cropping images
Cropping an image is achieved by selecting a specific (pixel) region of the image.
import cv2 as cv
import matplotlib.pyplot as plt
img = cv.imread(cv.samples.findFile("starry_night.jpg"),cv.IMREAD_COLOR)
img_rgb = cv.cvtColor(img, cv.COLOR_BGR2RGB)
fig, (ax1, ax2) = plt.subplots(1,2)
ax1.imshow(img_rgb)
ax1.set_title('Before Crop')
ax2.imshow(img_rgb[200:400, 300:600])
ax2.set_title('After Crop')
plt.show()
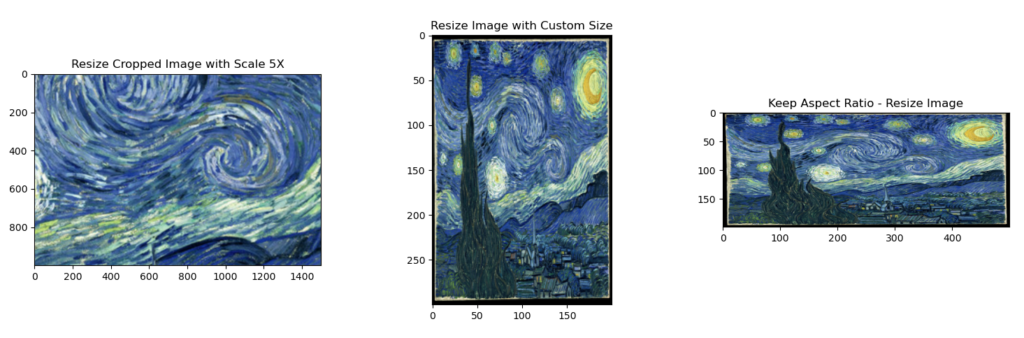
Resizing images
Syntax: dst = cv.resize( src, dsize[, dst[, fx[, fy[, interpolation]]]] )
The resize function resizes the src image down to or up to the specified size. The size and type are derived from the values of src, dsize,fx, and fy.
The resize function has two required arguments:
- src: input image
- dsize: output image size
Optional arguments that are often used include:
- fx: The scale factor along the horizontal axis. When this is 0, the factor is computed as dsize.width/src.cols.
- fy: The scale factor along the vertical axis. When this is 0, the factor is computed as dsize.height/src.rows.
import cv2 as cv
import matplotlib.pyplot as plt

img = cv.imread(cv.samples.findFile("starry_night.jpg"), cv.IMREAD_COLOR)
img_rgb = cv.cvtColor(img, cv.COLOR_BGR2RGB)

plt.figure(figsize=[18, 5])
plt.subplot(1, 3, 1)  # row 1, column 3, count 1

cropped_region = img_rgb[200:400, 300:600]
resized_img_5x = cv.resize(cropped_region, None, fx=5, fy=5)
plt.imshow(resized_img_5x)
plt.title("Resize Cropped Image with Scale 5X")

width = 200
height = 300
dimension = (width, height)
resized_img = cv.resize(img_rgb, dsize=dimension, interpolation=cv.INTER_AREA)

plt.subplot(1, 3, 2)
plt.imshow(resized_img)
plt.title("Resize Image with Custom Size")

desired_width = 500
aspect_ratio = desired_width / img_rgb.shape[1]
desired_height = int(resized_img.shape[0] * aspect_ratio)
dim = (desired_width, desired_height)
resized_cropped_region = cv.resize(img_rgb, dsize=dim, interpolation=cv.INTER_AREA)

plt.subplot(1, 3, 3)
plt.imshow(resized_cropped_region)
plt.title("Keep Aspect Ratio - Resize Image")
plt.show()
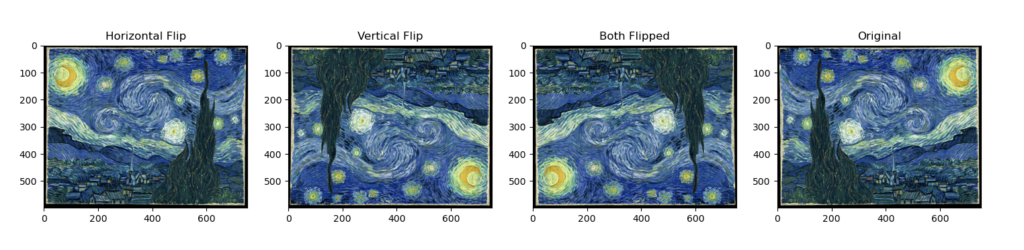
Flipping images
Syntax: dst = cv.flip( src, flipCode )
- dst: output array of the same size and type as src.
The flip function flips the array in one of three different ways.
The flip function has two required arguments:
- src: the input image
- flipCode: a flag to specify how to flip the image
- Use 0 to flip the image on the x-axis.
- Use a positive value (for example, 1) to flip the image on the y-axis.
- Use a negative value (for example, -1) to flip the image on both axes.
import cv2 as cv
import matplotlib.pyplot as plt
img = cv.imread(cv.samples.findFile("starry_night.jpg"),cv.IMREAD_COLOR)
img_rgb = cv.cvtColor(img, cv.COLOR_BGR2RGB)

img_rgb_flipped_horz = cv.flip(img_rgb, 1)
img_rgb_flipped_vert = cv.flip(img_rgb, 0)
img_rgb_flipped_both = cv.flip(img_rgb, -1)

plt.figure(figsize=[18,5])
plt.subplot(141);plt.imshow(img_rgb_flipped_horz);plt.title("Horizontal Flip");
plt.subplot(142);plt.imshow(img_rgb_flipped_vert);plt.title("Vertical Flip");
plt.subplot(143);plt.imshow(img_rgb_flipped_both);plt.title("Both Flipped");
plt.subplot(144);plt.imshow(img_rgb);plt.title("Original");
plt.show()
Further information
More details about OpenCV are available in the documentation.
Thank you.

Samyak Jain
Spectacular, and have all the information mentioned verbosely!
It will be exciting to have a talk on this in the upcoming flock 😉
You Really Don't Want to Know
For me, doing these kind of things in Gimp is torture. The mouse never does quite what I want. I will definitely look into this next time I need to mess with images.