


Generative AI continues to make strides, enabling developers and enthusiasts to create everything from realistic images to intricate artworks using AI models. Stable Diffusion, one of the leading image generation models, allows users to generate high-quality images from text prompts. AUTOMATIC1111 provides a powerful and user-friendly interface for running Stable Diffusion locally, offering a range of customization options and extensions.
In this article, we will cover:
- Setting up Stable Diffusion with AUTOMATIC1111 on Fedora.
- Running Stable Diffusion on localhost.
- Integrating Stable Diffusion with OpenWebUI.
- Generating images using prompts and interacting with LLaMA 3.3.
What is Stable Diffusion?
Stable Diffusion is a state-of-the-art text-to-image generation model developed by Stability AI. It is designed to take natural language prompts and generate corresponding images with impressive fidelity and diversity. Unlike cloud-based solutions, running Stable Diffusion locally ensures greater control, privacy, and flexibility.
What is AUTOMATIC1111?
AUTOMATIC1111 is a popular web-based interface for Stable Diffusion, designed for ease of use while offering extensive features for customization, fine-tuning, and extension support. With a clean UI and powerful backend, it has become the go-to solution for those looking to run Stable Diffusion locally.
Setting Up Stable Diffusion with AUTOMATIC1111
Before starting, ensure your Fedora system meets the following requirements:
- Python 3.10 or later installed (I’ve tested with 3.10.14 and 3.10.16)
- NVIDIA GPU with CUDA support (for GPU-based inference) or AMD
- Sufficient disk space for model files (at least 10GB)
- Podman installed (for OpenWebUI integration)
Installing Dependencies
$ sudo dnf install make gcc openssl-libs zlibrary-devel bzip2-devel readline-devel sqlite3pp-devel wget
curl llvm ncurses* xz-devel tk-devel libffi-devel zlib* liblzma* openssl*
Setting Up Python with pyenv
To manage different Python versions efficiently, we recommend using pyenv. Follow these steps to install and configure Python 3.10 using pyenv:
- Install pyenv: curl https://pyenv.run | bash
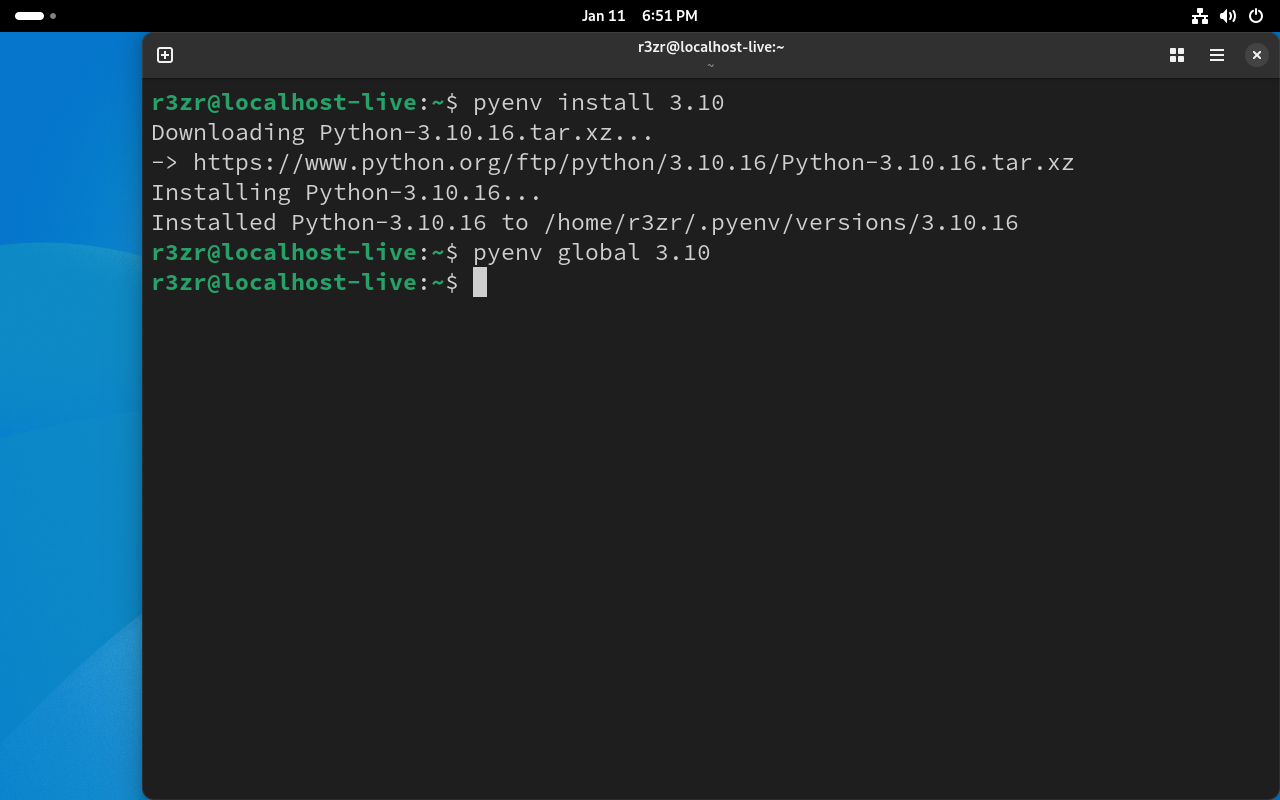
- Install Python 3.10 using pyenv: pyenv install 3.10
- Set Python 3.10 as the global version: pyenv global 3.10
It is now necessary to export $PATH to bashrc and reload bashrc to complete the pyenv setup. The following commands will help.
Pyenv will prompt : export PYENV_ROOT="$HOME/.pyenv"
[[ -d $PYENV_ROOT/bin ]] && export PATH="$PYENV_ROOT/bin:$PATH"
eval "$(pyenv init - bash)"
Reloading .bashrc : source .bashrc
Cloning the AUTOMATIC1111 Repository
AUTOMATIC1111 provides a GitHub repository that contains all necessary scripts for running Stable Diffusion locally. Let’s start by creating a directory.
$ mkdir stable-diffusion && cd stable-diffusion
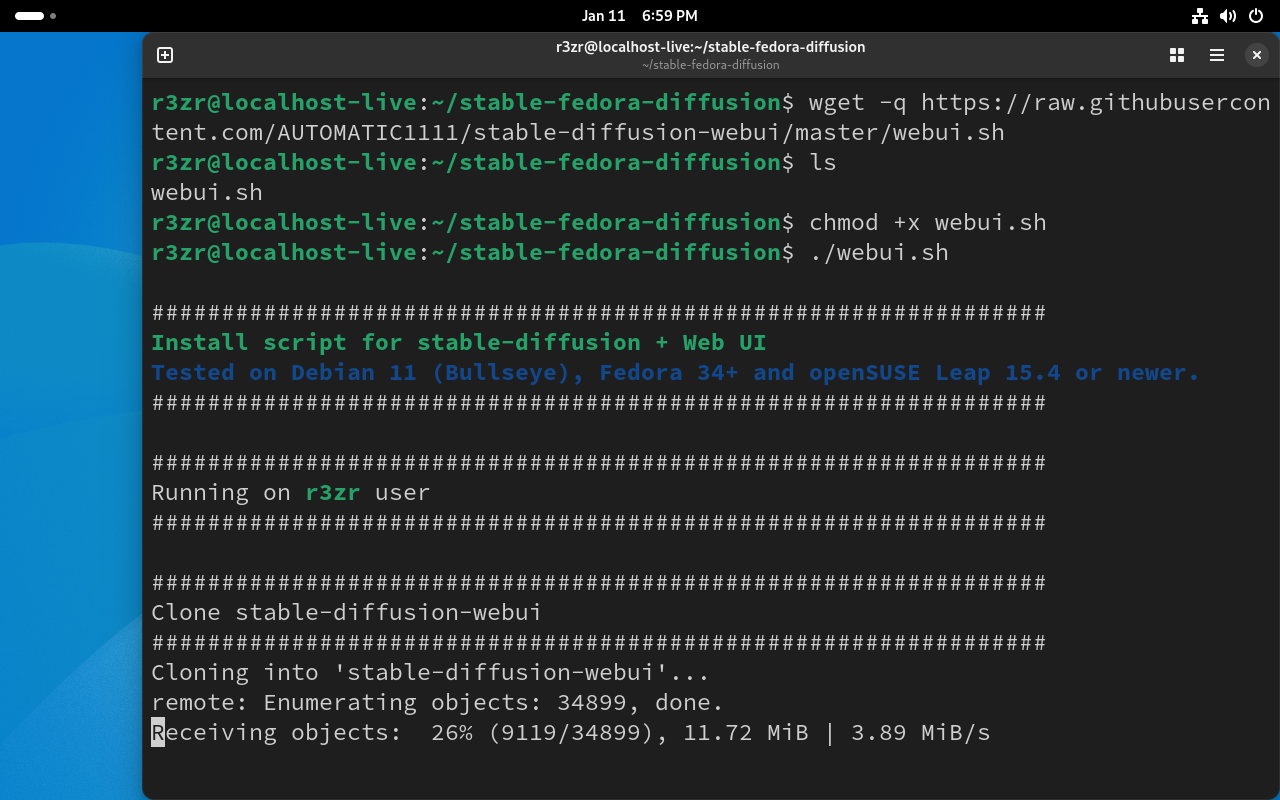
Clone the repository using the following command:
wget -q https://raw.githubusercontent.com/AUTOMATIC1111/stable-diffusion-webui/master/webui.sh
Making the webui.sh : chmod +x webui.sh
Running ./webui.sh
Note : if you are getting this error:
RuntimeError: Torch is not able to use GPU; add –skip-torch-cuda-test to COMMANDLINE_ARGS variable to disable this check
executing the command .webui.sh as follows should help!
export COMMANDLINE_ARGS="--medvram --opt-split-attention --skip-torch-cuda-test"
./webui.sh
Once the interface is running, open your browser and navigate to http://localhost:7860 to start generating images using text prompts.
Integrating Stable Diffusion with OpenWebUI
OpenWebUI provides a unified graphical interface for interacting with multiple AI models, including LLMs like LLaMA. Integrating Stable Diffusion with OpenWebUI allows users to interact with both text and image generation models from a single interface.
Running OpenWebUI with Stable Diffusion Support
To enable Stable Diffusion in OpenWebUI, we need OpenWebUI to run locally with models loaded the appropriate container configuration. The process is explained in my previous article for running Open WebUI and Llama locally. Once everything is set, we need to kill all instances of webui.sh and relaunch it with two switches as follows:
./webui --listen --api
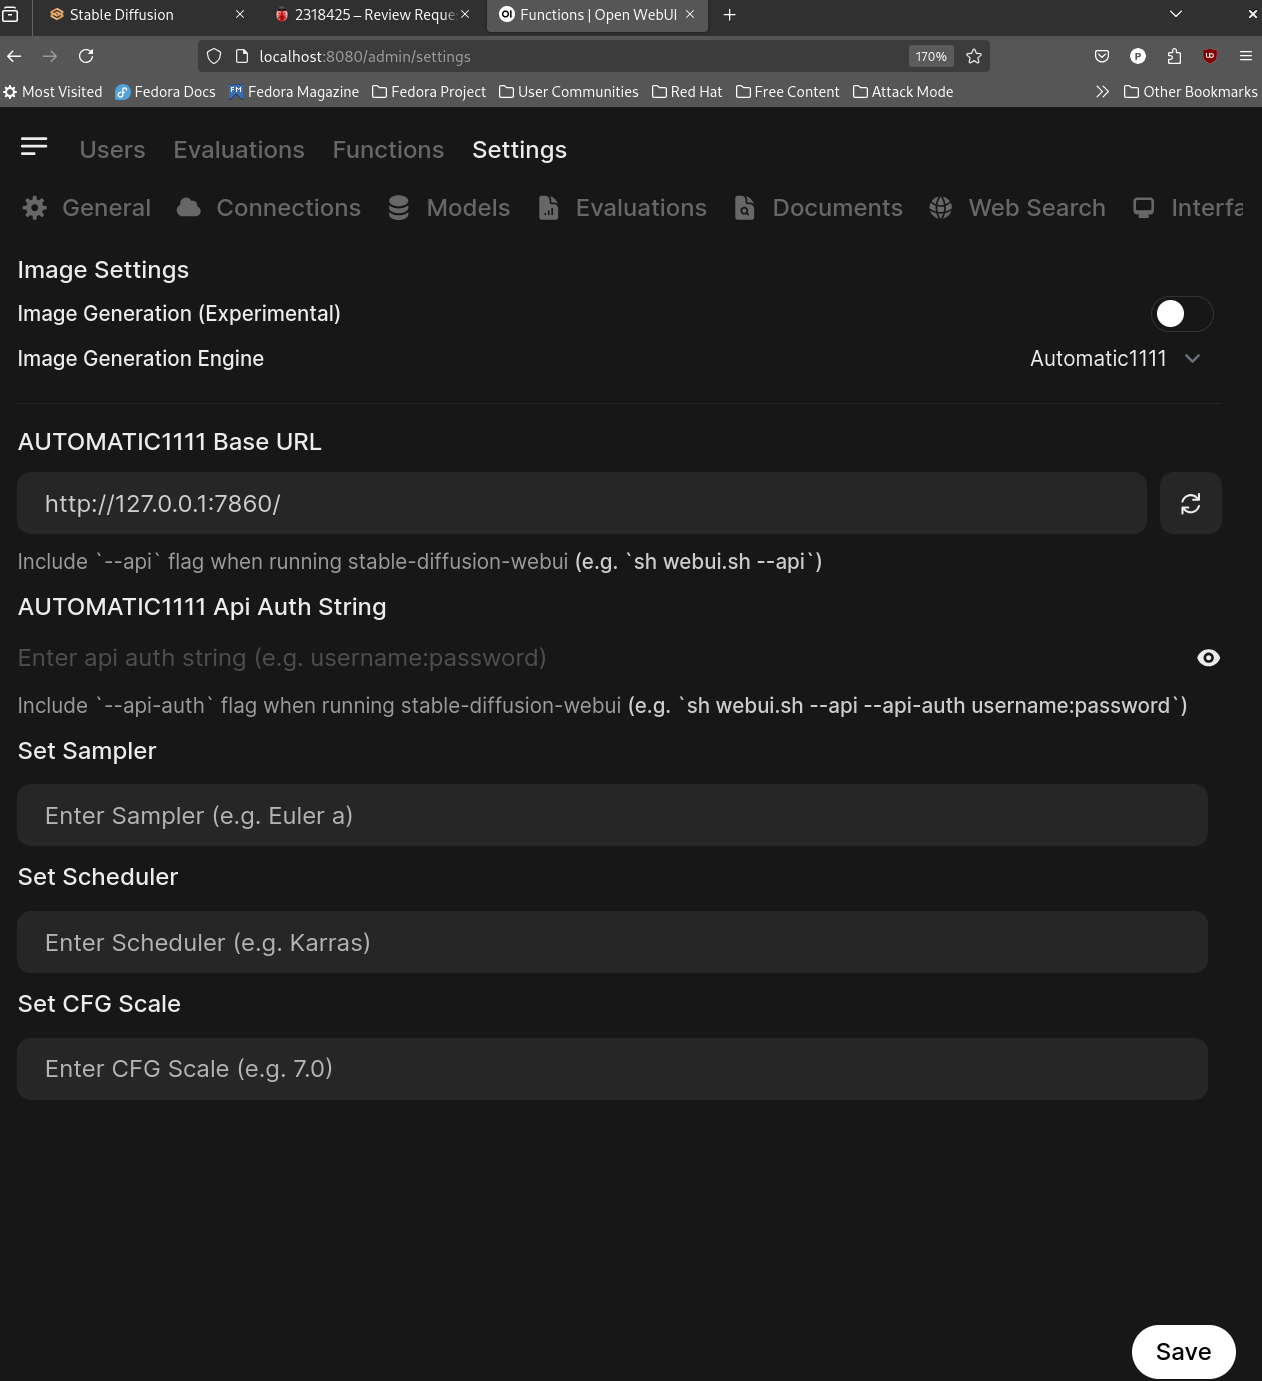
Loading OpenwebUI’s setting for any Admin/User profile will have a section for Images and one should be able to add the Automatic1111’s base URL in my case it’s 127.0.0.1:7860.
Interacting with LLaMA 3.3 and Generating Images
Once OpenWebUI is up and running with Stable Diffusion integrated, you can start interacting with LLaMA 3.3. Here’s how you can generate an image using a prompt:
- Input a creative text prompt.
- Allow LLaMA 3.3 to process the prompt and pass it to Stable Diffusion.
- View the generated image directly in the OpenWebUI interface.

In my case, Llama3.3 gave me an elaborate prompt for my rudimentary string. The image icon can be used to generate the image.
Conclusion
By following this guide, you can set up Stable Diffusion with AUTOMATIC1111 on Fedora and enhance your experience by integrating it with OpenWebUI. This setup provides a powerful local environment for both text and image generation, offering flexibility, privacy, and impressive results. Whether you’re a developer, artist, or AI enthusiast, running these models locally opens up new possibilities for creativity.

Darvond
I know it’s the “wave of the future”, but I don’t have to pretend to be happy about this Plagiarism Machine nor it’s cousin the Hallucinating Internet Connected Parrot.
Join us next time for other wonderful inventions from the book “Don’t Create the Torment Nexus”.
I fail to see what stable diffusion does for creative artistry, and I fail to see what LLMs do for anyone. It’s Cleverbot, but with a much bigger database.
Renich
I stopped reading when you installed pyenv. Fedora provides python3.10 from the repos:
Then, you create the venv with
, activate it, and proceed.
It would be so much better to modify this article to use Fedora’s resources.
In all honesty, I read on because I thought it would clarify how to use ROCm and Fedora’s resources to avoid using
.
Renich
Also, I recommend using sd.next: https://github.com/vladmandic/automatic
It’s a modernized fork.
Kevin
“…enabling developers and enthusiasts to create everything from realistic images to intricate artworks using AI models”
False: There is no creation with Gen AI. This is thinly veiled plagiarism. These images are far from realistic, and it’s not “art.”
“…allows users to generate high-quality images from text prompts.”
False: Again, these are not “high-quality images,” see the image above.
I hate to be harsh, but technologists must be honest with themselves when they are dealing with Gen AI. We can’t simply buy into the hype. Let’s call this what it is.
Liarus
The image shown on the acticle is just basic usage, you can achieve much better and much more convincing images using something like comfyui
Ed
So not being a developer type those install instructions were very messy for me.
The above comments make me wonder what’s the easiest way to install and gain access to Stable Diffusion to begin using it?
laamanni
I get an error i dont have NVidia, which is true.
Rob
I really liked to read about running a text-to-image model locally, up till now I only saw it online which all eat your data and whatever else you feed it.
I would love to see a manual doing these things in a pod with podman to prevent polluting my installation.
I’m definitely going to give this a try and see if I can get this to run in a pod with podman.
Tommy He
This was basically how I tried SD running locally on Fedora Workstation with AMD.
Unfortunately, AMD itself abandoned ROCm support in iGPU hence I ended up to use stablediffusion.cpp via Vulkan. It’s cross-vendor with fewer dependencies required. All required packages can be found in Fedora repo.
Get https://github.com/leejet/stable-diffusion.cpp
Parse
to
and compile.
More details can be found from its Github page.
red
Amd state if any person hellp no problem question to me
no compile amd rx6700xt
https://github.com/comfyanonymous/ComfyUI
https://github.com/ltdrdata/ComfyUI-Manager?search=1
https://github.com/RavenDevNG/ComfyUI-AMD
perfect prompts
https://github.com/stavsap/comfyui-ollama
in manger all packed, but the problem nvidia private repositorio cuda, last year its a big problem for developers and user . i thinkl nvidia = apple tactics / amd = android .