


HomeBank is an application designed to make personal accounting and money management easy and effective. Built by French developer Maxime Doyen, HomeBank has over 22 years of development and refinement behind it. This makes it one of the most user-friendly and solid options for organising your finances on Fedora.
Learn how to quickly set up your main banking account within HomeBank and analyse your current spending habits, helping you better plan your future savings and expenditure!
Installing Homebank
HomeBank is available in the default Fedora repositories. You can install it through the Gnome Software Centre or through dnf on the command line.
Search for HomeBank in the Software Centre and click Install. If you use the command line and dnf, type the following command.
$ sudo dnf install homebank
Importing transactions
The first thing you want to do is import recent transactions from your bank account. Nearly every bank worldwide allows you to export your transactions in various file formats through online banking. You’ll want to make sure it’s in either QIF, OFX, QFX or CSV format.
Upon opening HomeBank for the first time, go to the main horizontal menu and select File > Import, and select the correct file extension for your downloaded transactions.
Follow the import wizard through, naming the account and selecting every transaction to import them all.
Automatic categories for transactions
Now we have recent transactions imported, it’s time to see where all that money went. Whether you’ve chosen to import the last month, quarter, or year of account activity, it’s worth the little time it will now take to categorise them all. Automatic Categories are saved for the future, so when you import next month’s transactions, the rules will automatically categorise all that new spending for you.
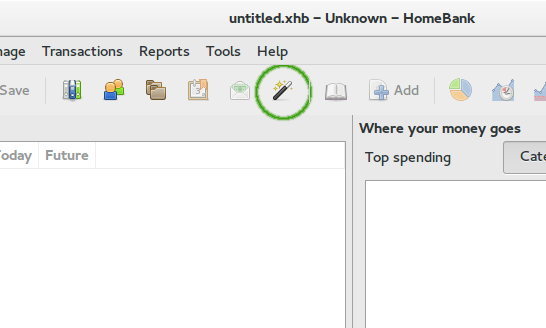
To make this process a little quicker and easier, you’ll want to have your list of transactions open at the same time as the category rules editor window. In the main HomeBank window, double-click on the account in the list on the left and drag the window title to one of the sides of your screen to snap it. Then snap the main HomeBank window to the other side, and click the Automatic Assignments button.
Look through the list of transactions, starting with your most frequent similar entries. The column we’re most concerned with is Memo. For example, your usual supermarket probably appears quite often (we’ll use ‘Tesco’).
- In the rules editor, click the Add button. Then, under Condition, make sure Memo is selected. Next to ‘Contains’, enter Tesco (or whatever appears in your Memo field in transactions).
- Select the checkbox next to Category beneath. Select one of the preset categories to assign it to those transactions.
- Repeat this process with all your other account activity, starting with the most frequent entries, until you’re finished.
- When you feel you’ve categorised everything you want to, click the ‘Run Auto Assignments’ button in the transaction list window, and we’ll be ready for the hard truth of where all that money went…
Reviewing your spending
The main HomeBank window shows a pie chart showing your top-level category spending, but it does seem to take a while to update and show recently added transactions. In the mean time, click the Statistics button in the main toolbar.
To begin, take a look at the List view, and sort by the Expense column by clicking on the column header. This gives you a very quick overview of what categories most of your spending falls in to. Clicking on the Detail button in the toolbar, and then selecting a category in the list, will show you the transactions that fall in to that category.
Select the Column and Doughnut display options to see all your data in whichever way you prefer, and use the filters on the right to pin point time-frames. Changing the ‘By’ option to show by Sub-category will drill down by more specific types of spending.
Setting a budget
Now we’ve learned the truth about why money has maybe been a bit tight recently, we can make sure next month our money is better allocated!
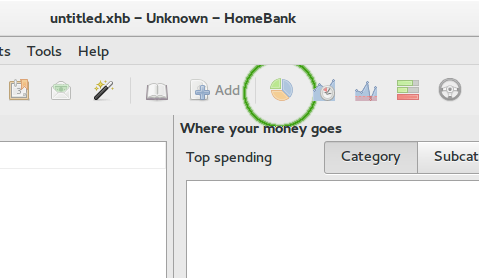
Clicking on the Budget Configuration button in the main window’s toolbar will open the budget editor.
Keep a list in your mind (or written) of the categories you have transactions in, and select the first one in the list on the left-hand side. As you can see, you can now set an expected amount to be spent in that category over the next few months.
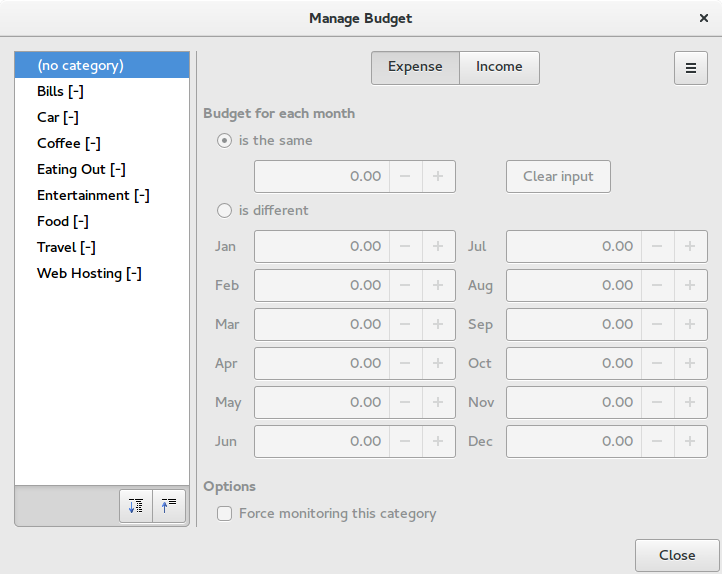
Once you’re done, click Close and you’re all set. When you import next month’s transactions, you’ll be able to see if you’ve over or underspent in each category. This should help keep you on track with your spending goals.
There’s so much more you can do with HomeBank, but looking at what you’re spending and planning future expenditure is essential in getting started with organising finances. See the HomeBank website for detailed guides on using all the features it has to offer.

Kos
I do not know how I managed to not hear about this wonderful piece of software. Thank you for writing this article.
Matt Harwood
Thanks for reading, Kos! Let me know how you get on!
Jim
I’ve tried out GNU Cash a little, but this one looks a little less complicated.
Matt Harwood
That’s what I’ve found. Jim. It’s like GnuCash without the learning curve, IMHO. Let me know if you give it a try!
philip
I have been using GnuCash for a year and is great. HomeBank looks a little more simple, which I understand, could be just what some people need. HomeBank is definitely very nice looking. Hopefully this increased competition will prompt GnuCash for a UI update.
Matt Harwood
Hi Philip! I’m glad you’re enjoying GnuCash, I know it has a loyal following. It’s the beauty of open source at work 🙂
Jonny
Thanks for your tip. I tried Gnu Cash a while ago, but I found it too complicated
Matt Harwood
Thanks Jonny! I’m glad you enjoyed the post 🙂
Pierre Timmermans
I installed it but then realized that my bank does not provide statements in the required format (ofx or qif format). There are some open-source csv to ofx convertors and it does not look very complicated to tailor one of those convertor to the csv format of my bank, I just need to find a couple of hours for that.
Matt Harwood
Hi Pierre! HomeBank can import through CSV, under File->Import. Hope that helps!
pierre
Indeed. But the csv format is specific to homebank, that’s why it does not want my bank’s csv’s as input. A simple awk script to convert from one format to the other should do the trick (it is just re-ordering of columns and date formatting), I’ll give it a try.
Thanks, Pierre
CRG
It doesn’t appear that this product supports downloading transactions.
træhest
Had to use
yum install homebank
Runs perfect ! Thx
Krish
I am using HomeBank after reading this post. I need a help.
I am trying to figure out how to add vehicle details like meter, consumption, fuel, etc. in order to show them up in vehicle reports?
‘F1’ help is giving some error “Browser error: Could not display the URL ‘file:/usr/share/doc/homebank-data/help/index.html'”.
Krish
Ok. My bad. I installed HomeBank from Software and it did not install doc files. So I have installed HomeBank doc from terminal.
Matt Harwood
Glad you sorted it, Krish! Interesting that the Software Centre doesn’t pull down the docs too.
I’m glad you’re enjoying HomeBank after the article 🙂
Krish
And even its official website is not working in India. It says “Your requested URL has been blocked as per the directions received from Department of Telecommunications, Government of India. Please contact administrator for more information.”
🙁