SSL security allows users to trust the authenticity of a site’s content. While you can host an SSL blog on both GitHub and GitLab pages, only GitLab supports SSL for custom domains. This article shows you how to use Pelican and Let’s Encrypt to produce a secure blog hosted on GitLab pages. If you’d like to learn more about Pelican on Fedora, check out the Pelican article previously posted on Fedora Magazine.
Why use SSL security on your blog? One reason is that search engines like Google are moving toward downgrading search results for sites that don’t use it. The Fedora Infrastructure community team team is considering requiring HTTPS for blogs to be published on the Fedora Planet feed.
Create Directory Structure
The first step is to create the directory structure to support the verification process used by Let’s Encrypt. This process involves serving a page from a hidden directory. First, change directory to your Pelican blog content, substituting the correct directory name:
cd ~/myblog
Now create the directory:
mkdir -p .well-known/acme-challenge
Install Certbot
Next, install certbot so you can request a certificate from your computer:
sudo dnf install certbot
Generate The Certificate
After the install is complete, run the command to generate a certificate for a remote site.
certbot certonly -a manual -d yoursite.com --config-dir ~/letsencrypt/config --work-dir ~/letsencrypt/work --logs-dir ~/letsencrypt/logs
Replace yoursite.com with your actual domain name. At the prompt, you must accept that the IP address of your computer is being logged.
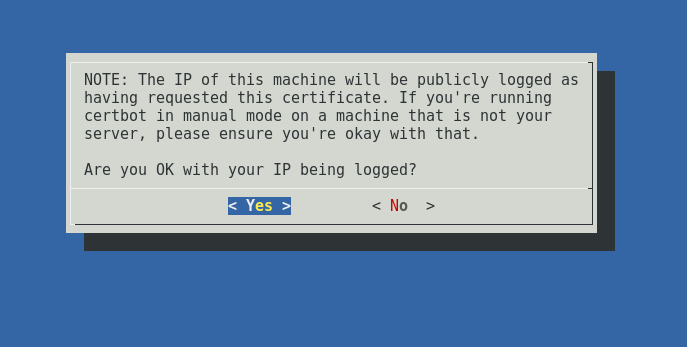
The results will be as follows. The log string for the file name and contents will be different:
Make sure your web server displays the following content at
 http://yoursite.com/.well-known/acme-challenge/uF2HODXEnO98ZRBLhDwFR0yOpGkyg0UyP4QZHImDfd1 before continuing:

uF2HODXEnO98ZRBLhDwFR0yOpGkyg0UyP4QZHImJ8qY.imp4JScFS23eaYWG4tF5e9TSRfGwDuFMmkQTiqN73t8
The important part of the output from certbot is above. The rest of the output (seen below) is only used when running the certbot command directly on the server:
If you don't have HTTP server configured, you can run the following
 command on the target server (as root):
mkdir -p /tmp/certbot/public_html/.well-known/acme-challenge
 cd /tmp/certbot/public_html
 printf "%s" uF2HODXEnO98ZRBLhDwFR0yOpGkyg0UyP4QZHImJ8qY.imp4JScFS23eaYWG4tF5e9TSRfGwDuFMmkQTiqN73t8 > .well-known/acme-challenge/uF2HODXEnO98ZRBLhDwFR0yOpGkyg0UyP4QZHImDfd1
# run only once per server: $(command -v python2 || command -v python2.7 || command -v python2.6) -c \ "import BaseHTTPServer, SimpleHTTPServer; \ s = BaseHTTPServer.HTTPServer(('', 80), SimpleHTTPServer.SimpleHTTPRequestHandler); \ s.serve_forever()" Press ENTER to continue
At this point the certbot program waits until you’re ready for the page to be served. To make this happen you must create the necessary file.
Create Verification File
nano content/.well-known/acme-challenge/uF2HODXEnO98ZRBLhDwFR0yOpGkyg0UyP4QZHImDfd1
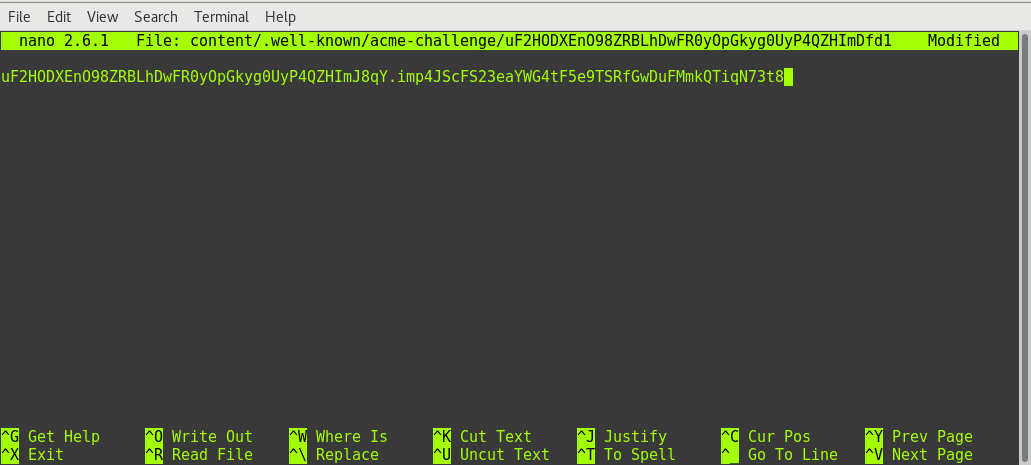
Once the file is saved you need to generate the site using Pelican.
make html
You can now test the server locally. If everything has worked you can use Pelican to publish your site.
make publish
Modify GitLab YML File
You cannot push the output folder to GitLab using normal git commands. Once you have pushed the site to GitLab, modify the .gitlab-ci.yml file so that it builds the page.
  script:
  - mkdir .public
  - cp -r * .public
  - mv .public public
  - mkdir public/.well-known
  - mkdir public/.well-known/acme-challenge
  - mv .well-known/acme-challenge/uF2HODXEnO98ZRBLhDwFR0yOpGkyg0UyP4QZHImJ8qY public/.well-known/acme-challenge/
  artifacts:
    paths:
    - public
  only:
  - master
Without the last three lines under the script section GitLab won’t create the hidden page.
Once you commit and push this file, GitLab processes your files and creates the site. Once it’s finished, browse the site and ensure that you get the correct results. Finally, go back to the terminal window running certbot and hit Enter to continue.
IMPORTANT NOTES:
 - Congratulations! Your certificate and chain have been saved at
 /home/cprofitt/letsencrypt/config/live/hub.cprofitt.com/fullchain.pem.
 Your cert will expire on 2017-05-19. To obtain a new or tweaked
 version of this certificate in the future, simply run certbot
 again. To non-interactively renew *all* of your certificates, run
 "certbot renew"
 - If you like Certbot, please consider supporting our work by:

Donating to ISRG / Let's Encrypt:   https://letsencrypt.org/donate
 Donating to EFF:                    https://eff.org/donate-le
Create Custom Domain Using The Certificate
At this point a number of files have been created. You can now create a new domain for your GitLab page.

Select New Domain:
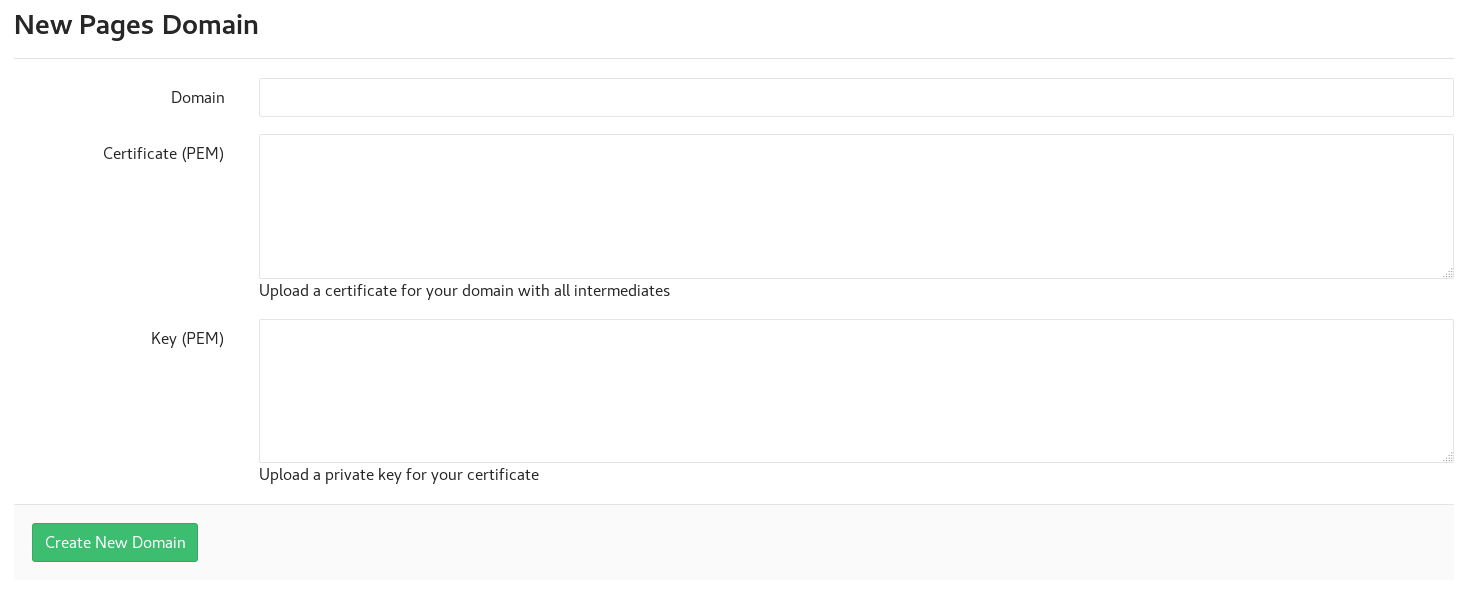
To complete the process:
- For the Certificate (PEM) use the file in letsencrypt/config/archive/yoursite.com/fullchain1.pem
- For the Key (PEM) use the file in letsencrypt/config/archive/yoursite.com/privkey1.pem
Open up both files and paste the contents into the appropriate fields shown in the image above. Then click Create New Domain. Within moments, your site serves pages using the SSL certificate. Remember that you must renew the Let’s Encrypt certificate every 90 days.
Your pages are now using SSL. Congratulations!

