


This article will guide you through setting up a single-node OKD cluster on your own Fedora Linux system. OKD is the community distribution of Kubernetes. This will be done using CRC, also known as “OpenShift Local”. It will also explore how OKD works under the hood and install an application via the web console.
Introducing OKD
Containers are ubiquitous in today’s cloud-native world and Kubernetes has become the de-facto standard for container orchestration at scale. However, Kubernetes itself falls short of being an all-rounded container platform. On one hand, developers must familiarize themselves with Kubernetes-specific terminology and master the kubectl command line to leverage its power effectively. On the other hand, platform engineers must carefully evaluate and integrate third-party components with Kubernetes to build a customized container platform addressing specific business requirements and expend effort on the continued maintenance of that platform. So is there a solution addressing both of these challenges? Enter OKD!
OKD, also known as OpenShift Origin, is the community distribution of Kubernetes that powers Red Hat OpenShift. It is open source under the permissive Apache 2.0 license in the same spirit as upstream Kubernetes. Unlike upstream Kubernetes, it is a complete container platform, a developer and operations friendly Kubernetes distro. For developers, OKD focuses on the developer experience by providing a built-in web console and tooling such as source-to-image (S2I) which simplify the developer workflow thus enhancing developer productivity. For platform engineers, OKD provides a standardized collection of components designed to work together as a whole with automated upgrades and lifecycle management for both application and cluster-level components, thereby simplifying platform maintenance.
CRC – Runs Containers
CRC, also known as OpenShift Local, makes it easy to run OKD on a standard laptop or desktop. Its name is a recursive acronym for “CRC – Runs Containers”. This article will guide you through setting up a single-node OKD cluster on your own laptop or desktop with CRC. We will also explore how OKD works under the hood and install an application via the web console.
Before we start, ensure your system meets the following minimum requirements:
- Fedora Workstation 38+ recommended
- 4 physical CPU cores (8 vCPUs)
- 16 GiB of RAM
- At least 35 GiB of available storage
A conceptual understanding of containers is assumed. Experience with containers and Kubernetes is helpful but not required. So what are you waiting for? Let’s dive right in!
Installing libvirt and NetworkManager dependencies for CRC
On Linux, CRC depends on libvirt and NetworkManager. If necessary, run the following command on Fedora Workstation 38+:
$ sudo dnf install --refresh -y libvirt NetworkManager
The dependencies vary by operating system. If not using Fedora Workstation 38+, consult the CRC documentation for details.
Downloading and installing CRC
Download and extract the latest tarball for CRC from the OpenShift mirror – no subscription required:
$ wget https://developers.redhat.com/content-gateway/file/pub/openshift-v4/clients/crc/2.31.0/crc-linux-amd64.tar.xz
$ tar xvf crc-linux-amd64.tar.xz
Install the crc binary to your PATH:
$ mkdir -p "$HOME/.local/bin/"
$ install crc-linux-*-amd64/crc "$HOME/.local/bin/crc"
Log out and in again to ensure crc is available in your PATH.
Now check that CRC is correctly installed:
$ crc version
CRC version: 2.31.0+6d23b6
OpenShift version: 4.14.7
Podman version: 4.4.4
Configuring and starting CRC
CRC requests that telemetry data to be sent to Red Hat the first time it is started, unless we explicitly opt out of telemetry collection beforehand:
$ crc config set consent-telemetry no
CRC supports the following presets:
- openshift: OpenShift Container Platform
- okd: OKD
- microshift: MicroShift
- podman: Podman container runtime
By default, the OpenShift Container Platform preset is selected. Change it to OKD with the following command:
$ crc config set preset okd
Run the setup subcommand which performs host-level configuration to ensure CRC will work correctly when started:
$ crc setup
Now for the moment we’ve been waiting for — start the CRC VM!
$ crc start
This takes approximately 15-30 minutes so grab a cup of coffee tea while OKD is spinning up.
Exploring OKD with the oc command line
oc is the official command line client for OKD. While the web console provides a beginner-friendly UI for performing many common operations, some operations are only available on the command line. Using the command line enables us to better understand OKD as a Kubernetes distribution so we’ll start by interacting with our OKD cluster via the command line, introducing the basic Kubernetes concepts involved along the way. Don’t worry, we will explore the web console in a moment 🙂
CRC comes bundled with its own copy of oc – make this available in our PATH:
$ eval $(crc oc-env)
Alternatively, if desired, fetch a copy of oc from the OpenShift Mirror and place it under your PATH.
Nodes
A Kubernetes cluster is comprised of one or more nodes. Each node is a physical or virtual machine. Kubernetes is responsible for scheduling workloads (containers) on the appropriate node(s) to balance application performance and node utilization. The oc command shown below returns a list of all nodes in our OKD cluster.
$ oc get nodes
NAME                 STATUS   ROLES                         AGE   VERSION
crc-d4g2s-master-0   Ready    control-plane,master,worker   44d   v1.27.6+d548052
oc reports 1 node in our OKD cluster which is both a control plane node and a worker node.
- The control plane is the “brain” of the cluster and is responsible for managing the cluster itself. It is responsible for serving Kubernetes client requests (from oc or kubectl), scheduling workloads, reconciling the state of the cluster, and maintaining the integrity of cluster metadata. It is usually comprised of 3, 5 or 7 control plane nodes for high availability, depending on the total size of the cluster.
- Worker nodes form the “body” of the cluster and are responsible for running application workloads. Together, they form the data plane.
Let’s take a closer look at our node by displaying additional fields (note these lines are wrapped):
$ oc get nodes -o wide
NAME                 STATUS   ROLES                         AGE   VERSION           INTERNAL-IP      EXTERNAL-IP   OS-IMAGE                        KERNEL-VERSION          CONTAINER-RUNTIME
crc-d4g2s-master-0   Ready    control-plane,master,worker   44d   v1.27.6+d548052   192.168.126.11   <none>        Fedora CoreOS 38.20231027.3.2   6.5.5-200.fc38.x86_64   cri-o://1.27.0
In particular, notice the OS-IMAGE field which tells us that our node is running Fedora CoreOS (FCOS). FCOS is a container-optimized OS designed for running containerized workloads at scale. OKD integrates deeply with FCOS and requires all control plane nodes to run FCOS while worker nodes may run Fedora Server instead. Through the deep integration with FCOS, OKD manages cluster upgrades and node lifecycle management in a fully automated manner.
Pods
Pods are the atomic unit of computing in Kubernetes. A pod contains a collection of 1 or more tightly coupled containers and are ephemeral in nature. Most pods run application workloads in the data plane while some pods run cluster-level components in the control plane.
Get the total number of pods running on our OKD cluster:
$ oc get pods --all-namespaces --no-headers | wc -l
69
This brings us to our next concept – namespaces.
Namespaces
Namespaces segregate Kubernetes workloads by purpose for easier categorization and access management. Think of each namespace as representing a single, coherent application or project. OKD defines an additional API object known as projects which are just namespaces with additional metadata, such as a project description, implemented with Kubernetes annotations. In OKD, projects and namespaces always have a 1-to-1 mapping so creating a namespace automatically creates the corresponding project and vice versa.
View existing namespaces in our OKD cluster:
$ oc get namespaces
NAME                                               STATUS   AGE
default                                            Active   44d
hostpath-provisioner                               Active   43d
kube-node-lease                                    Active   44d
kube-public                                        Active   44d
kube-system                                        Active   44d
openshift                                          Active   44d
openshift-apiserver                                Active   44d
openshift-apiserver-operator                       Active   44d
openshift-authentication                           Active   44d
openshift-authentication-operator                  Active   44d
openshift-cloud-controller-manager                 Active   44d
openshift-cloud-controller-manager-operator        Active   44d
openshift-cloud-credential-operator                Active   44d
openshift-cloud-network-config-controller          Active   44d
openshift-cluster-machine-approver                 Active   44d
openshift-cluster-samples-operator                 Active   44d
openshift-cluster-storage-operator                 Active   44d
openshift-cluster-version                          Active   44d
openshift-config                                   Active   44d
openshift-config-managed                           Active   44d
openshift-config-operator                          Active   44d
openshift-console                                  Active   44d
openshift-console-operator                         Active   44d
openshift-console-user-settings                    Active   44d
openshift-controller-manager                       Active   44d
openshift-controller-manager-operator              Active   44d
openshift-dns                                      Active   44d
openshift-dns-operator                             Active   44d
openshift-etcd                                     Active   44d
openshift-etcd-operator                            Active   44d
openshift-host-network                             Active   44d
openshift-image-registry                           Active   44d
openshift-infra                                    Active   44d
openshift-ingress                                  Active   44d
openshift-ingress-canary                           Active   44d
openshift-ingress-operator                         Active   44d
openshift-kni-infra                                Active   44d
openshift-kube-apiserver                           Active   44d
openshift-kube-apiserver-operator                  Active   44d
openshift-kube-controller-manager                  Active   44d
openshift-kube-controller-manager-operator         Active   44d
openshift-kube-scheduler                           Active   44d
openshift-kube-scheduler-operator                  Active   44d
openshift-kube-storage-version-migrator            Active   44d
openshift-kube-storage-version-migrator-operator   Active   44d
openshift-machine-api                              Active   44d
openshift-machine-config-operator                  Active   44d
openshift-marketplace                              Active   44d
openshift-monitoring                               Active   44d
openshift-multus                                   Active   44d
openshift-network-diagnostics                      Active   44d
openshift-network-node-identity                    Active   44d
openshift-network-operator                         Active   44d
openshift-node                                     Active   44d
openshift-nutanix-infra                            Active   44d
openshift-oauth-apiserver                          Active   44d
openshift-openstack-infra                          Active   44d
openshift-operator-lifecycle-manager               Active   44d
openshift-operators                                Active   44d
openshift-ovirt-infra                              Active   44d
openshift-route-controller-manager                 Active   44d
openshift-sdn                                      Active   44d
openshift-service-ca                               Active   44d
openshift-service-ca-operator                      Active   44d
openshift-user-workload-monitoring                 Active   44d
openshift-vsphere-infra                            Active   44d
4 of these namespaces are Kubernetes-reserved system namespaces:
- default
- kube-node-lease
- kube-public
- kube-system
hostpath-provisioner contains a CSI driver for dynamic provisioning of storage on Kubernetes. This will not be covered in this article. The rest are namespaces starting with openshift* which are OKD-reserved system namespaces.
Services
Services expose Pods to the rest of the cluster and to the outside world. Pods are ephemeral in nature, so external clients and other pods cannot depend on the continued existence of any particular pod for application and network-level communication. Services address this issue by providing a stable entry point for communicating with a particular application represented by its dynamic, ever-changing collection of pods.
View a list of services in the default namespace (again, the follow three lines are wrapped):
$ oc get services
NAME         TYPE           CLUSTER-IP   EXTERNAL-IP                            PORT(S)   AGE
kubernetes   ClusterIP      10.217.4.1   <none>                                 443/TCP   44d
openshift    ExternalName   <none>       kubernetes.default.svc.cluster.local   <none>    44d
The kubernetes service is responsible for serving the Kubernetes API within the cluster. This allows pods running within the cluster to query cluster information and even schedule new workloads on the cluster provided the appropriate privileges, in a manner similar to how oc (or kubectl) interacts with the cluster. The openshift service is simply an alias to kubernetes.
Let’s now move on to the web console which is where OKD shines. With the OperatorHub built into the web console, it’s easy to install applications with just a few clicks. We’ll also briefly touch on the concepts of Kubernetes operators implemented on OKD using the Operator Framework.
Installing the Argo CD operator on OperatorHub
On OKD, applications are managed by operators which are installed via OperatorHub which is available through the OKD web console. An operator is a software controller encoding human operational knowledge for managing a particular application and performing these operational tasks in a fully automated manner. This frees the cluster administrator from the mundane task of managing that particular application and allowing them to focus on tasks that deliver actual business value.
In the section to follow, we will install the Argo CD operator via the OKD web console. Argo CD is a GitOps continuous delivery tool for Kubernetes which eases modern software deployment practices such as blue-green and canary deployments. Once installed we will then leverage the operator to create an Argo CD instance effortlessly by applying an ArgoCD custom resource to our cluster. For the purposes of this article we won’t focus on Argo CD itself.
Logging in to the web console as the cluster administrator
If you closed your terminal window from a previous step, open a new terminal window now and make oc available in your PATH.
$ eval $(crc oc-env)
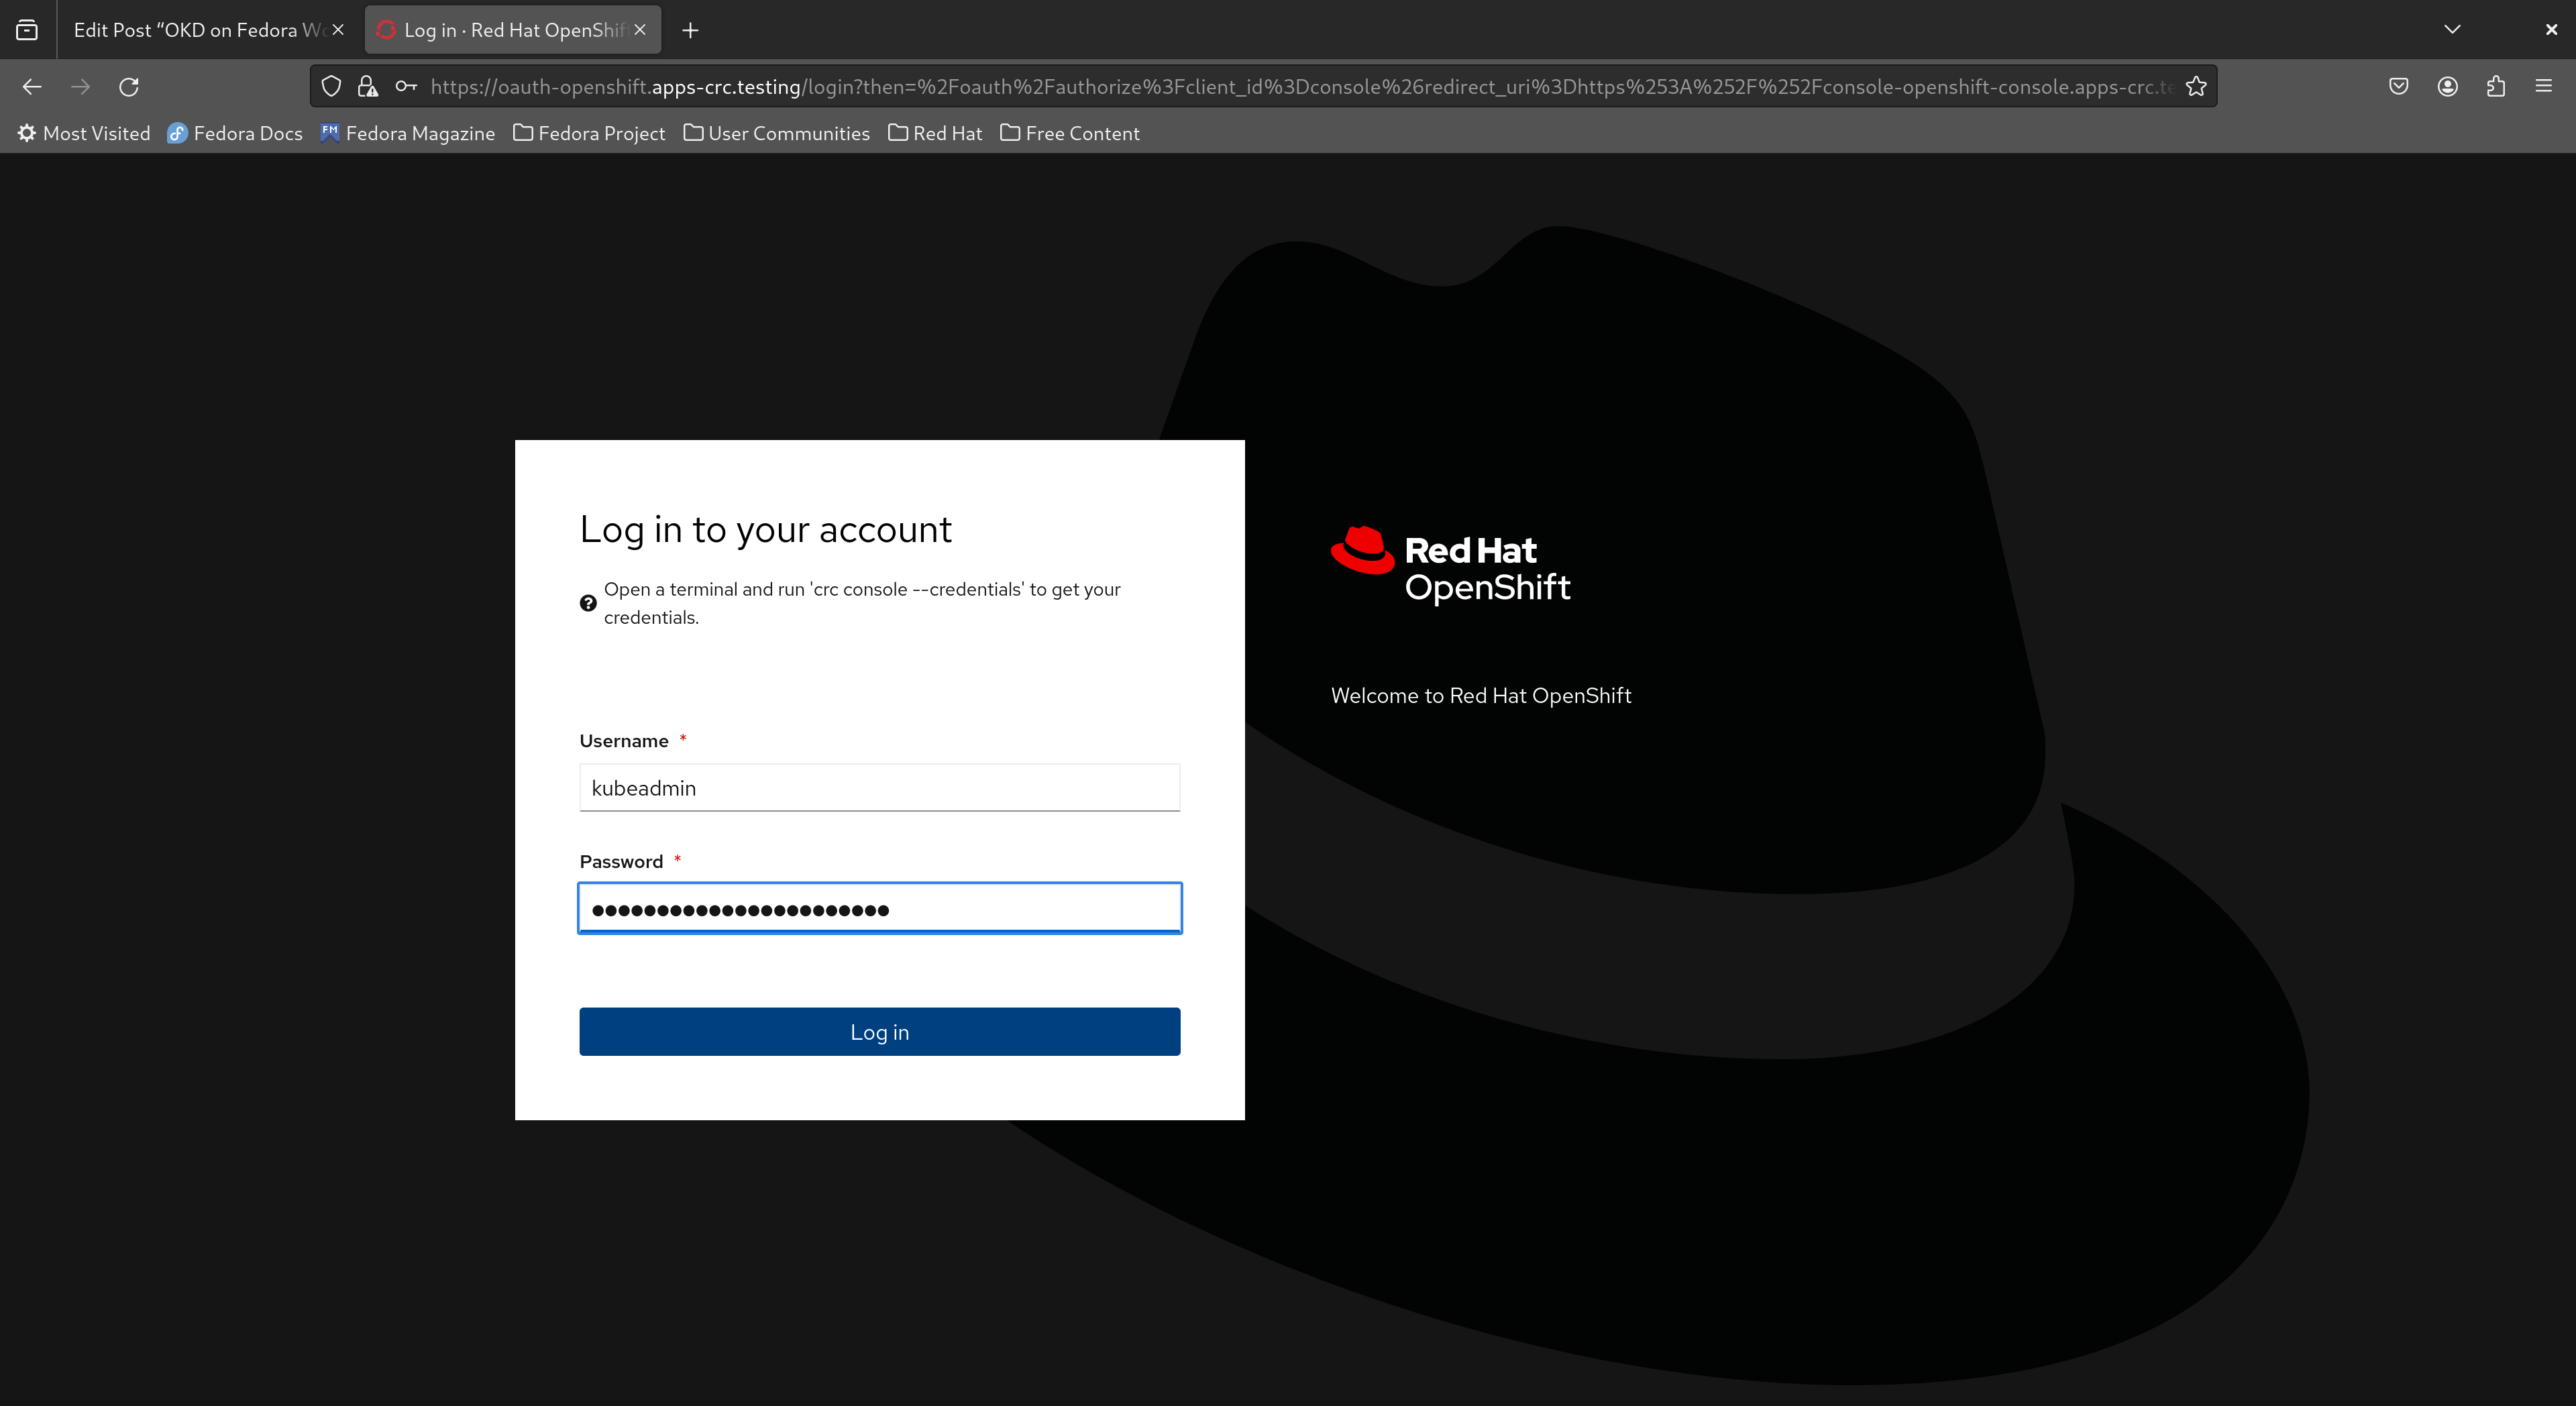
The default cluster administrator on OKD is kubeadmin. Fetch the password for kubeadmin by running the command below.
$ crc console --credentials
Now point your browser to https://console-openshift-console.apps-crc.testing, ignore any certificate warnings, type in kubeadmin for the username, copy the password from the output of the crc console command above and click “Log in”.
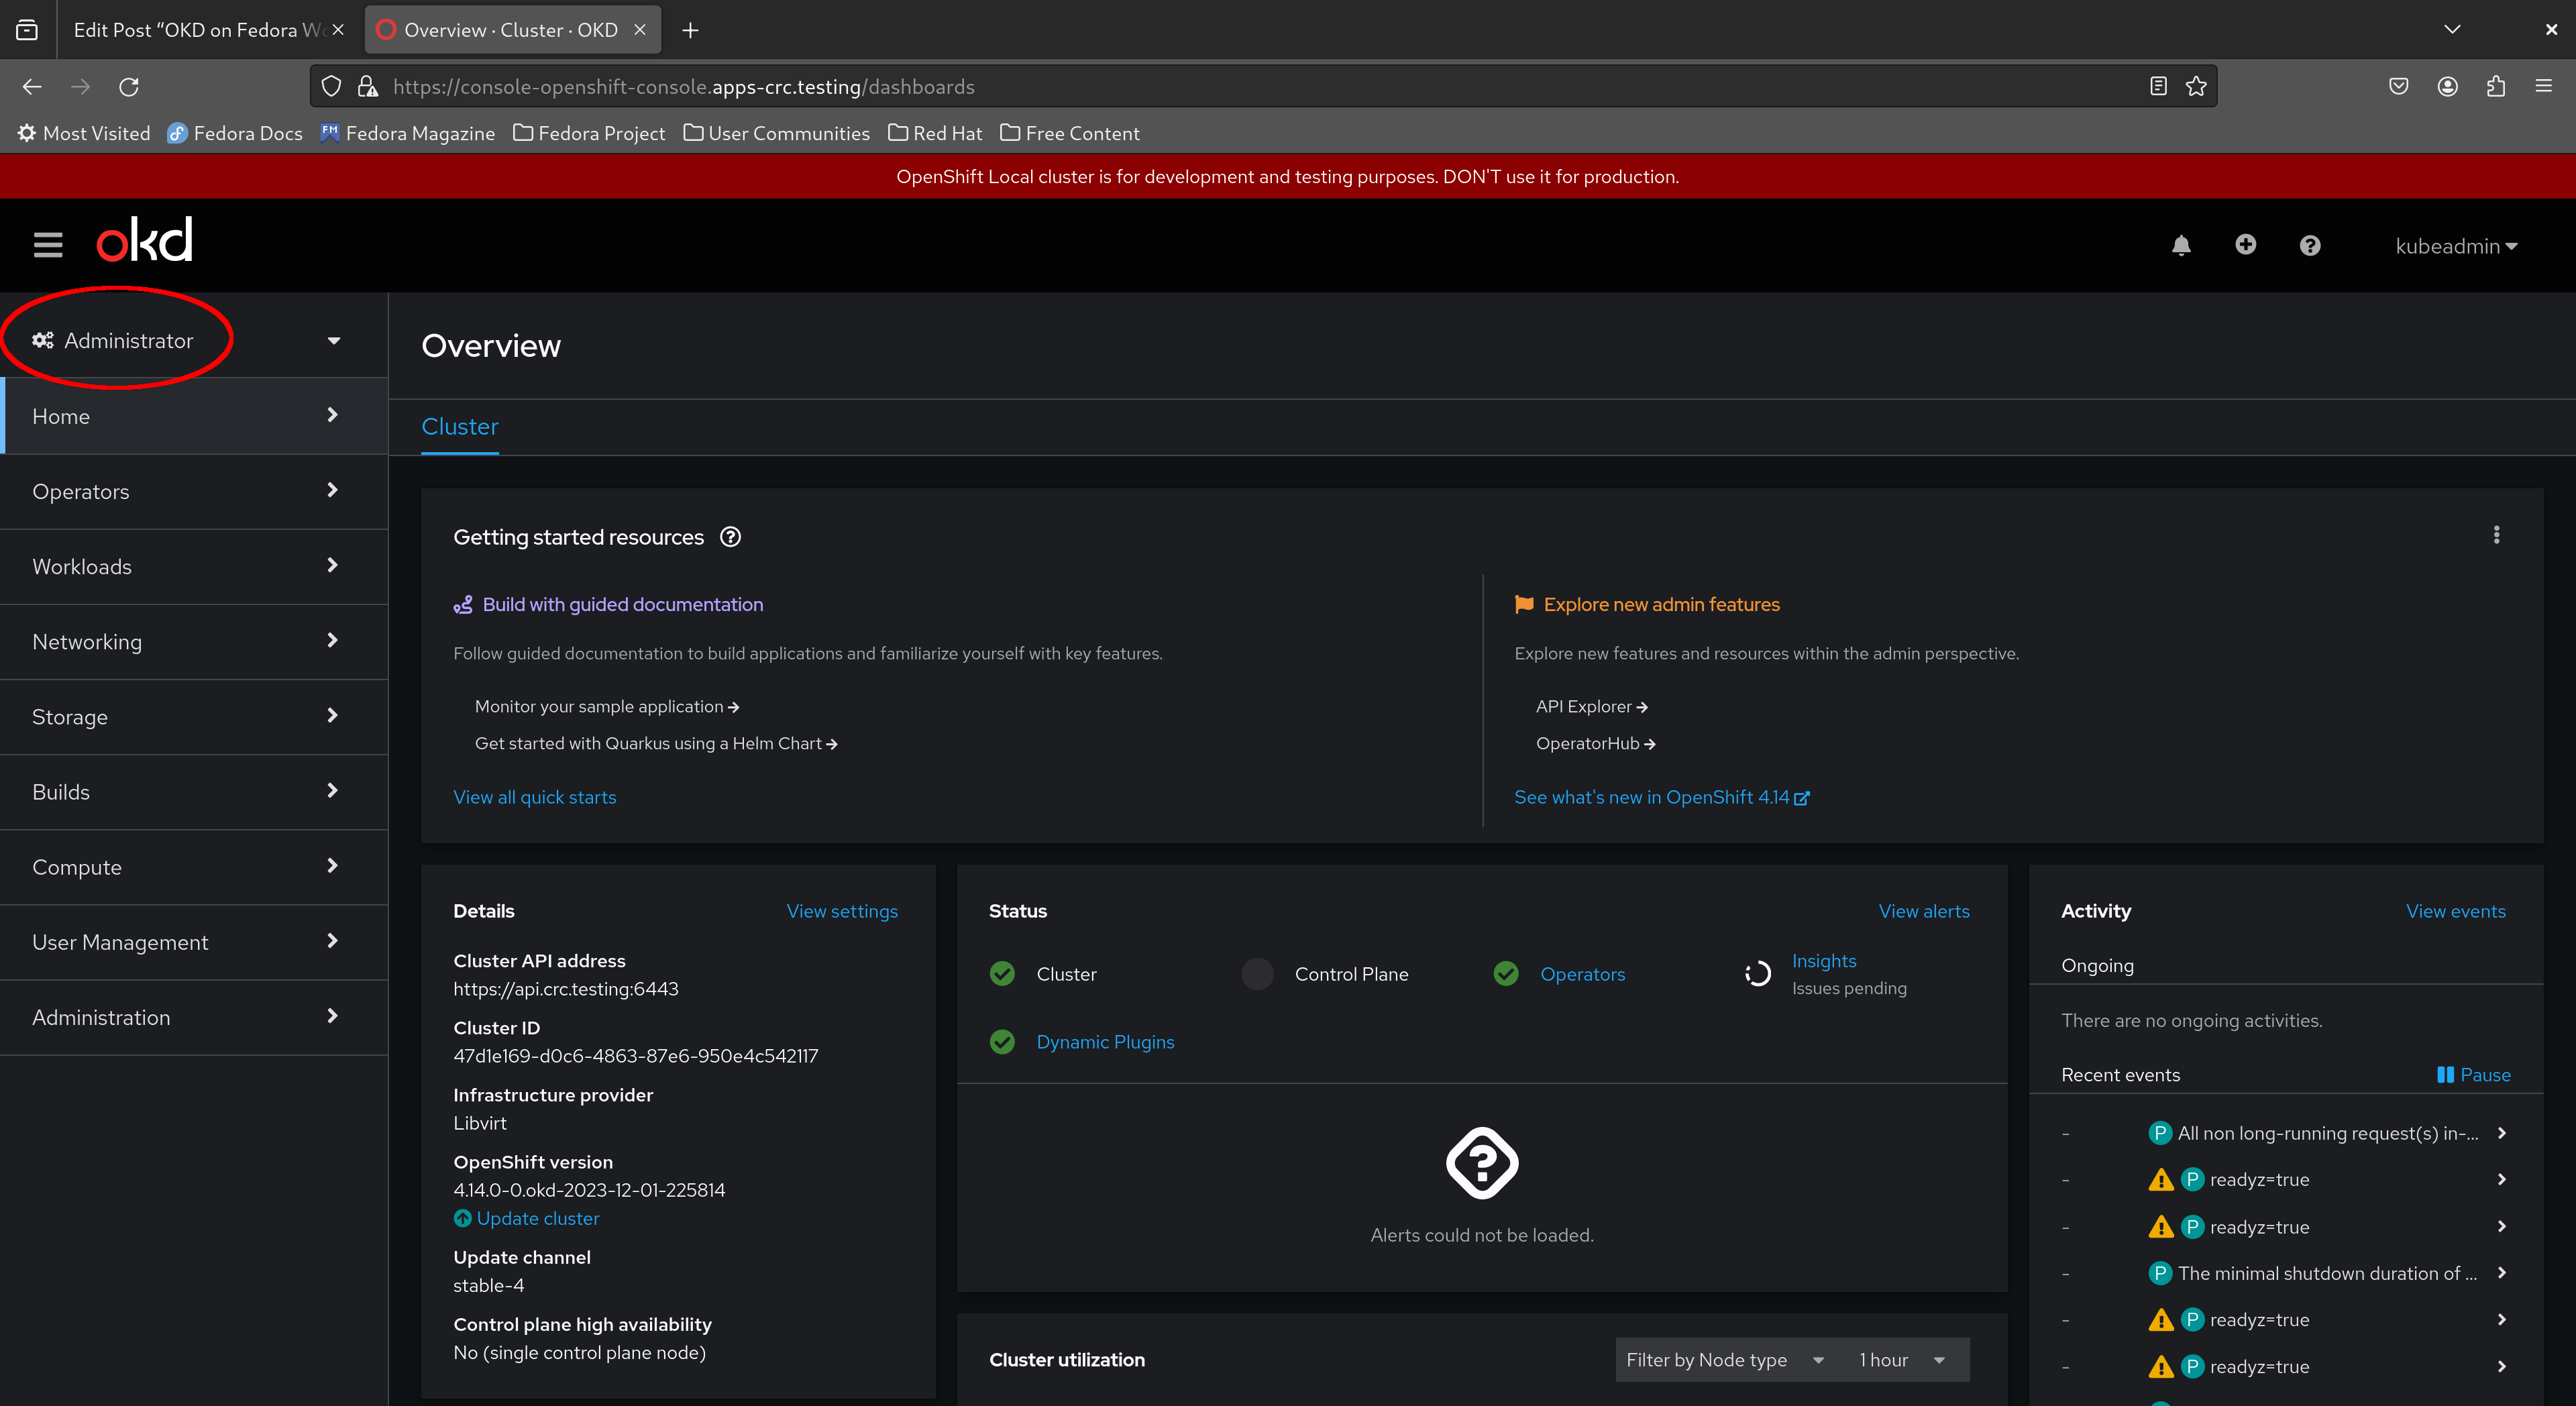
This brings up the administrator dashboard. Feel free to explore the menu items to the left before we move on. In particular, take a look at the Developer perspective as well by clicking the “Administrator” dropdown to the top left.
Installing the Argo CD operator via the OKD web console
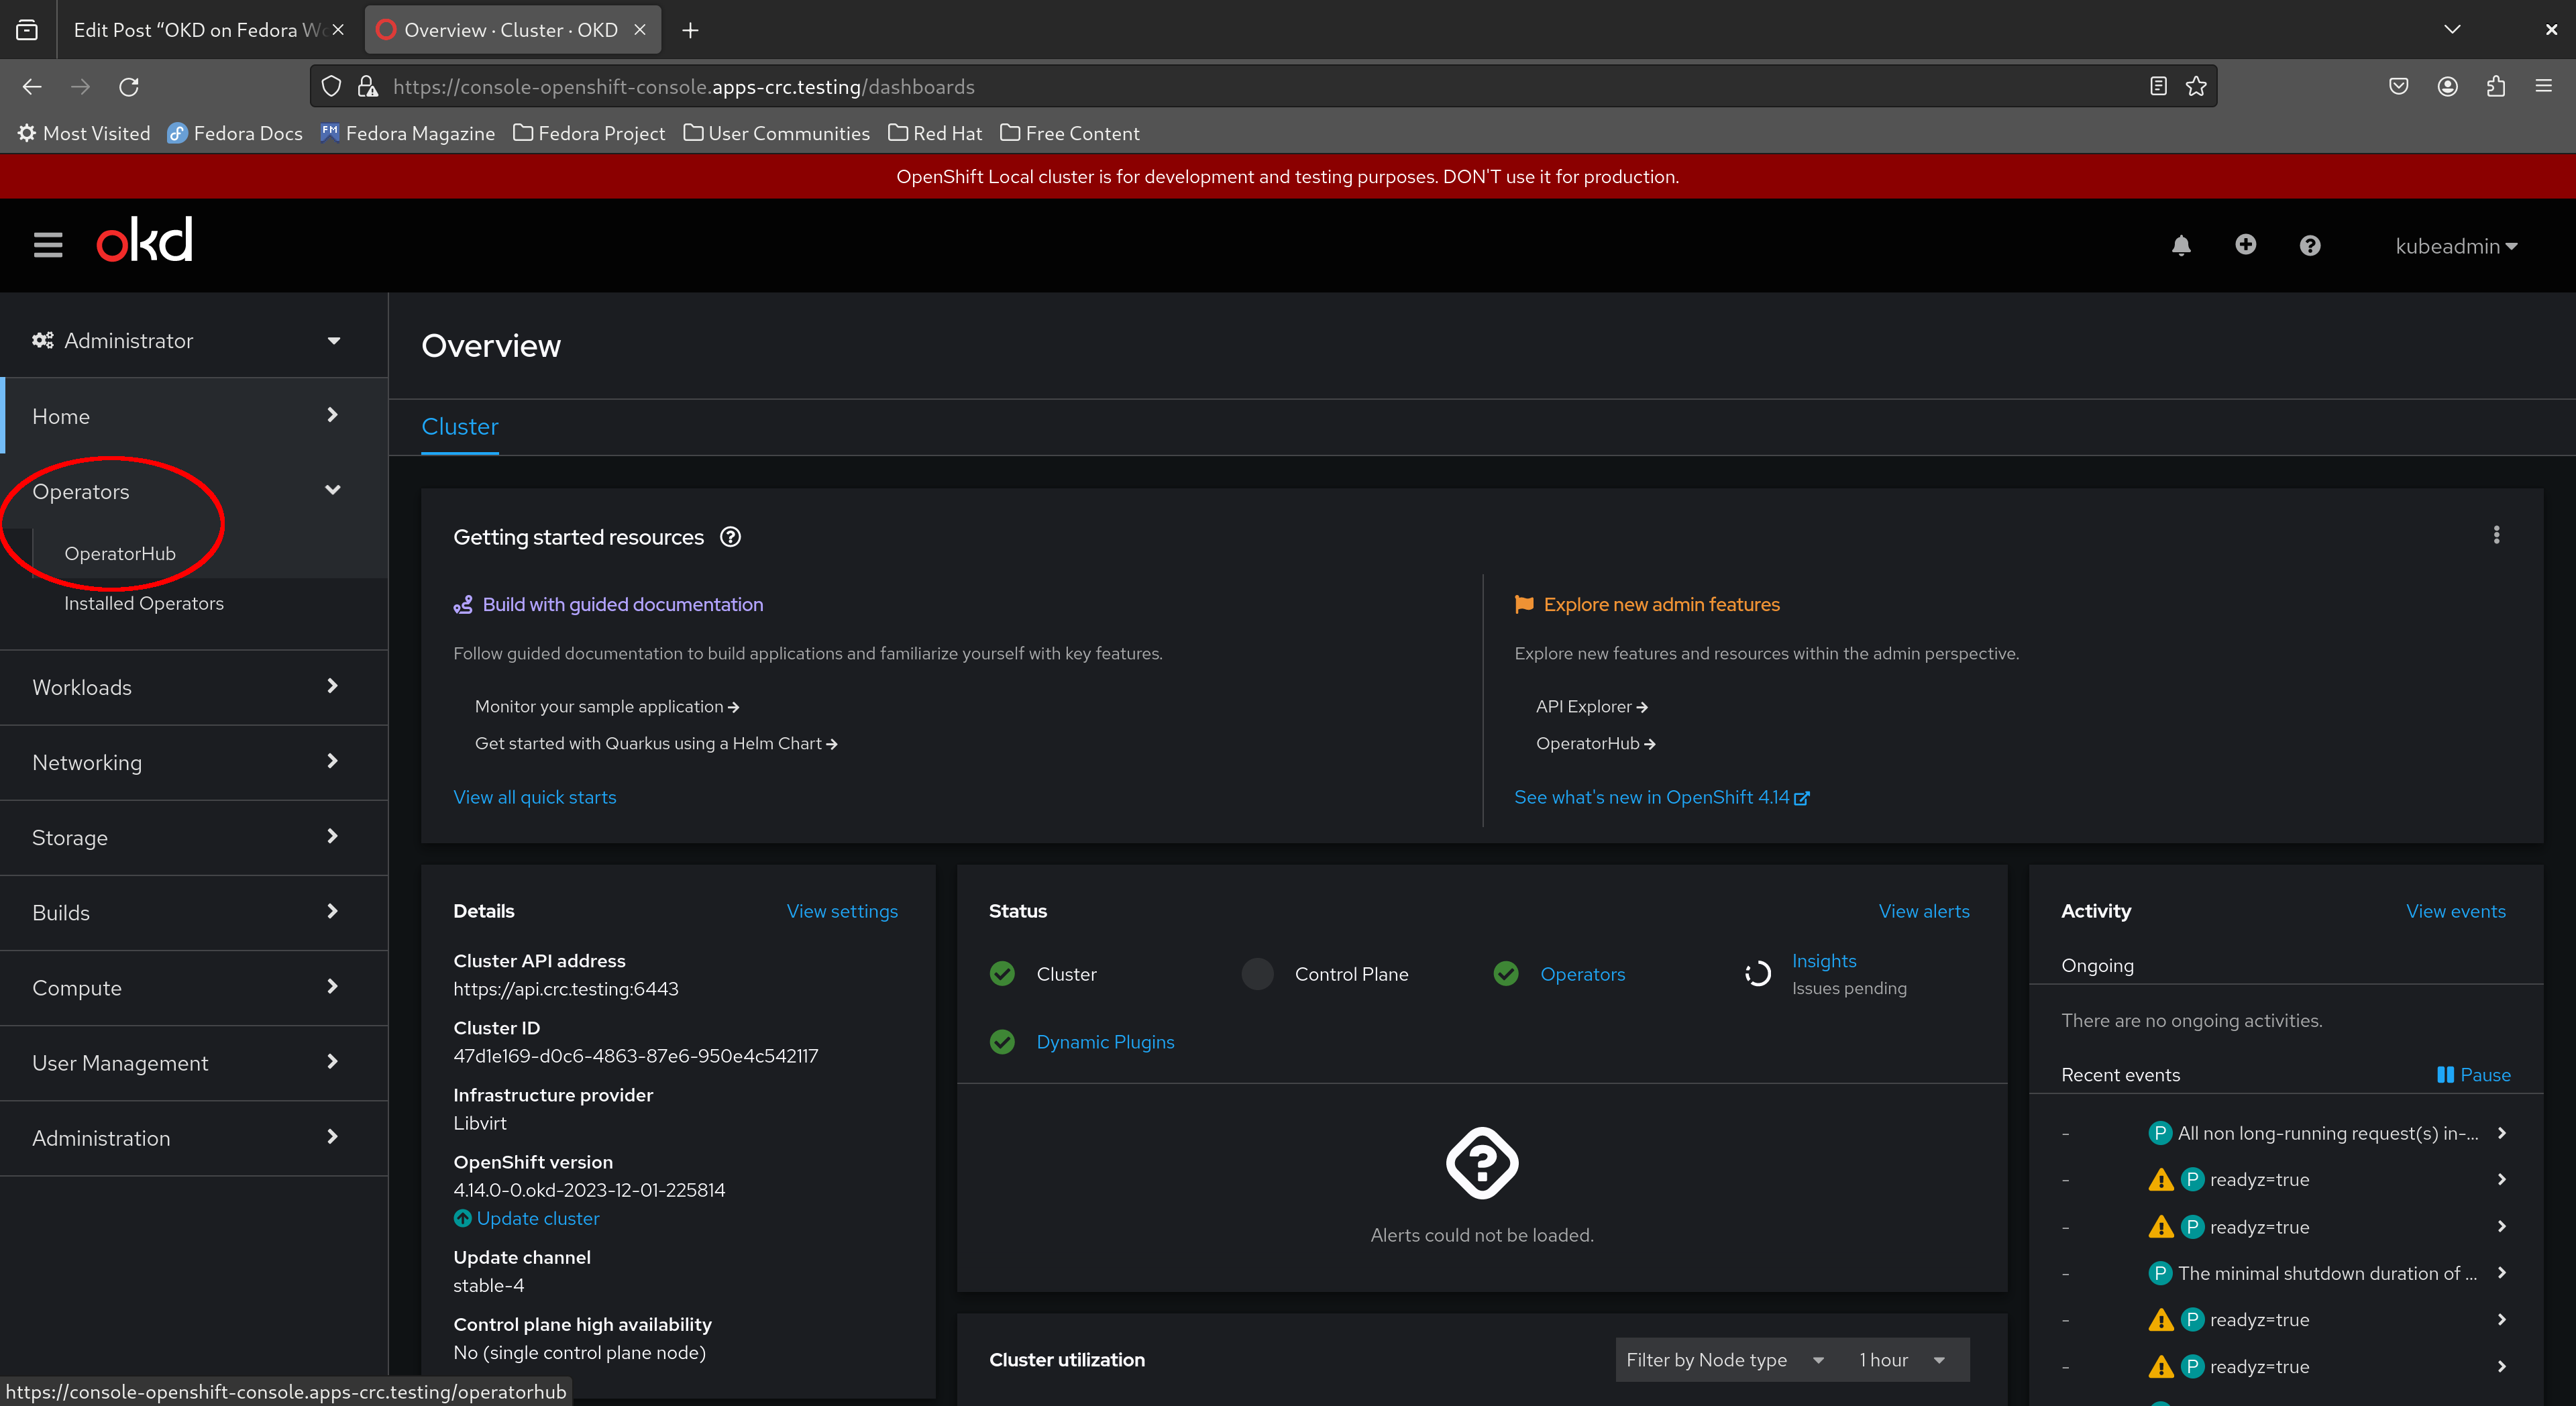
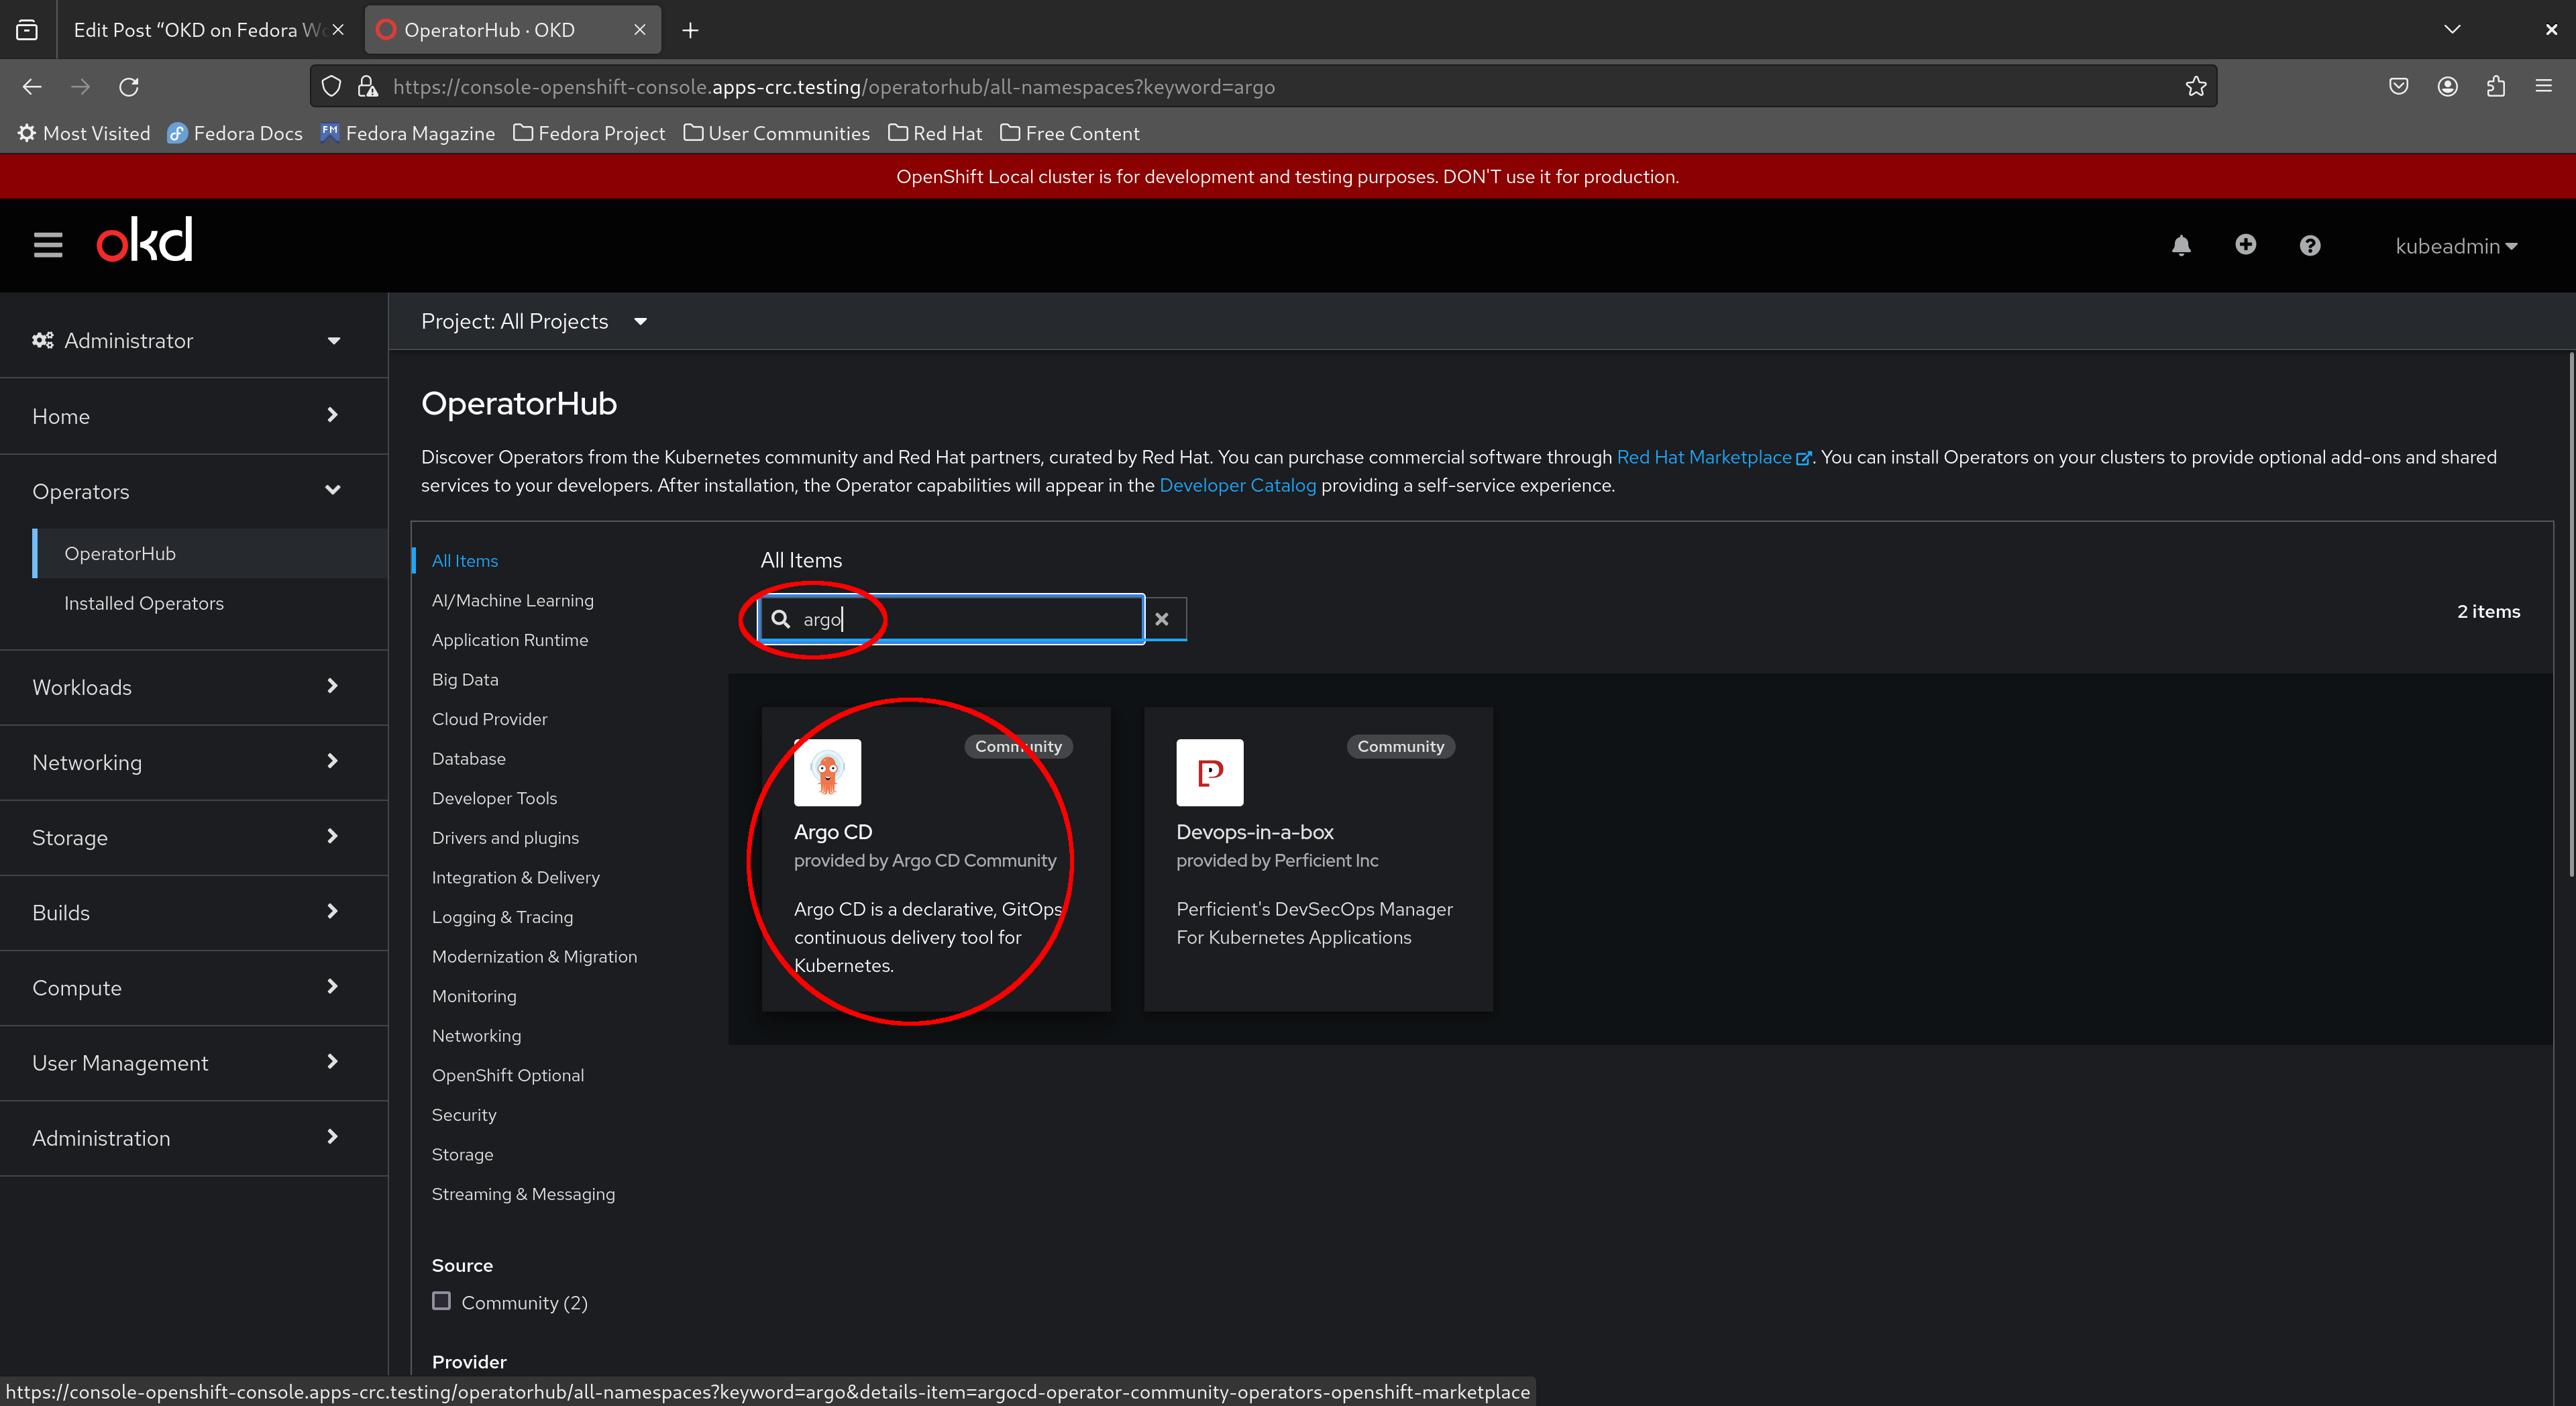
Now return to the Administrator dashboard and select “Operators > OperatorHub” from the menu on the left.
Next, search for “Argo CD” and select the Argo CD operator as shown in the screenshot below.
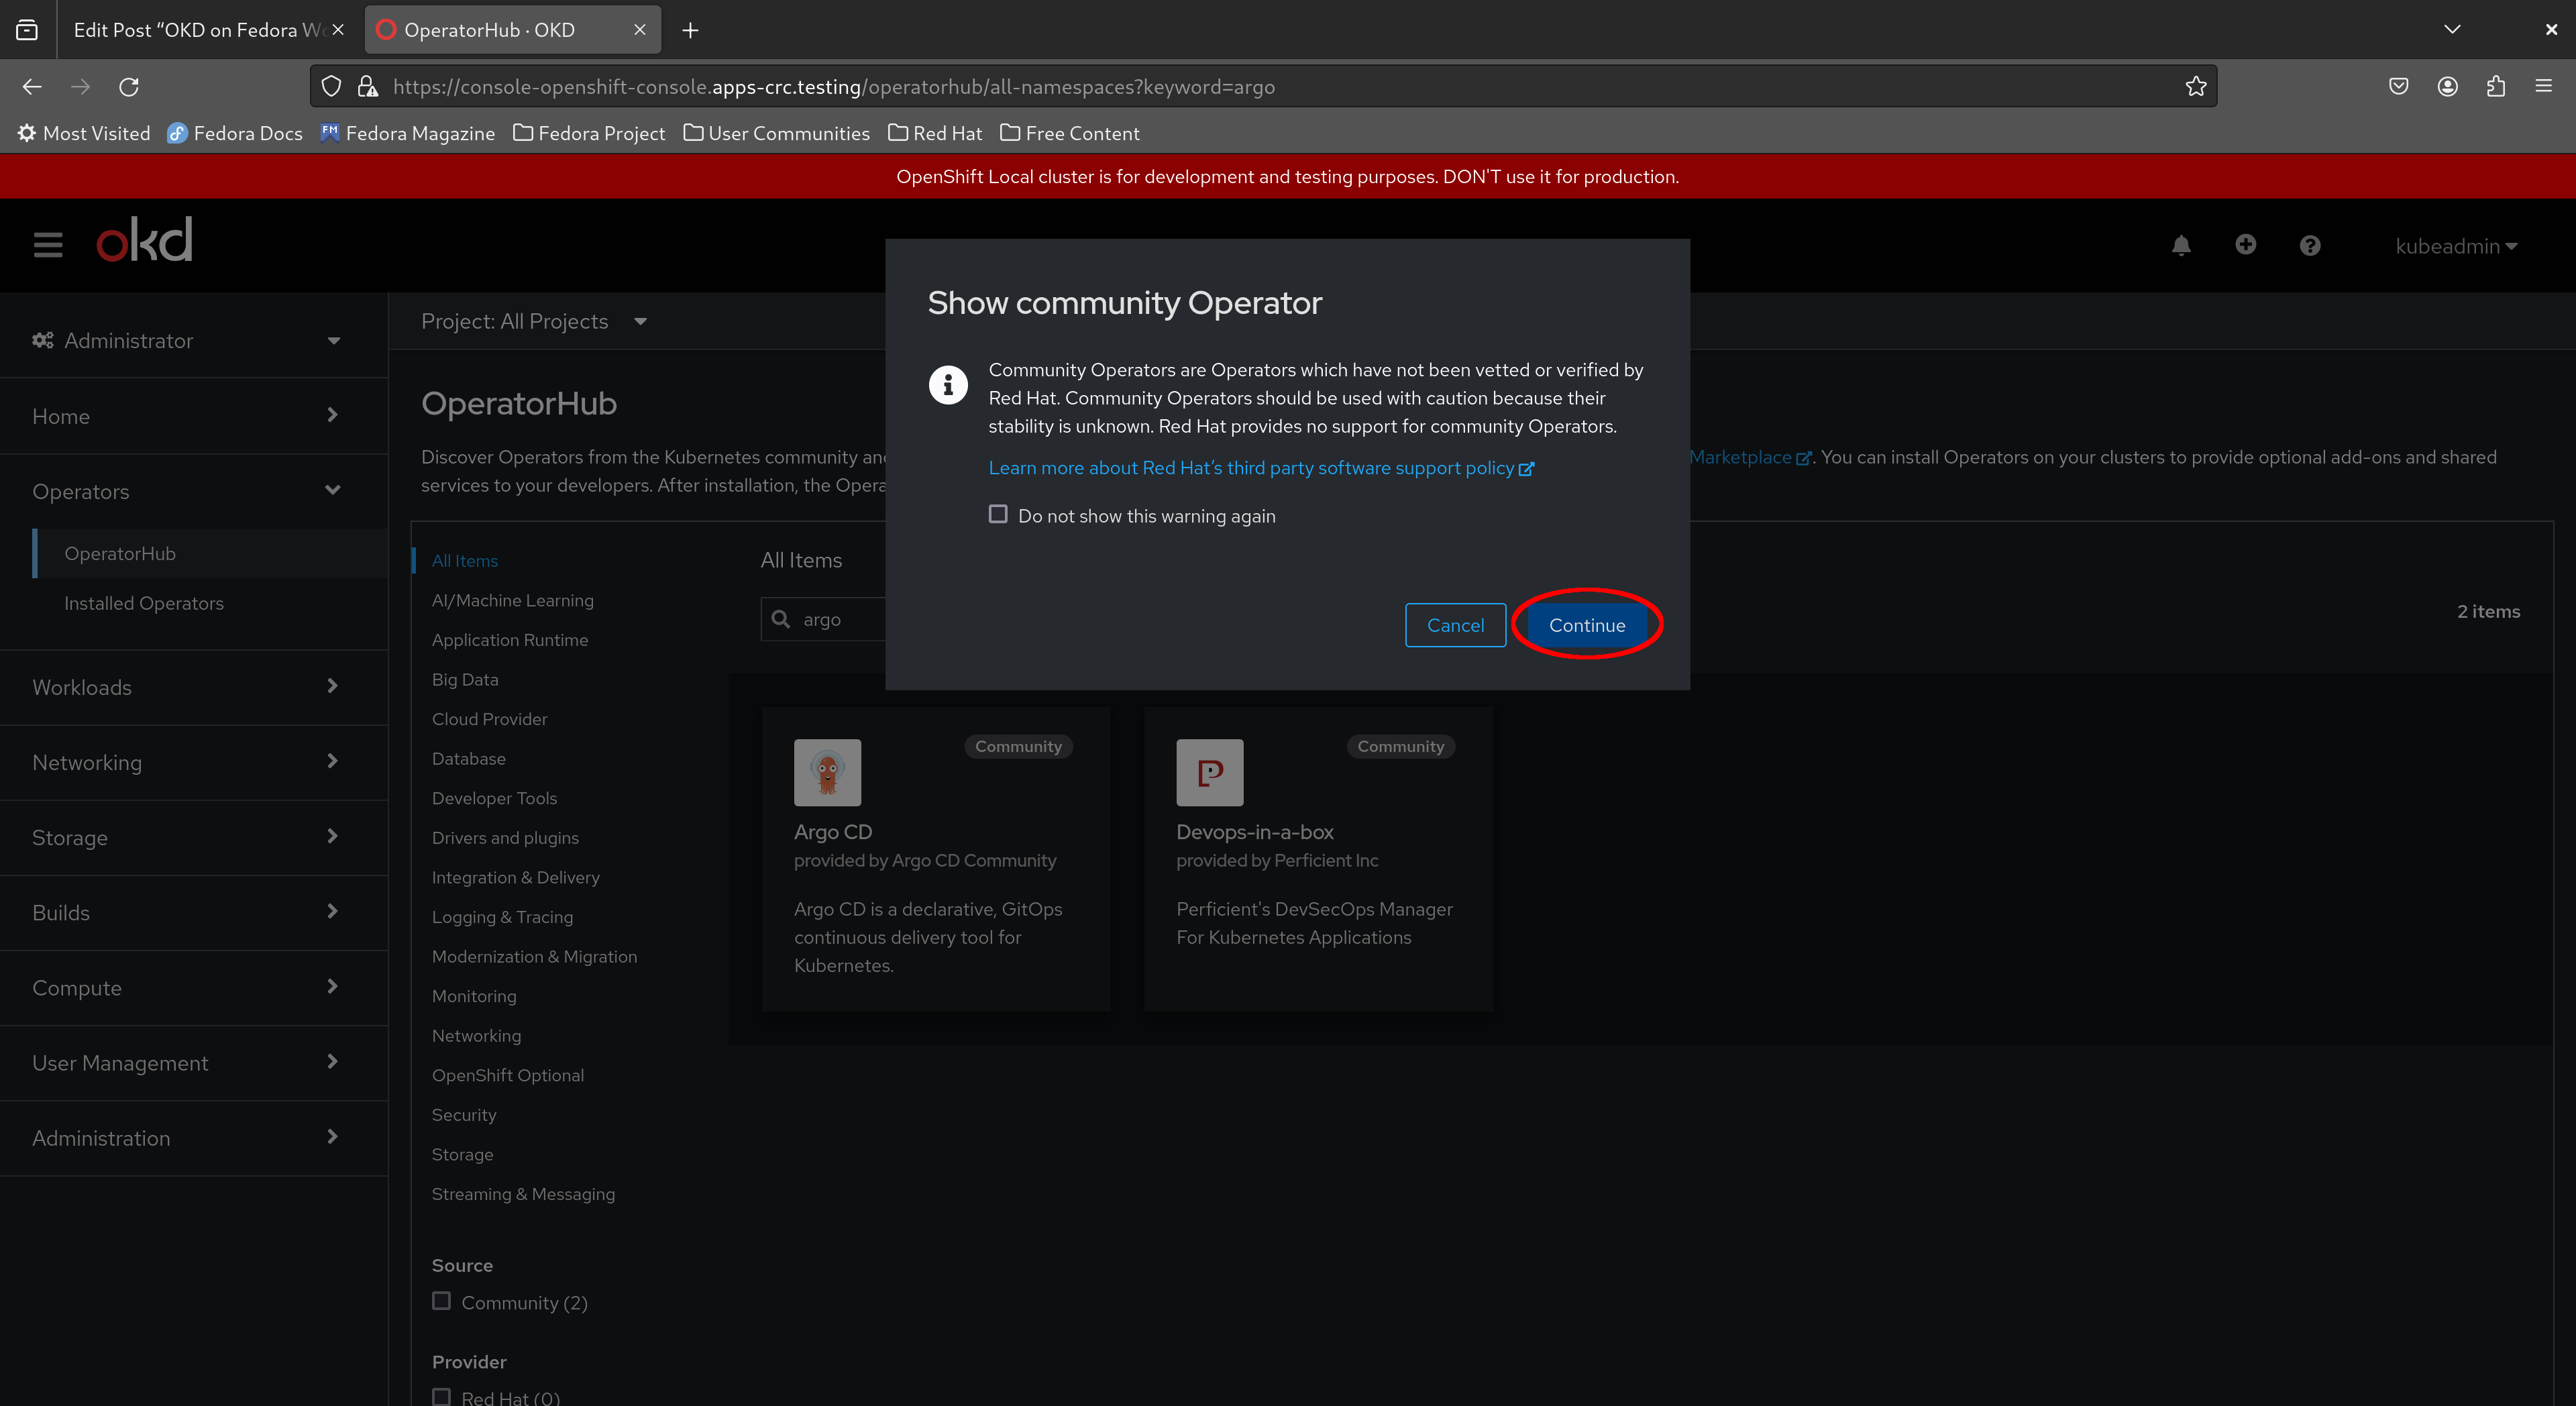
A warning appears that this is a community operator not supported by Red Hat. Acknowledge the warning and click “Continue”.
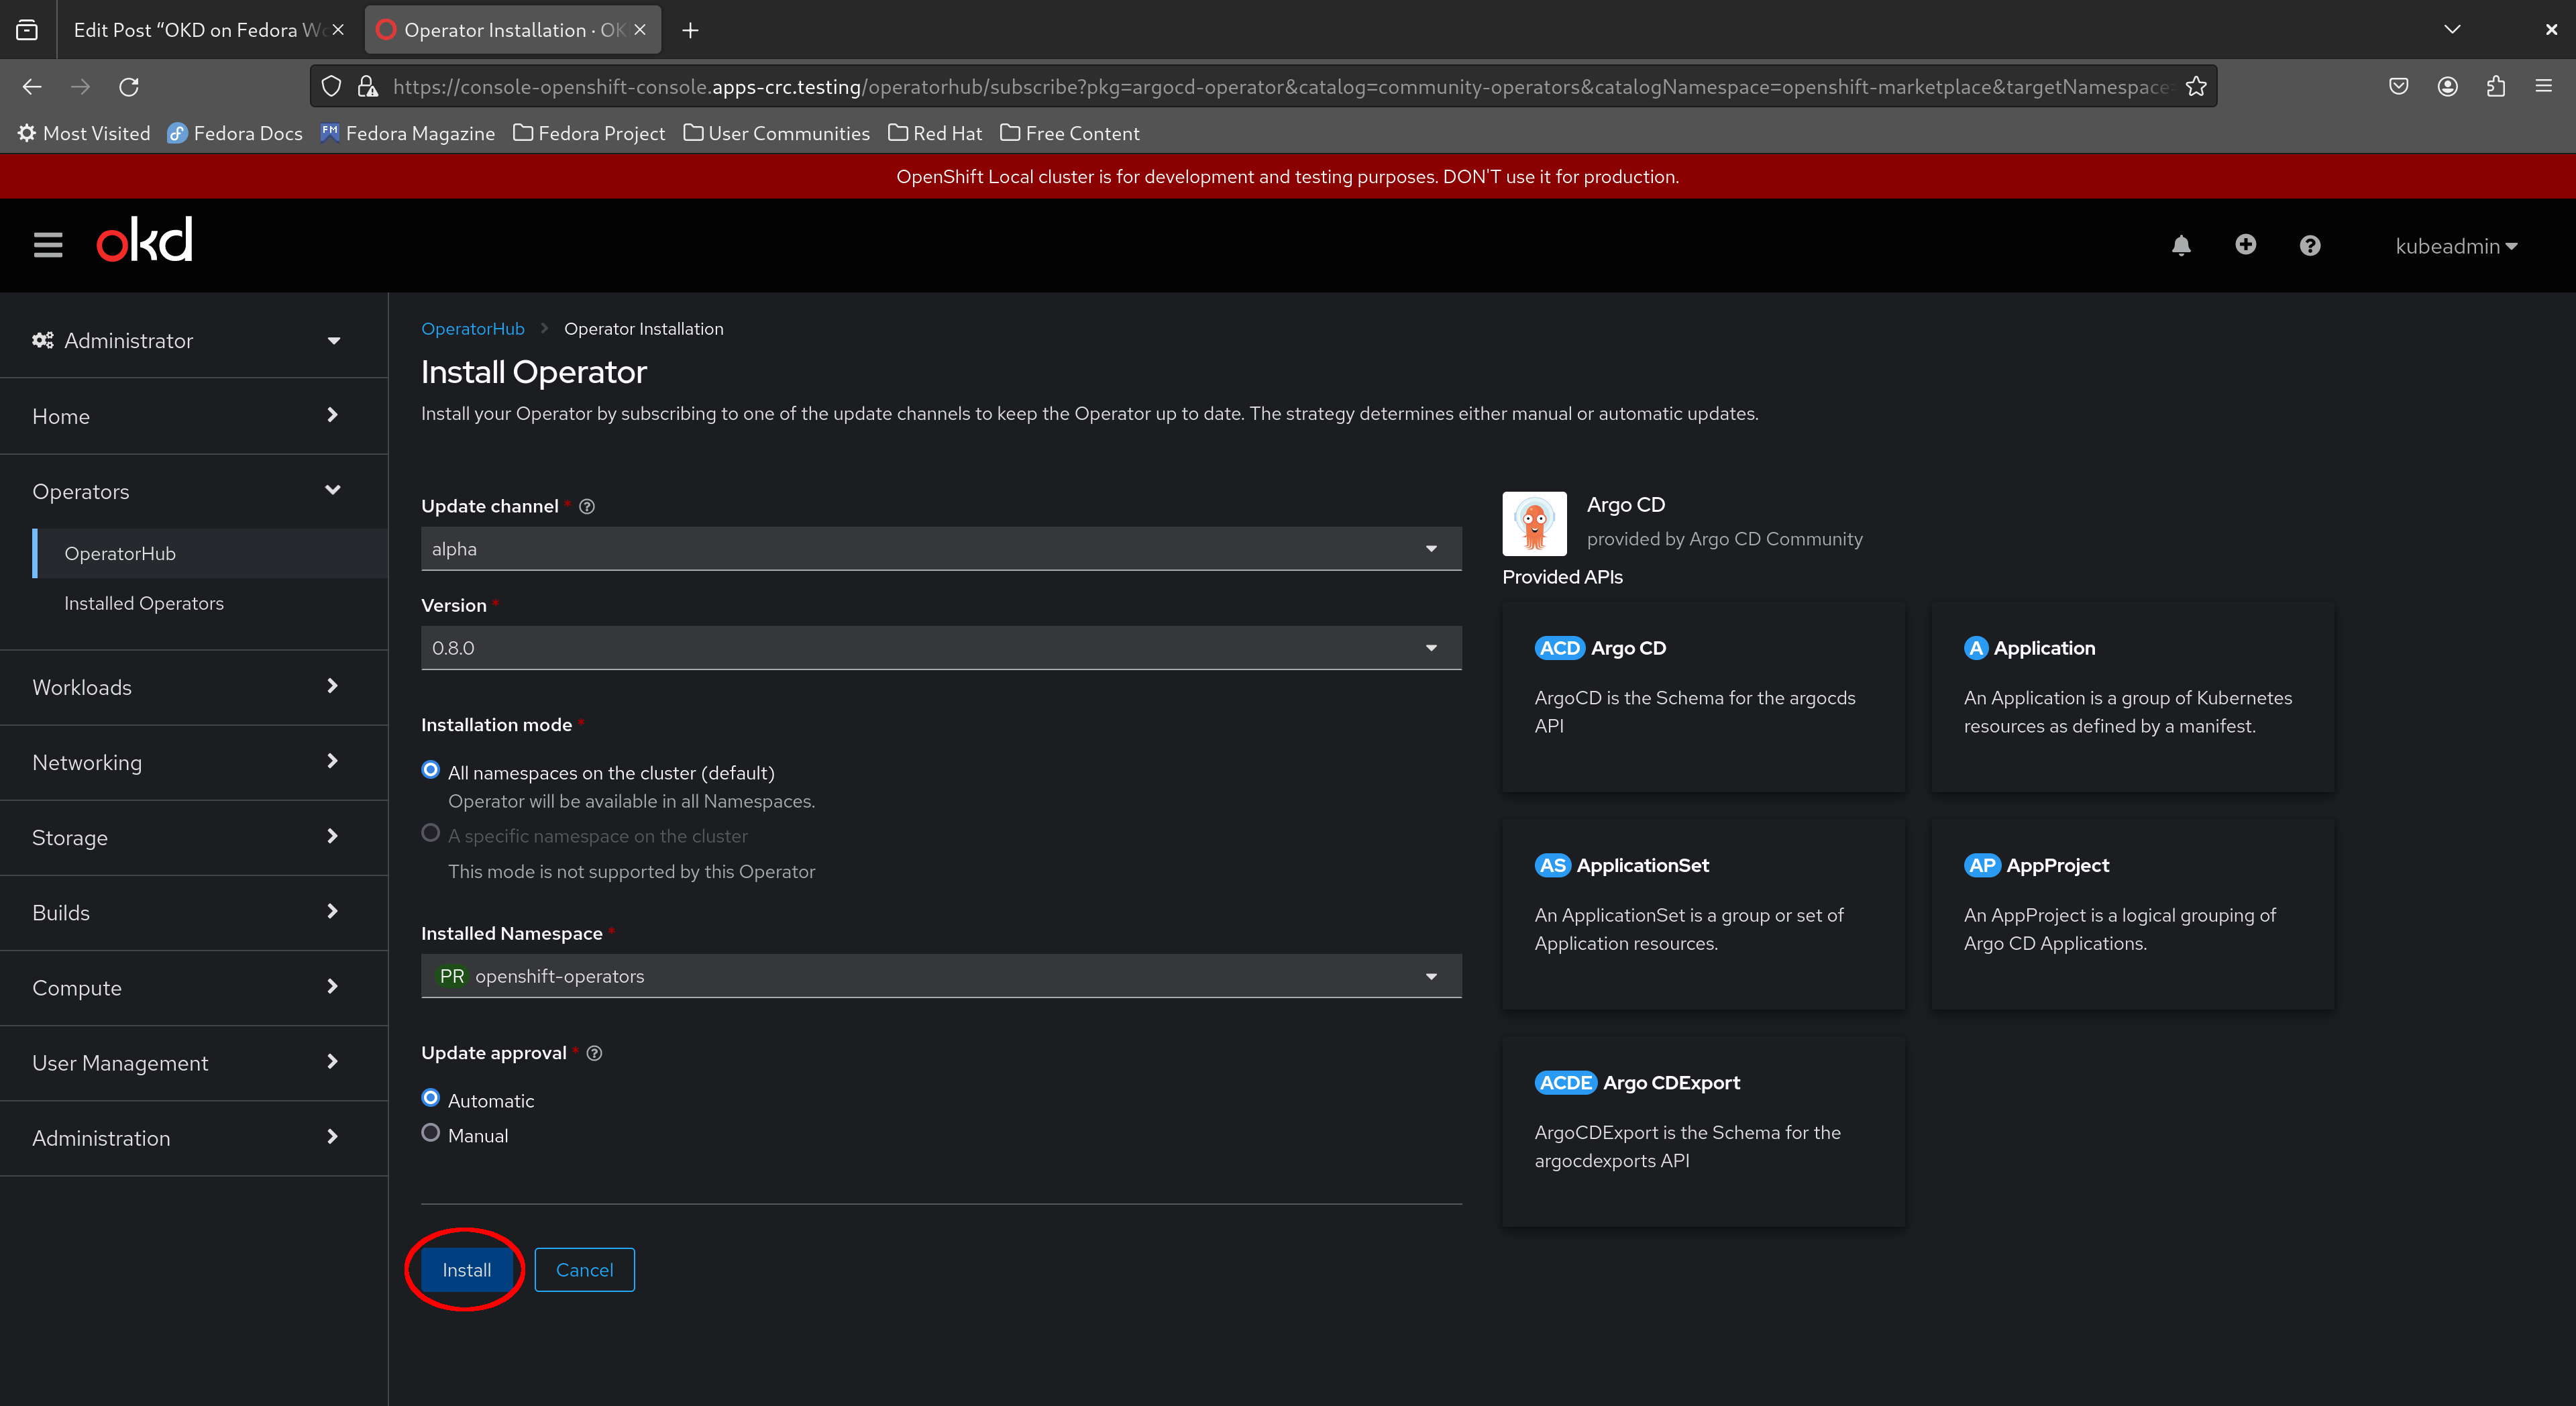
Read through the description and click “Install”.

Leave the options at their defaults and confirm your action by clicking “Install” once more.
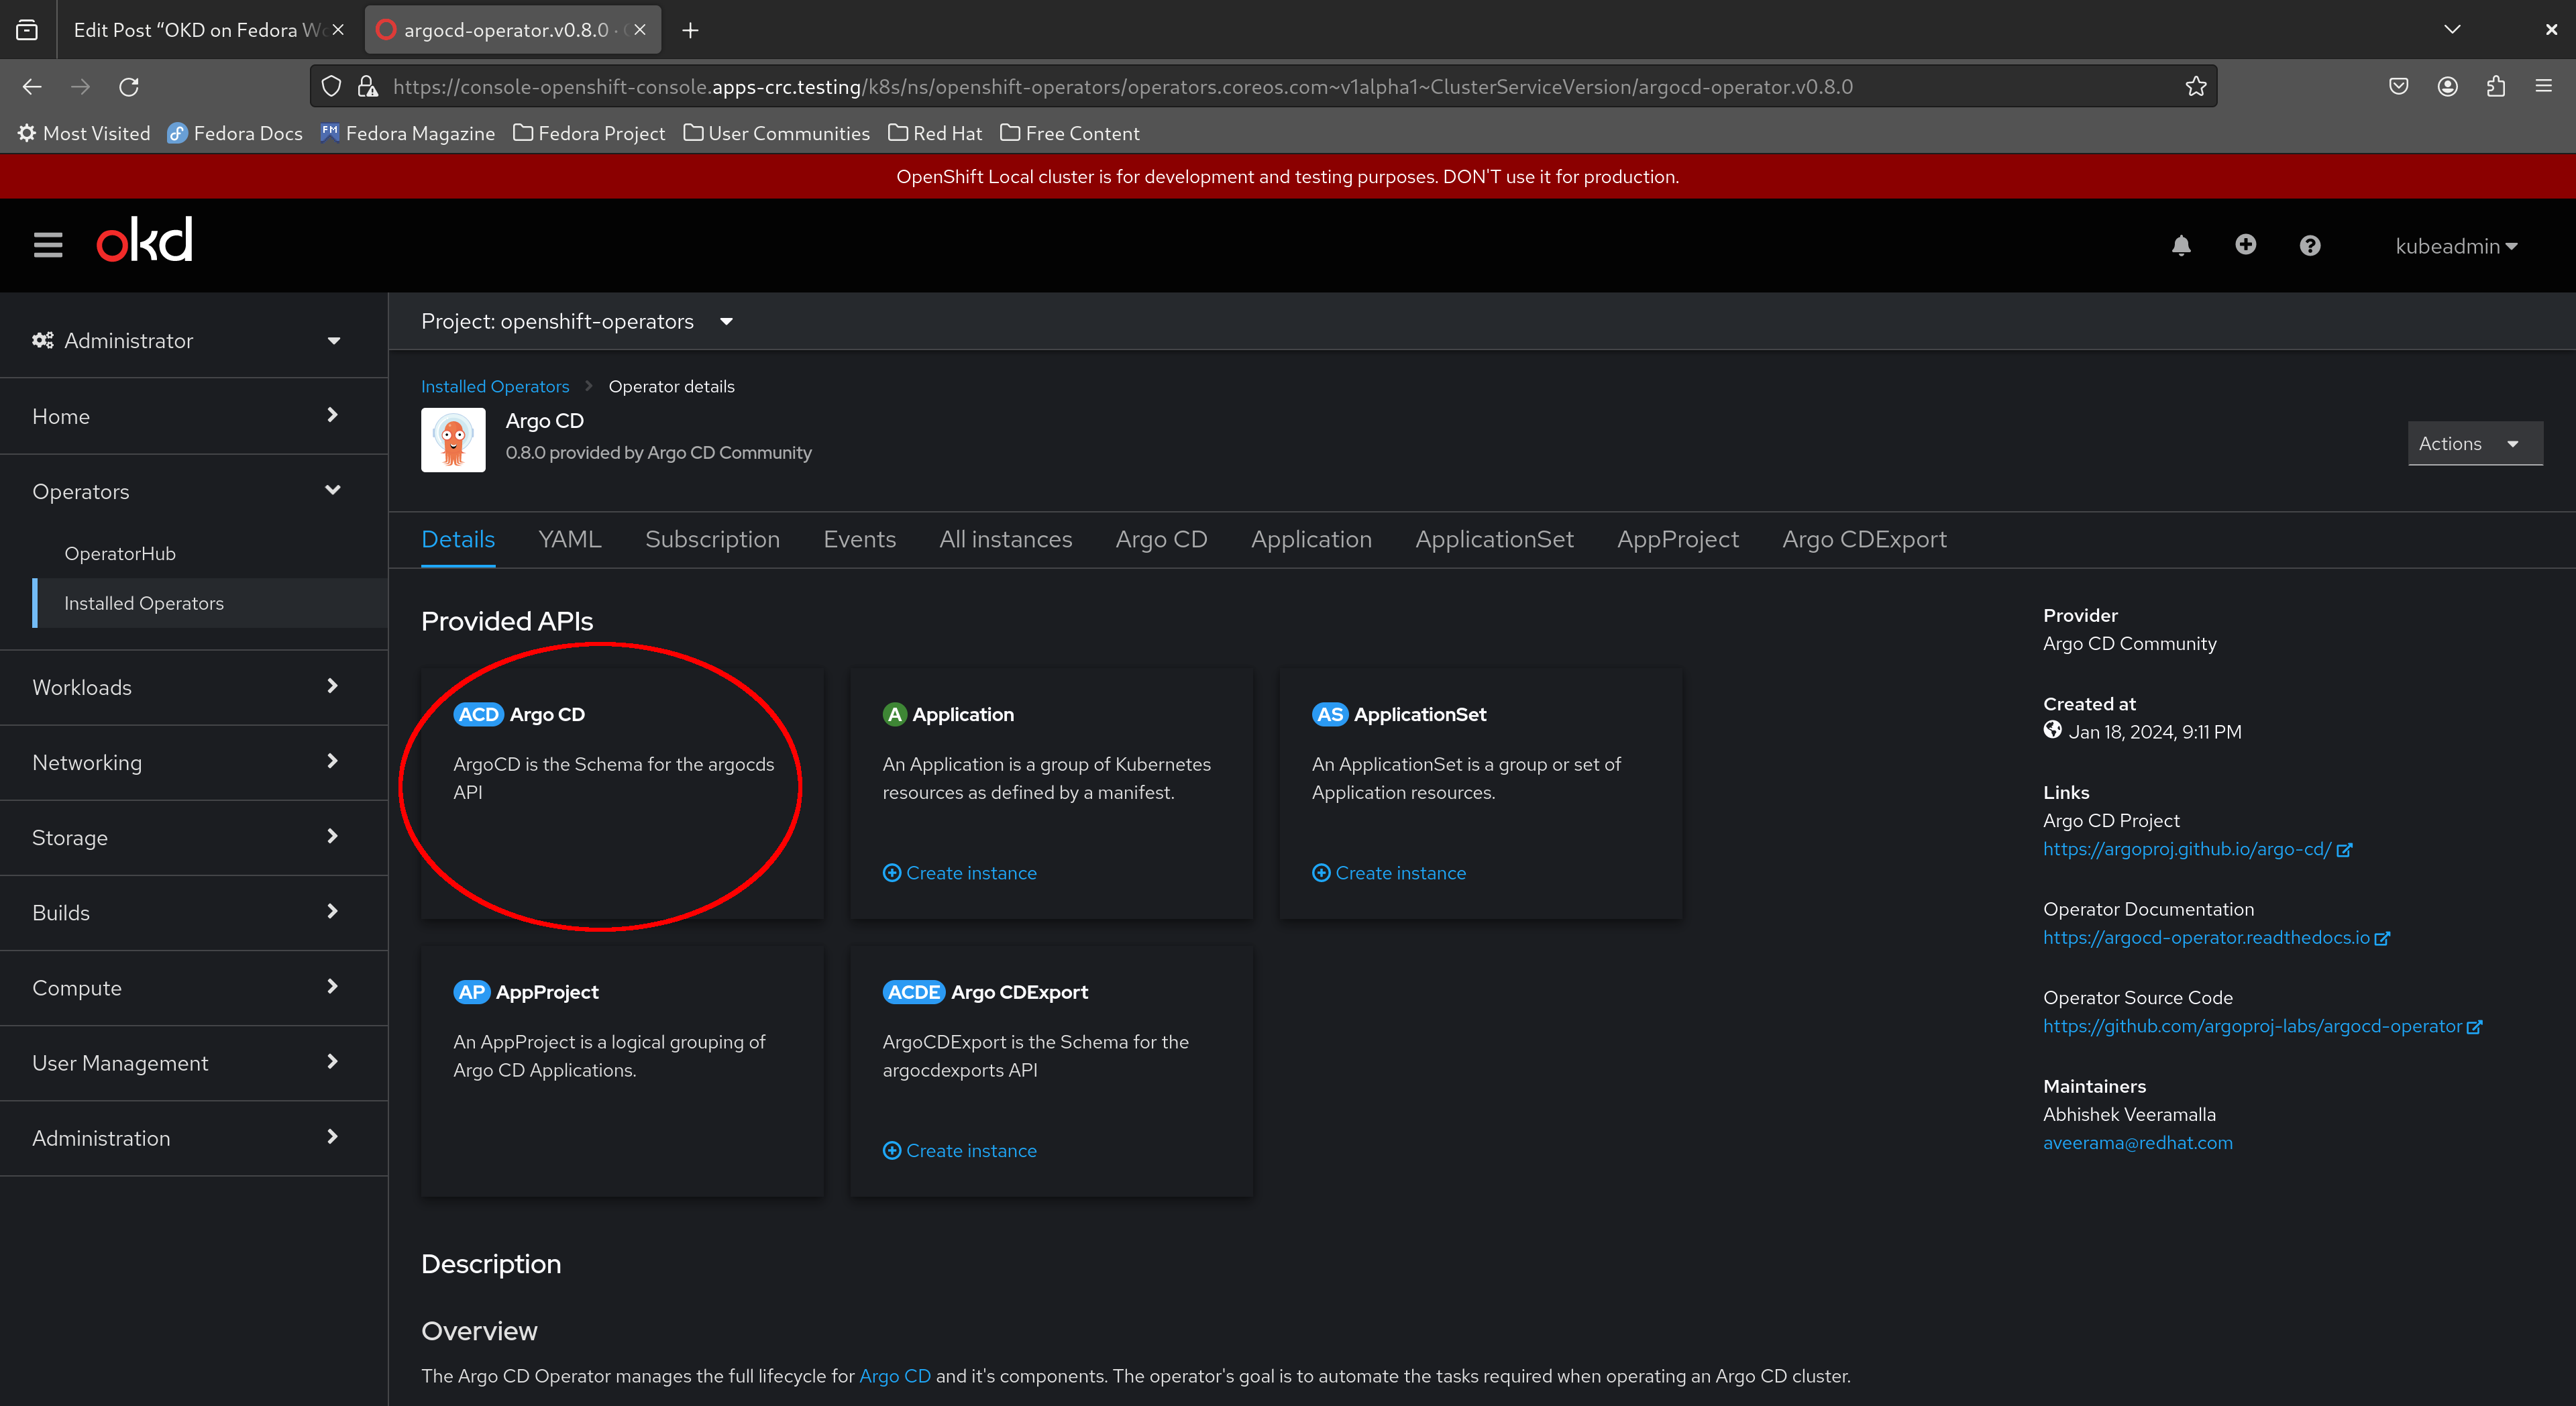
This initiates installation of the Argo CD operator on your cluster. Wait a few moments for the installation to complete, then click “View operator” to view the details of the Argo CD operator as shown below.

As highlighted in the screenshot below, the custom resource we’ll use to create our Argo CD instance is ArgoCD. Custom resource definitions (CRDs) enable additional functionality on Kubernetes by extending the Kubernetes API.
Deploying our Argo CD instance and logging in to the Argo CD web console
To create our ArgoCD custom resource, click the plus sign to the top right of the window and type in the appropriate YAML as shown in the screenshot below, then click “Create” – we’ll create an argocd namespace and deploy our Argo CD instance there.
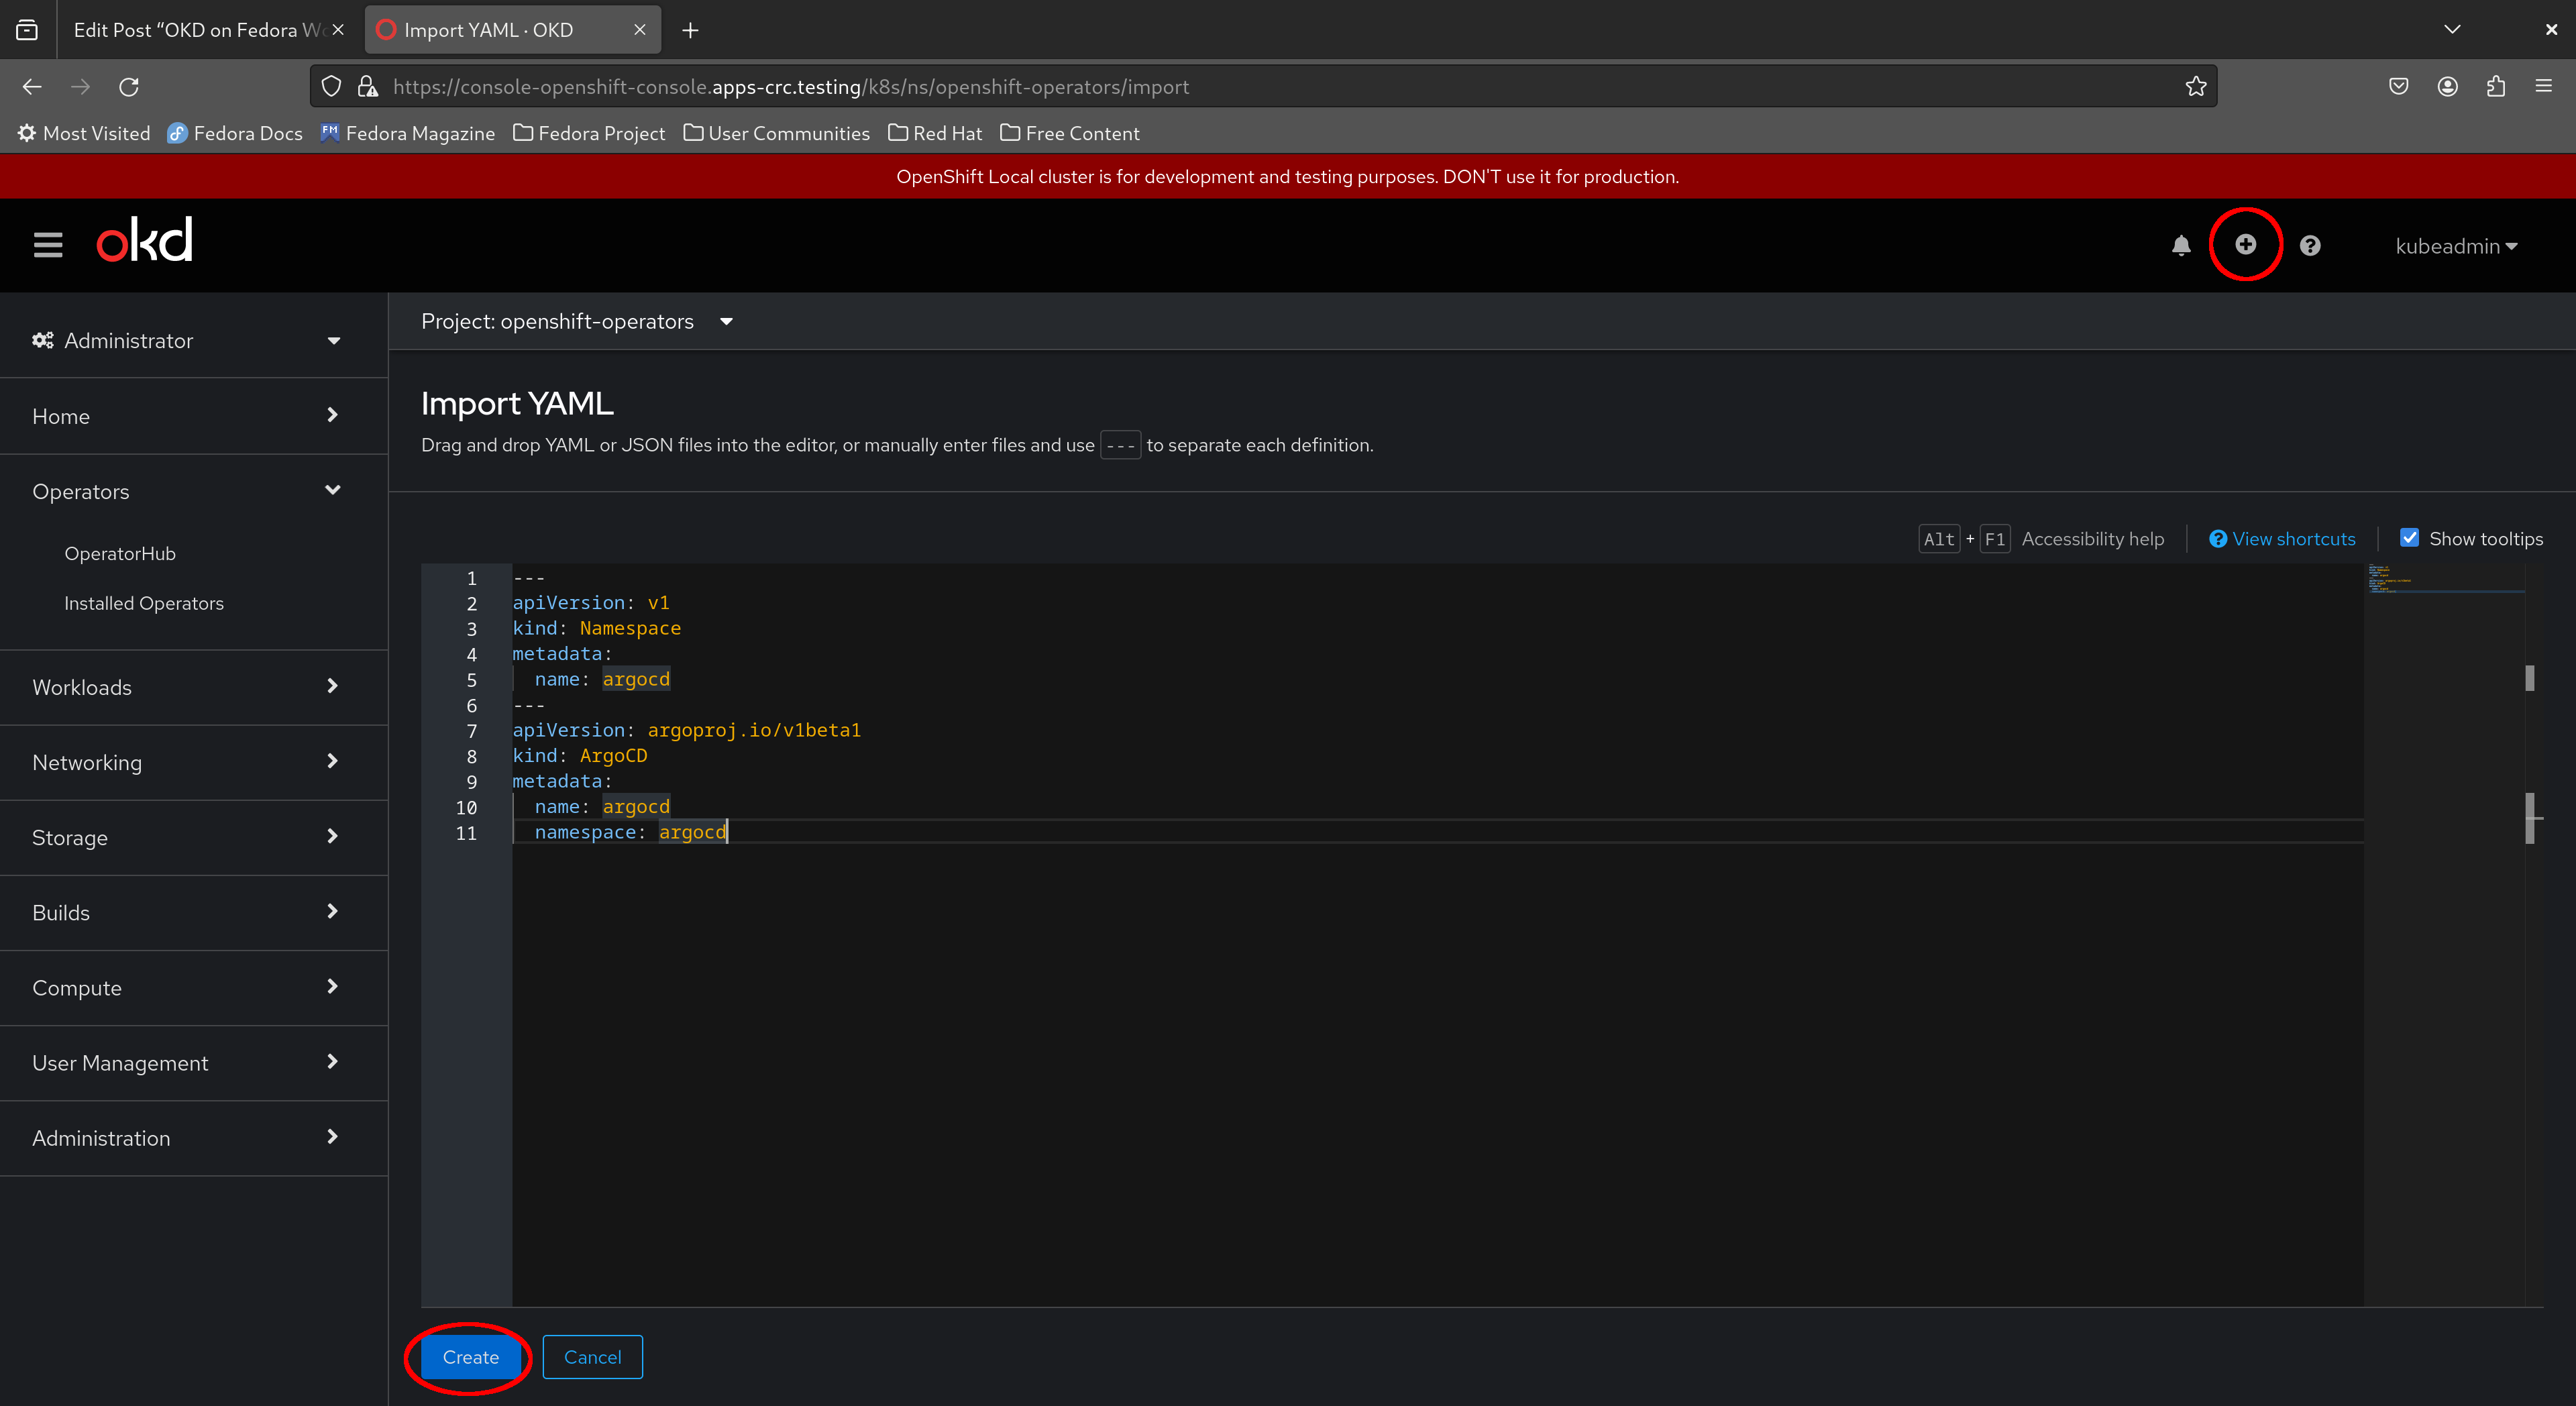
If it helps, here is the exact YAML to apply to our cluster:
---
apiVersion: v1
kind: Namespace
metadata:
  name: argocd
---
apiVersion: argoproj.io/v1beta1
kind: ArgoCD
metadata:
  name: argocd
  namespace: argocd
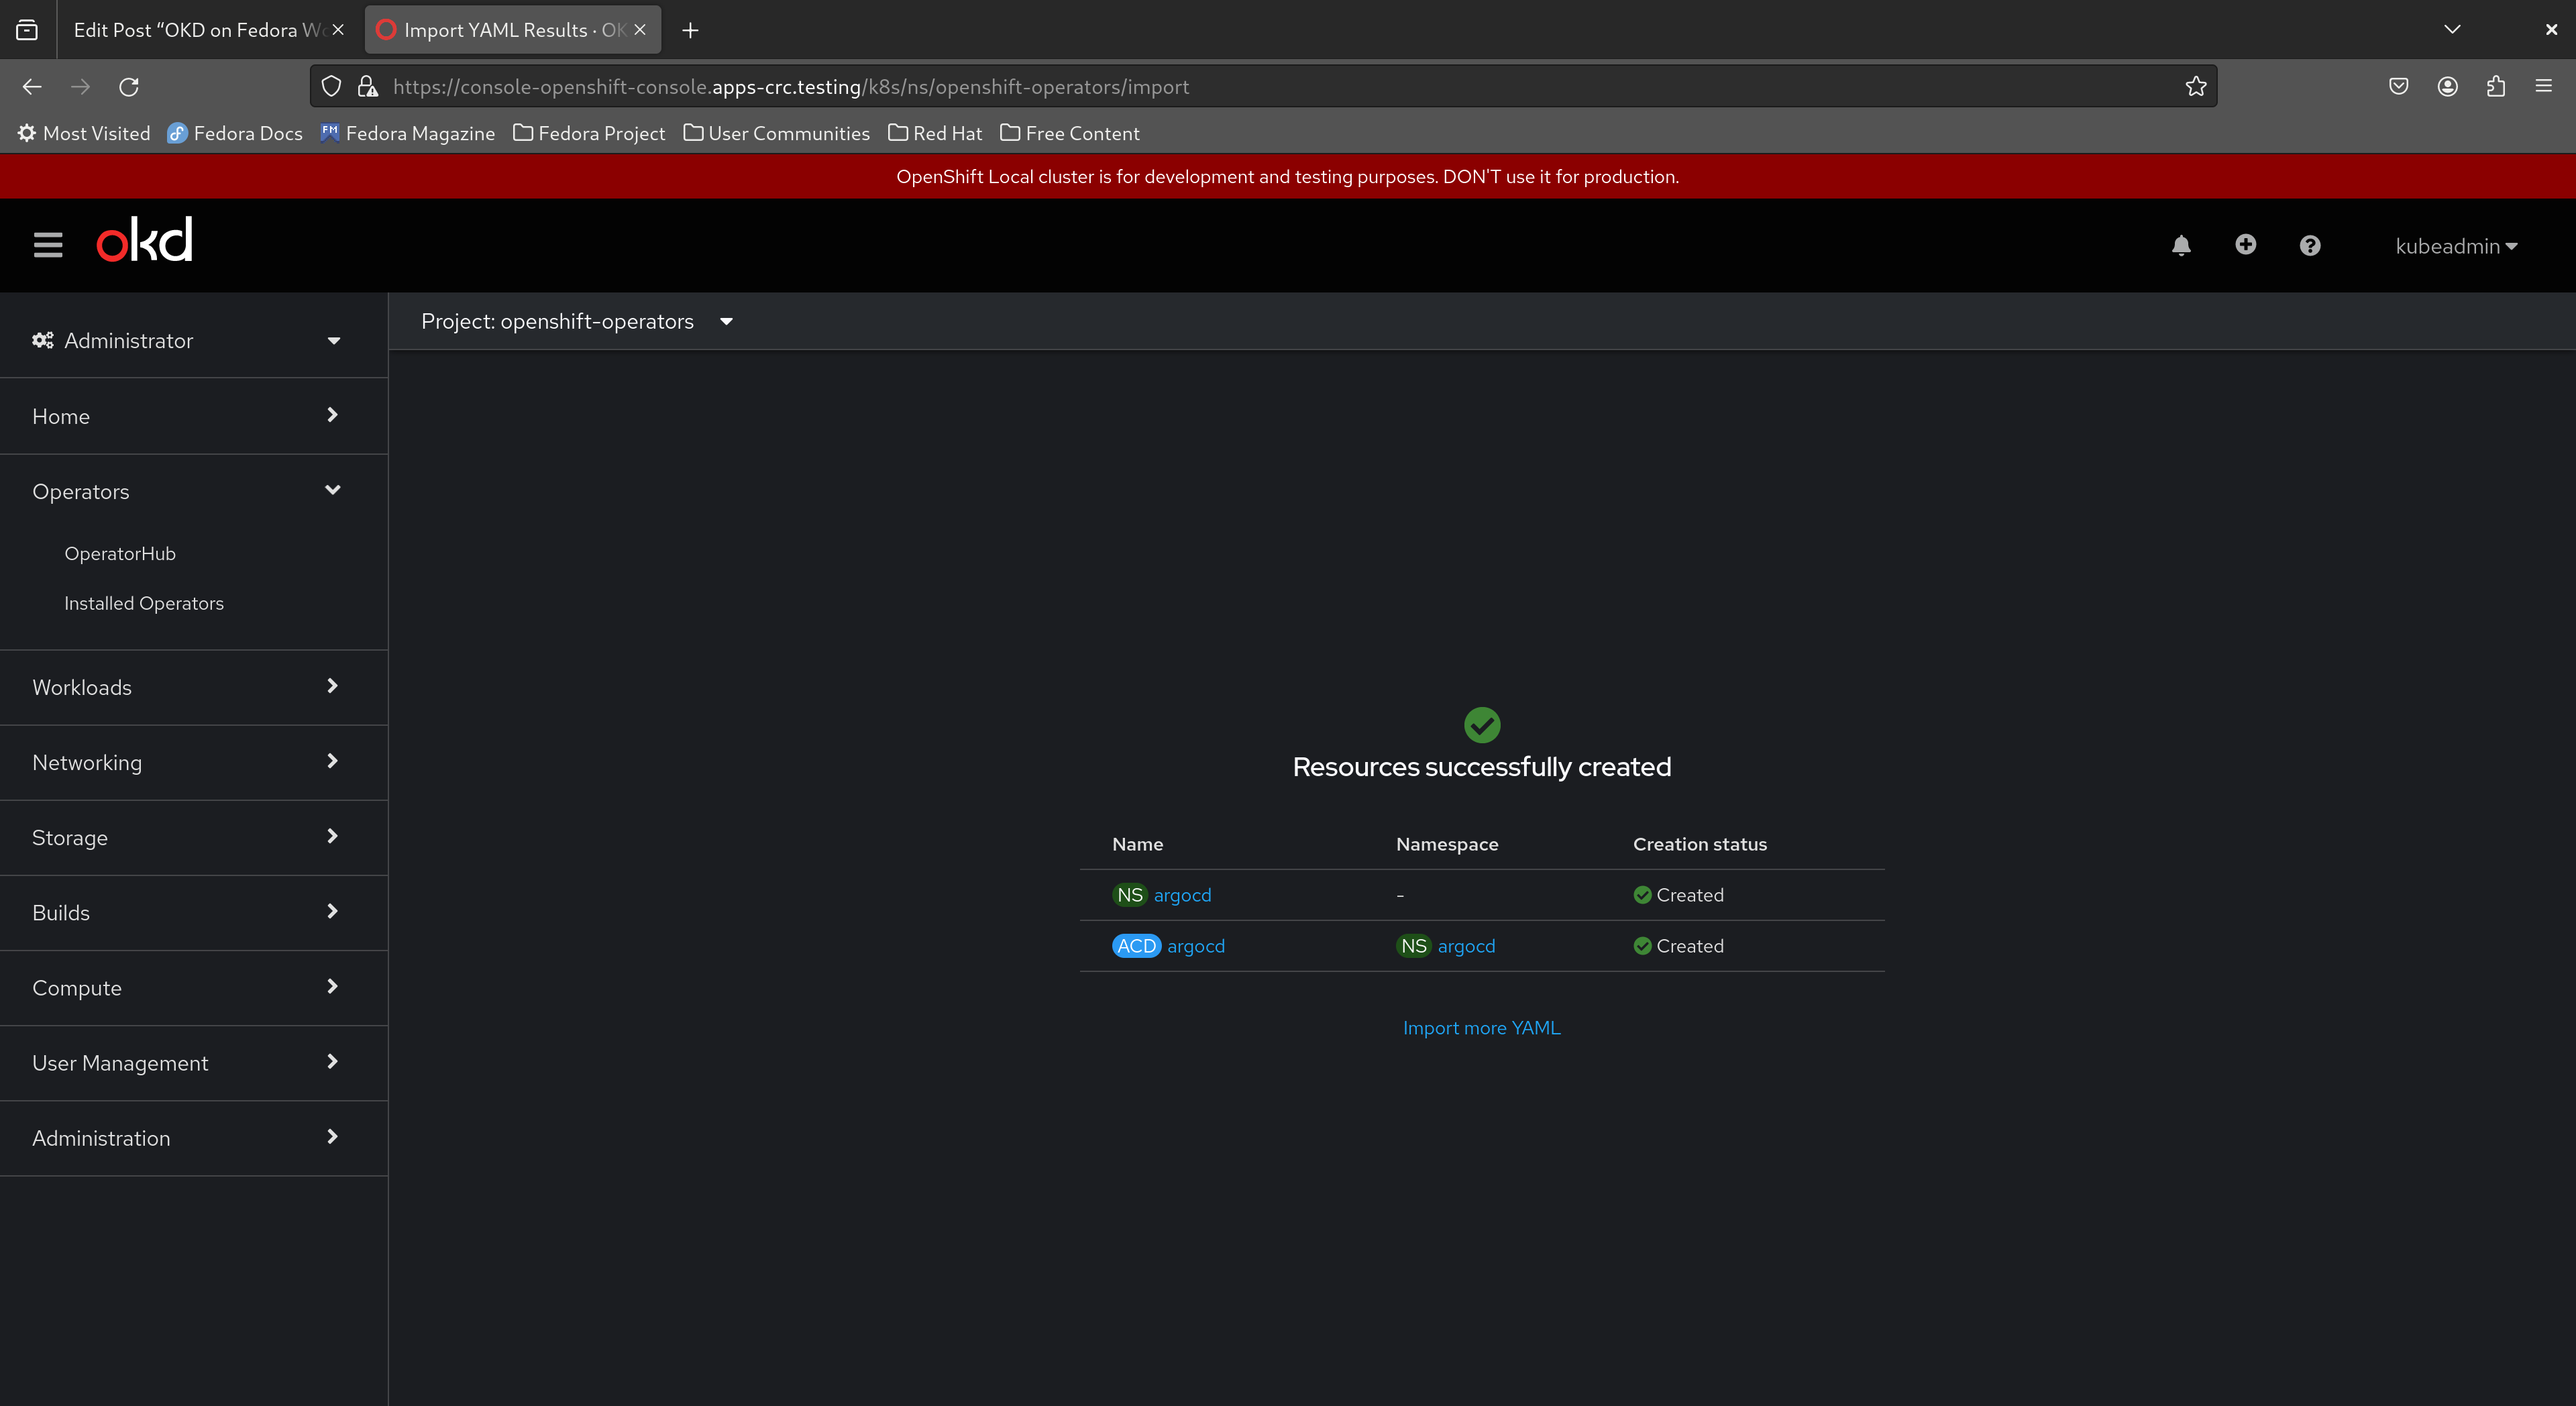
Here’s what you should see if the operation was successful.
Now return to the command line and run the following command to wait for the Argo CD instance to become ready.
$ oc -n argocd wait \
      --for=jsonpath='{.status.phase}'=Available \
      argocd.argoproj.io \
      argocd
argocd.argoproj.io/argocd condition met
The Argo CD web console is available as the service argocd-server which is a ClusterIP by default and therefore only available from within the cluster. Forward this service locally and visit https://localhost:8443/ in your web browser. Ignore any certificate warnings raised by your browser.
$ oc -n argocd port-forward service/argocd-server 8443:443
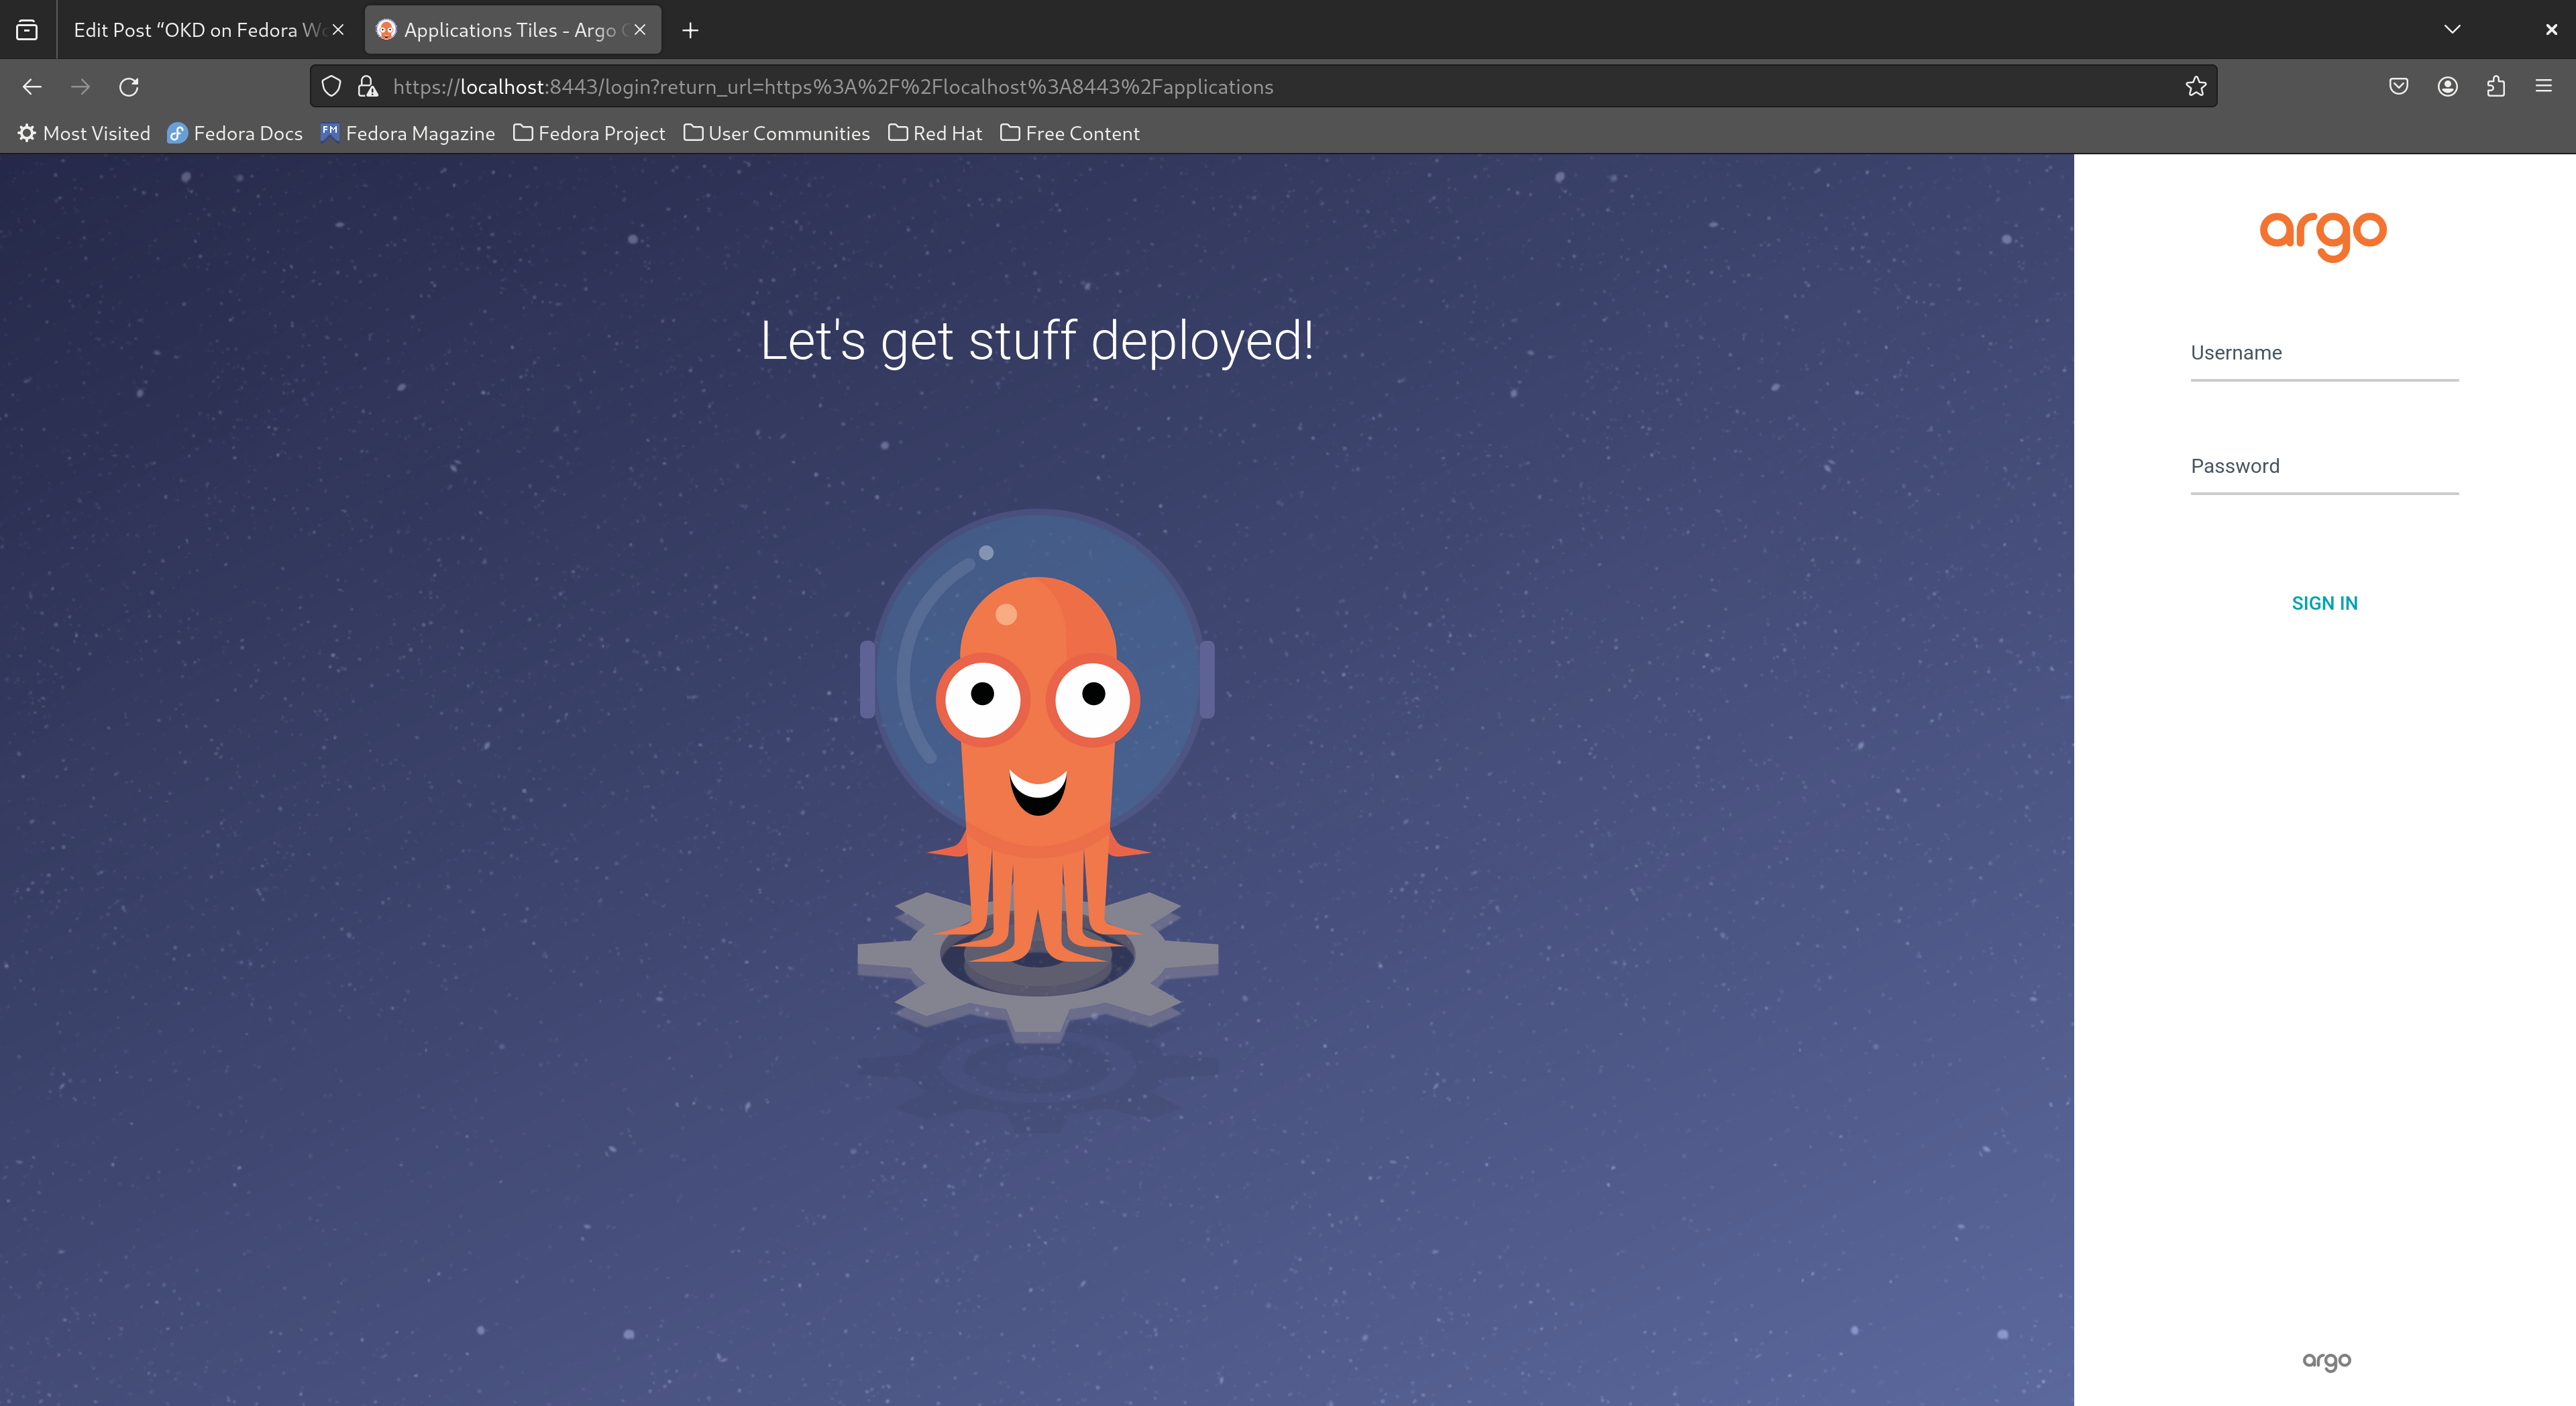
This brings us to the Argo CD login page. The default Argo CD administrator is admin while the password is stored in the secret argocd-cluster. Extract the administrator password from the argocd-cluster secret by opening a new terminal window, making oc available in our PATH with the eval $(crc oc-env) command and running oc extract:
$ oc -n argocd extract secret/argocd-cluster --to=-
Fill in admin for the username and the extracted password as per the output of the command above, then click “Sign in” to enter the Argo CD dashboard.
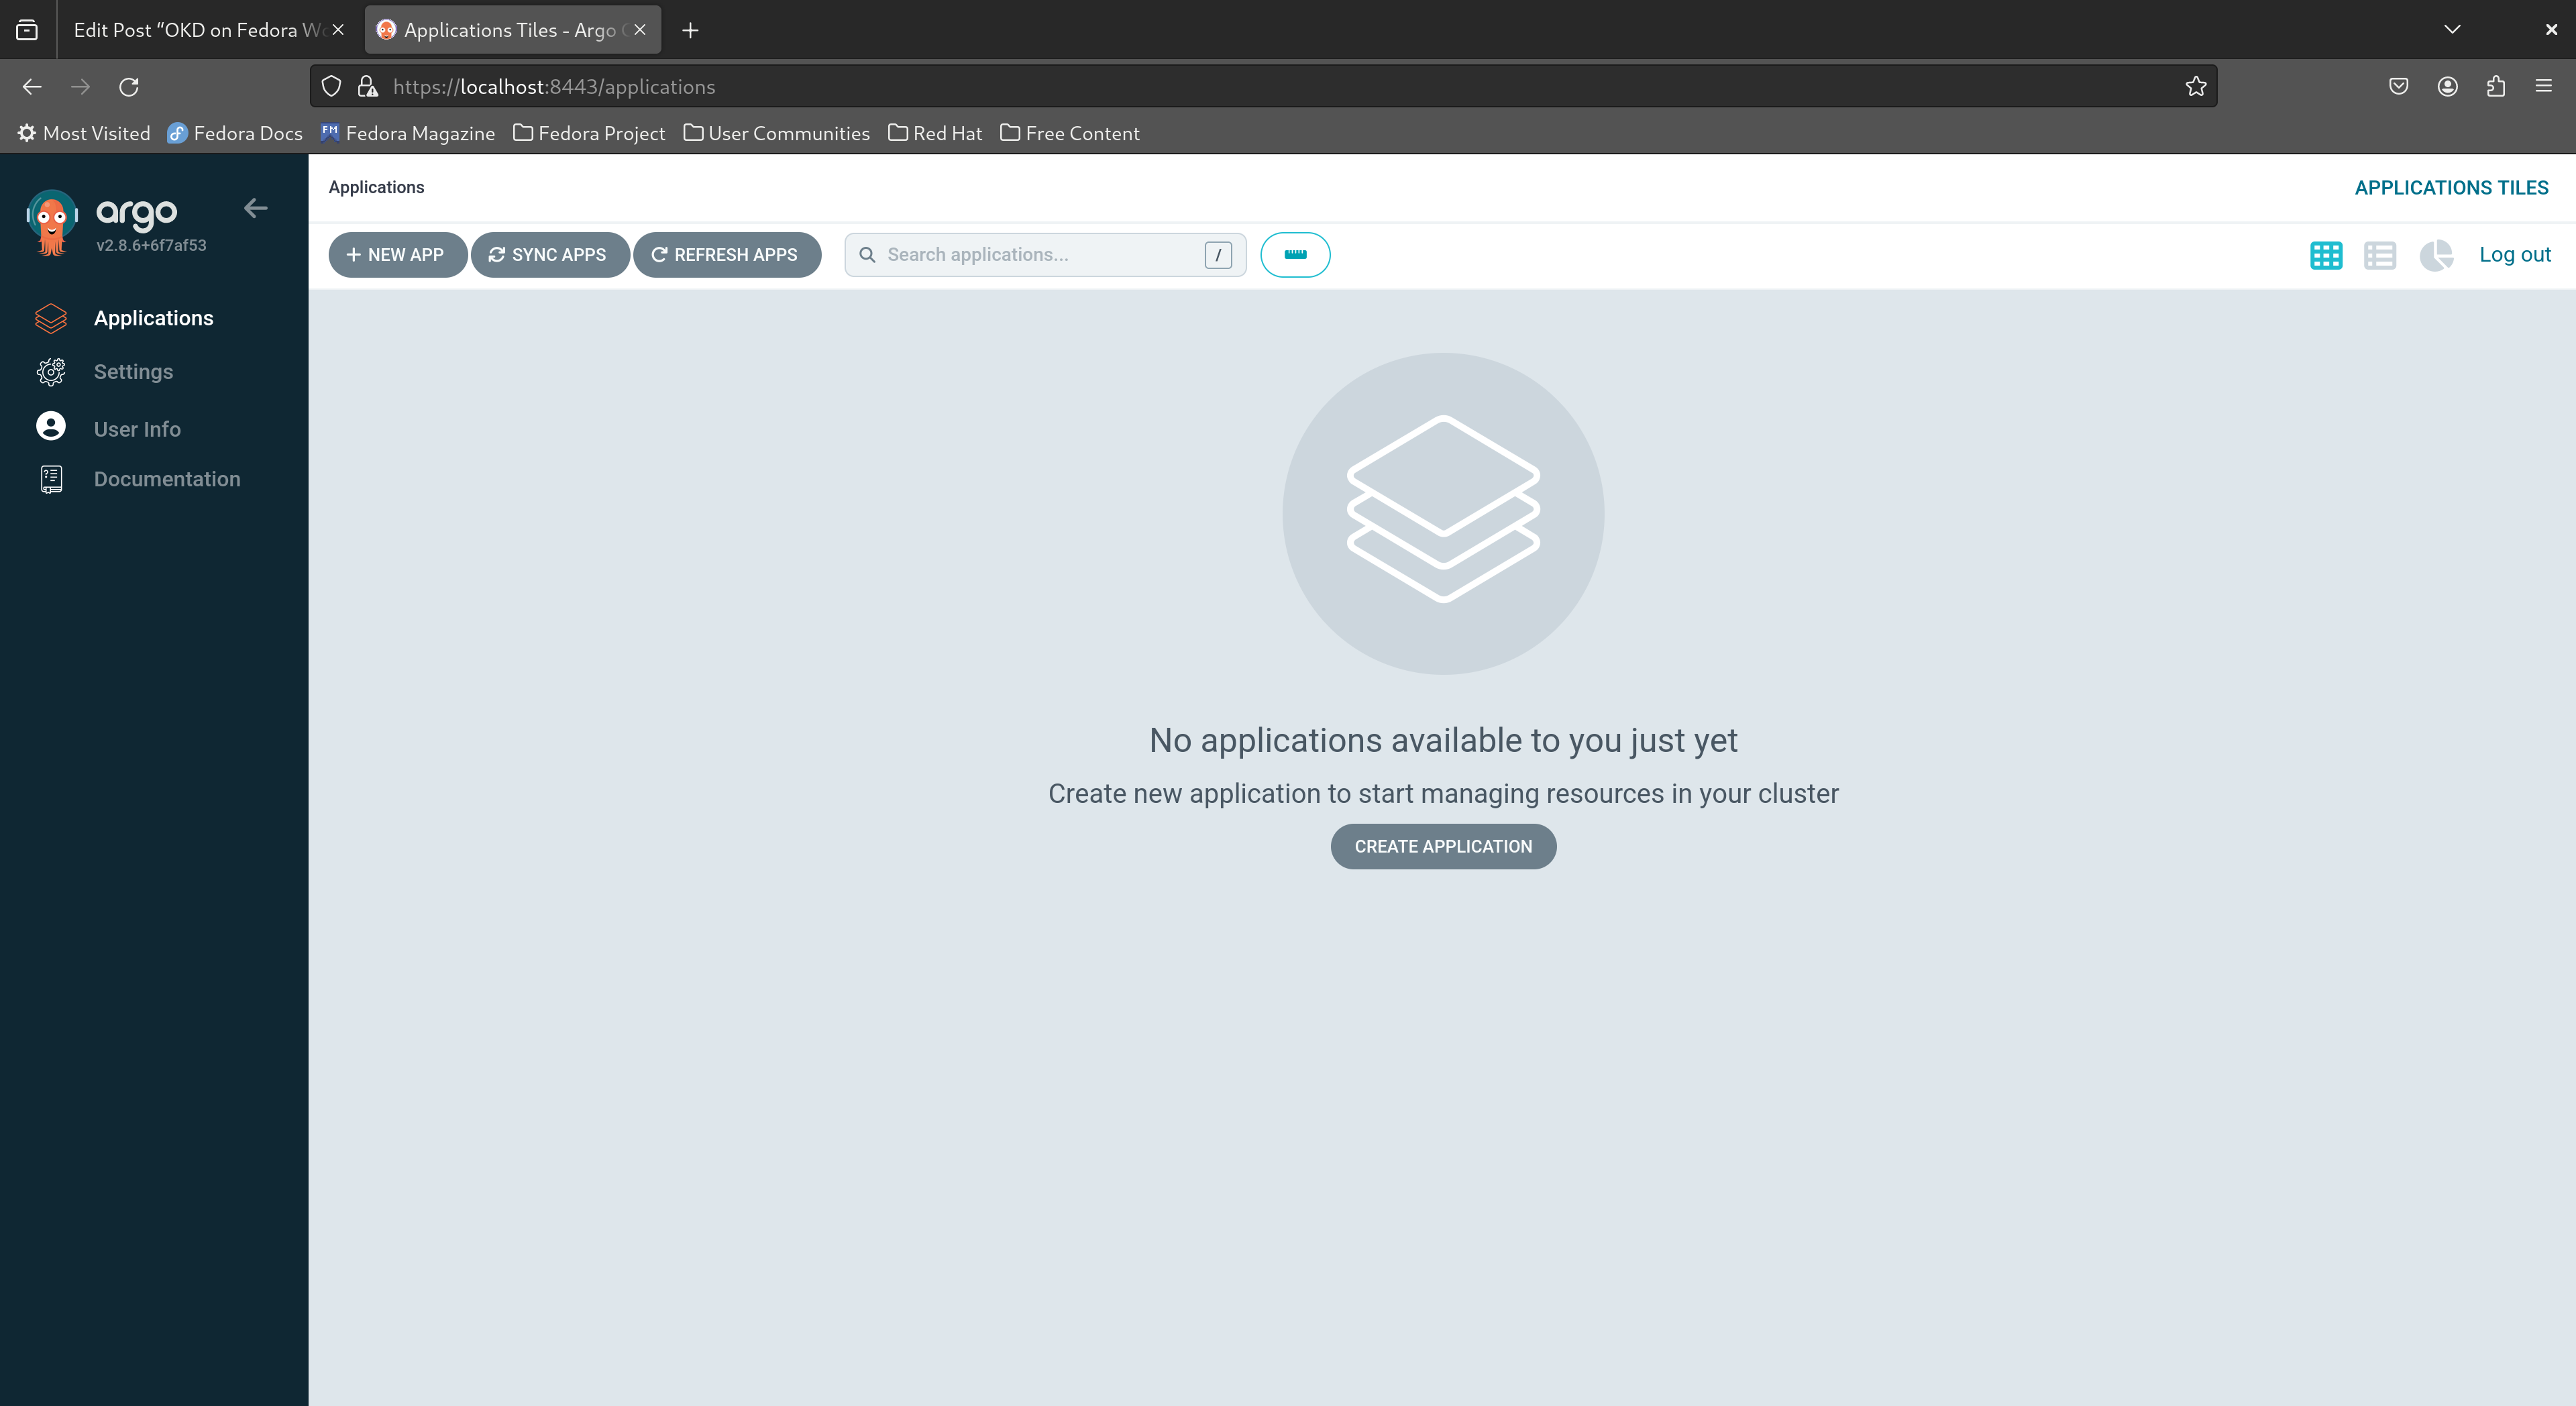
Congratulations, you have successfully set up a single-node OKD cluster on your laptop with CRC and installed Argo CD via the operator!
Concluding remarks and going further
We hope you enjoyed this article and learned the basics of Kubernetes through setting up a minimal OKD cluster on your laptop. Learn more about OKD via the official website and play around with Argo CD by following through some of the tutorials there. In the meantime, don’t forget to check out Fedora CoreOS as well and learn by participating in the Fedora CoreOS test days!

RG
Great article. Haven’t seen a lot of step by step tutorials touching okd in detail.
Donald Sebastian Leung
Thank you, glad you enjoyed the article 🙂
newton
realmente estamos indo direto para um planeta melhor e livre ,e nosso Fedora faz este ardúo caminho mas vencendo barreiras e fazendo sistema elegante e cheio de novidade obrigado
Dani_L
Is it possible to ‘crc setup’ for a user that’s not in sudoers? One of the reasons I like podman is the non-requirement for root priv.
Donald Sebastian Leung
I believe the minimum requirement is that the user running ‘crc setup’ be in the ‘libvirt’ group. CRC spins up an OKD environment by creating a virtual machine running Fedora CoreOS and configuring the network to meet OKD’s requirements so the user invoking the command must be able to create system virtual machines and configure the network accordingly.
corey
This is a pretty cool tool and well described thanks!
I’ve tried to install OKD manually with Fedora CoreOS and really struggled. never really got there.
Would love to see this project assist in simplifying that requirement for single and multi-node lab style clusters that can be booted on bare metal.
Donald Sebastian Leung
Glad to hear that you’ve found the article and CRC tool useful 🙂
Patrick Chiang
This guide is very helpful