In Fedora 40, Cloud images for Microsoft Azure are directly available in Azure via its new Community Gallery feature. This article will describe how to use these.
Introduction
Starting in Fedora 39, the Fedora Project began producing Cloud images for Microsoft Azure which could be manually uploaded to an Azure tenant. In Fedora 40, these images are available directly in Azure via its new Community Gallery feature.
To use Microsoft Azure, you will need a Microsoft account. New users get 12 months of several services free, including virtual machines, so you can try everything covered in this article without needing to pay for anything. These virtual machines have 1-2 vCPUs and 1 GiB of RAM, which is enough for development or testing, low traffic web servers, small databases, etc.
Using the web portal
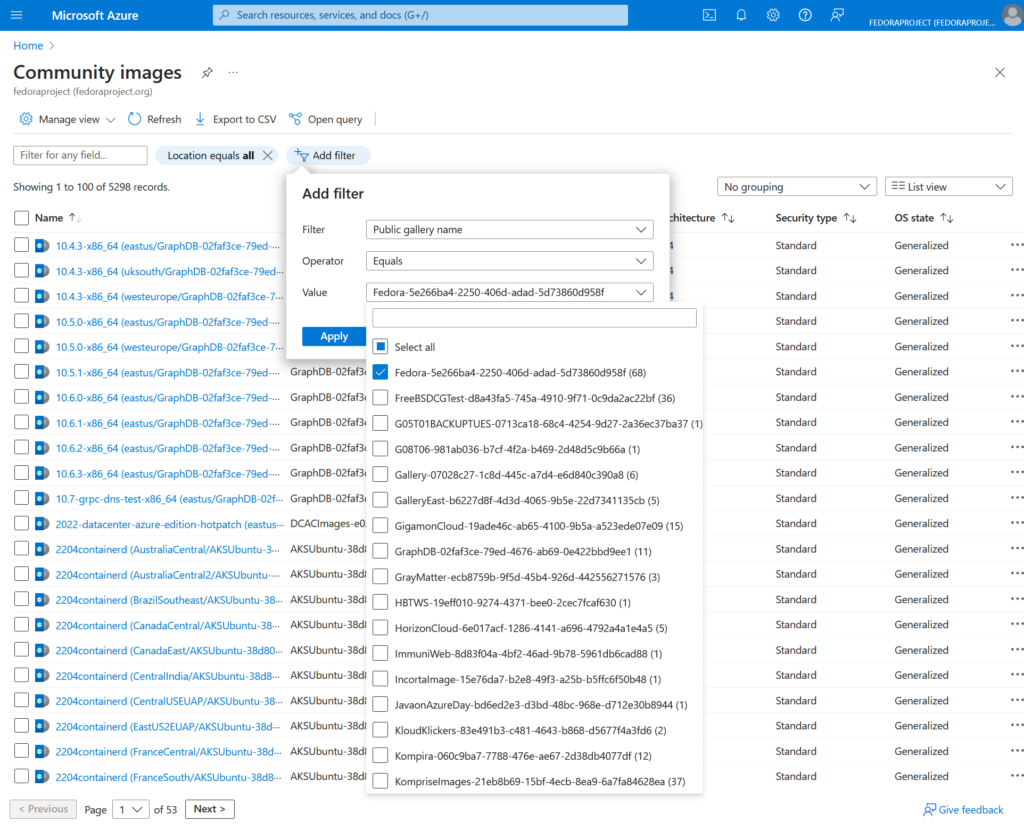
To get started, go to the Community images service in the Azure Portal. Add a filter on Public gallery names and select Fedora’s public gallery name, Fedora-5e266ba4-2250-406d-adad-5d73860d958f.

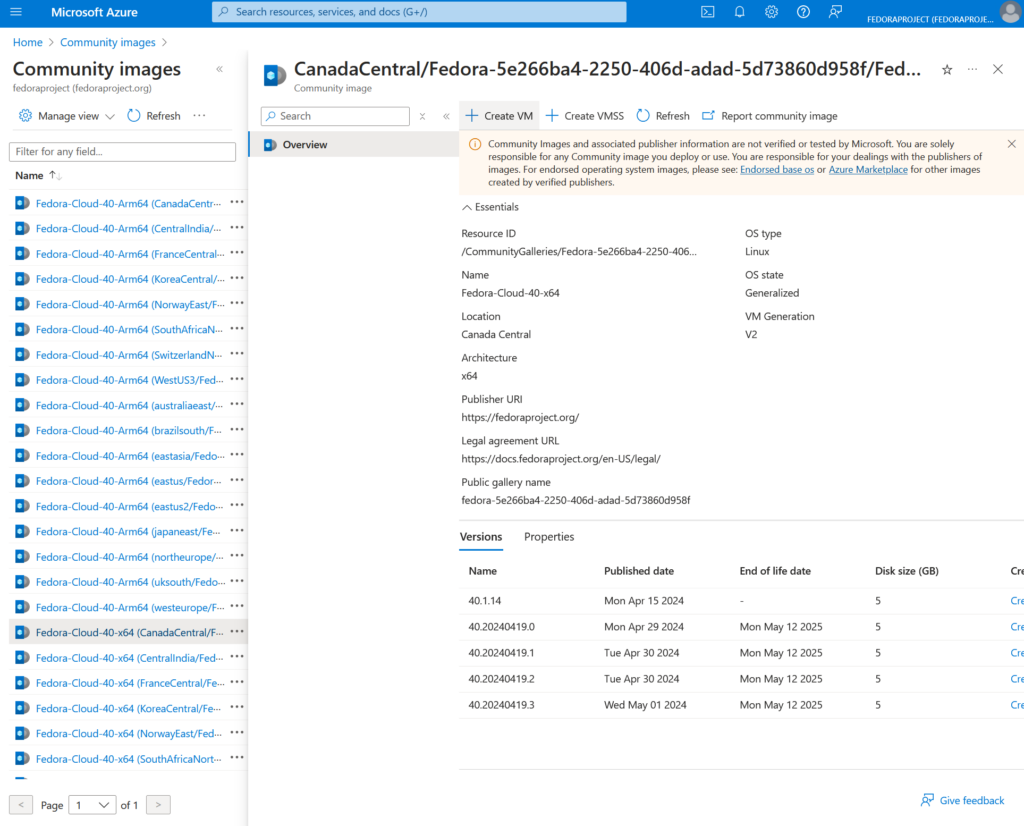
Select a Fedora 40 x64 image in a location near you, then click Create VM.

Alternatively, you can go to the The Fedora Project’s Cloud section, click Launch in public cloud, and select the Azure region to jump directly to the Create VM blade.
Configure the VM
Click Create new under the Resource group field. Resource groups are buckets of arbitrary resources (virtual machines, storage accounts, public IP addresses, etc.) which are related. Next, give your virtual machine a name. The name you choose becomes the host name as well as the virtual machine resource name in Azure. After that, you should set the virtual machine size. Click See all sizes and type “B2ats_v2” into the search bar, click on the only result, and click Select at the bottom of your screen.

Finally, click Review + create at the bottom of your screen, and then click Create.
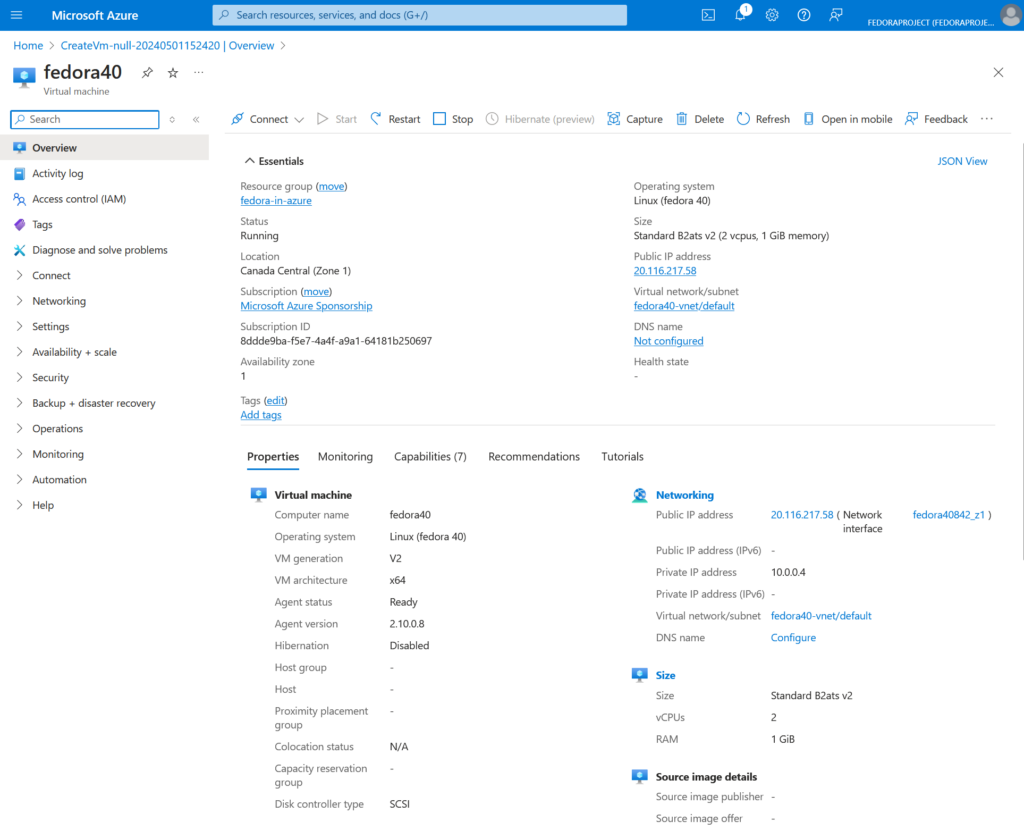
Download the SSH key it generates for you. Afterwards, you will be taken to a page where you can see your resources being created. Once they’ve all completed, click on Go to resource. This will take you to the overview page for your new virtual machine running Fedora 40. Under Essentials you’ll find the public IP address assigned to your instance which you can use to SSH to the virtual machine.

Open a terminal, ensure the SSH key you downloaded has proper permissions, and log in to your new machine:
chmod 600 ~/Downloads/<key name>
ssh -i ~/Downloads/<key name> azureuser@<pubic IP address>

Finally, if you decide you don’t need the machine anymore, you can clean everything up by deleting the resource group. From the virtual machine overview page, click on the resource group name you created under Essentials, then click Delete resource group and confirm you want to delete it. Everything you created in the resource group is destroyed with it.
Launch a virtual machine via azure-cli
You may prefer to manage your resources from the command line. The downside of the CLI is it doesn’t guide you through all the options available. The upside is that, if you know what you want, it’s much quicker than clicking through all the options available. This section covers using the CLI to create the exact same virtual machine as the first section.
Prerequisites
Install the Azure command-line interface and log in:
sudo dnf install azure-cli
az login
Find the Image ID
We need the Fedora 40 image ID in Microsoft Azure to launch the virtual machine from the CLI. Each Fedora release has an image definition for each hardware architecture. Each image definition contains one or more image versions. We add new image versions with the latest updates on a regular basis.
First, list all available image definitions in Fedora’s public gallery:
az sig image-definition list-community --public-gallery-name Fedora-5e266ba4-2250-406d-adad-5d73860d958f --location eastus --query '[].name'
Optionally, you can list the versions available using an image definition’s name:
az sig image-version list-community --public-gallery-name Fedora-5e266ba4-2250-406d-adad-5d73860d958f --gallery-image-definition "Fedora-Cloud-40-x64" --location eastus --query '[?!excludeFromLatest].uniqueId'
Typically, you should use the latest available version of an image definition, which you can reference by replacing the version number in the image version’s uniqueId with latest. For example, the image ID for the latest x86_64 Fedora 40 image is /CommunityGalleries/Fedora-5e266ba4-2250-406d-adad-5d73860d958f/Images/Fedora-Cloud-40-x64/Versions/latest.
Create the VM
Begin by creating the resource group:
az group create --location eastus --resource-group fedora-in-azure
Next, create the virtual machine using the image ID we found:
az vm create --location eastus --name fedora40 --resource-group fedora-in-azure --image /CommunityGalleries/Fedora-5e266ba4-2250-406d-adad-5d73860d958f/Images/Fedora-Cloud-40-x64/Versions/latest --size Standard_B2ats_v2 --security-type TrustedLaunch --generate-ssh-keys
Finally, you can delete everything with:
az group delete --resource-group fedora-in-azure
Conclusion
We have covered the basics for creating Fedora virtual machines in Microsoft Azure. For more in-depth coverage of virtual machine features you can refer to the virtual machine documentation for Azure. The Azure CLI documentation is also available online.


david
All these intentions are fantastic indeed, but how the heck in 2024 the Linux community is still not able to offer to the market generic smartphone/tablet where we can install the OS of our choice (especially Fedora) and break the IOS/ANDROID monopoly? it baffles me.
RG
Android 14 apis have support for virtualization… I think we should be able to install fedora/phish as a VM in android, then use some magic to figure out the incompatible drivers…. Don’t know…
david
ok but why not to just get the instruction from the chipset or even create with an A.I. a generic ARM mobo including chipset with drivers? for example, snapdragon gen 8 is managed by linux kernel 6 since 1 year now…
Taco
Hey, you make it sound really easy! Don’t let your dreams be dreams, go for it 🙂
saibug
Fedora everywhere 😉
Nothing better than Fedora