Everyone eventually runs into an inbox loaded with messages that they need to sort through. If you are like a lot of people, this is not a fast process. However, use of mail filters can make the task a little less tedious by letting Thunderbird pre-sort the messages into categories that reflect their source, priority, or usefulness. This article is an introduction to the creation of filters in Thunderbird.
Filters may be created for each email account you have created in Thunderbird. These are the accounts you see in the main Thunderbird folder pane shown at the left of the “Classic Layout”.
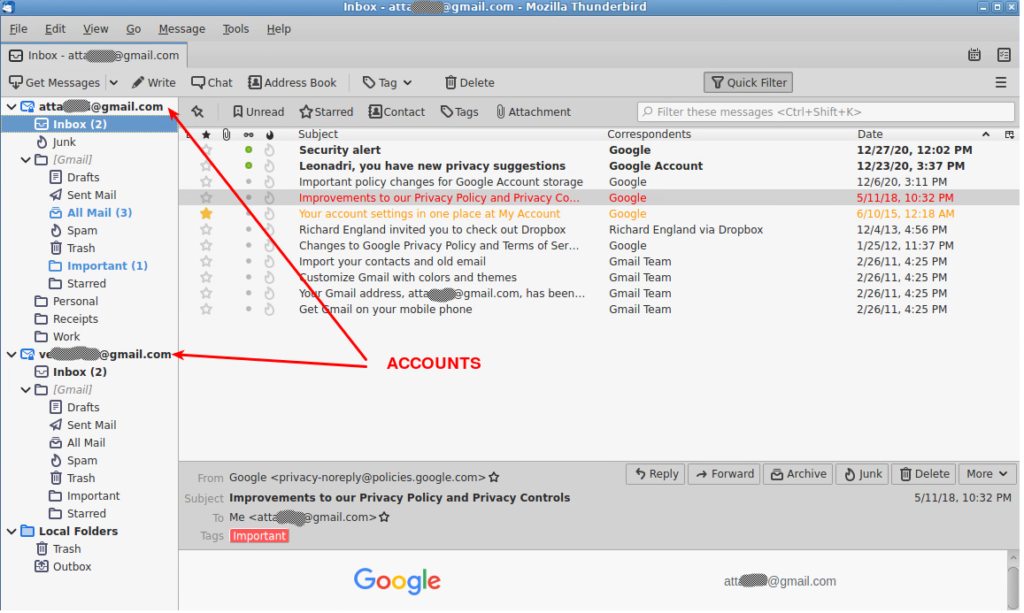
There are two methods that can be used to create mail filters for your accounts. The first is based on the currently selected account and the second on the currently selected message. Both are discussed here.
Message destination folder
Before filtering messages there has to be a destination for them. Create the destination by selecting a location to create a new folder. In this example the destination will be Local Folders shown in the accounts pane. Right click on Local Folders and select New Folder… from the menu.
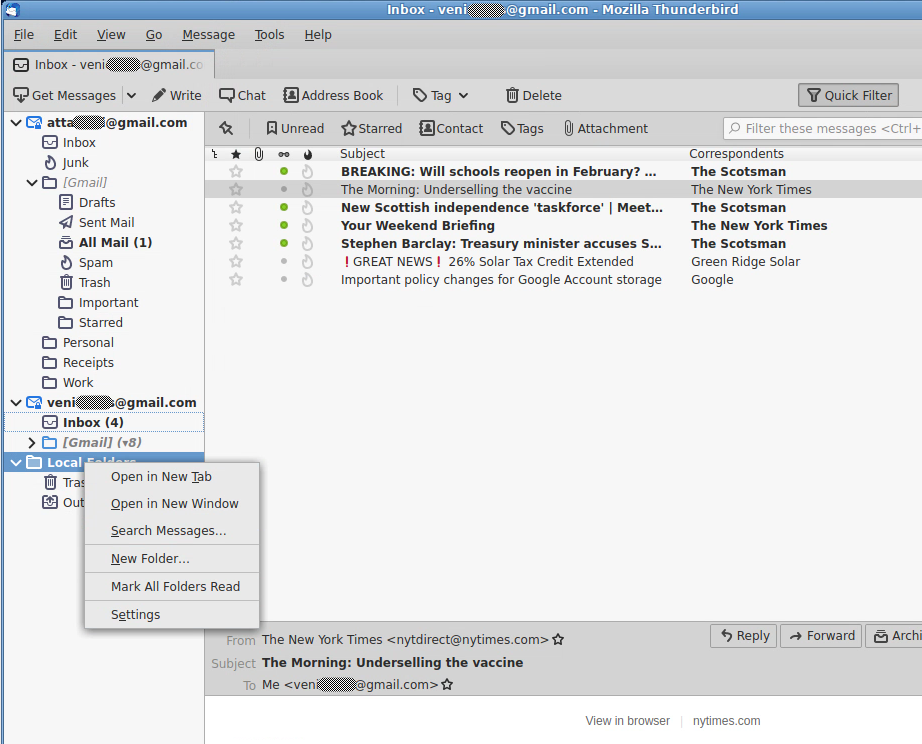
Enter the name of the new folder in the menu and select Create Folder. The mail to filter is coming from the New York Times so that is the name entered.

Filter creation based on the selected account
Select the Inbox for the account you wish to filter and select the toolbar menu item at Tools > Message_Filters.
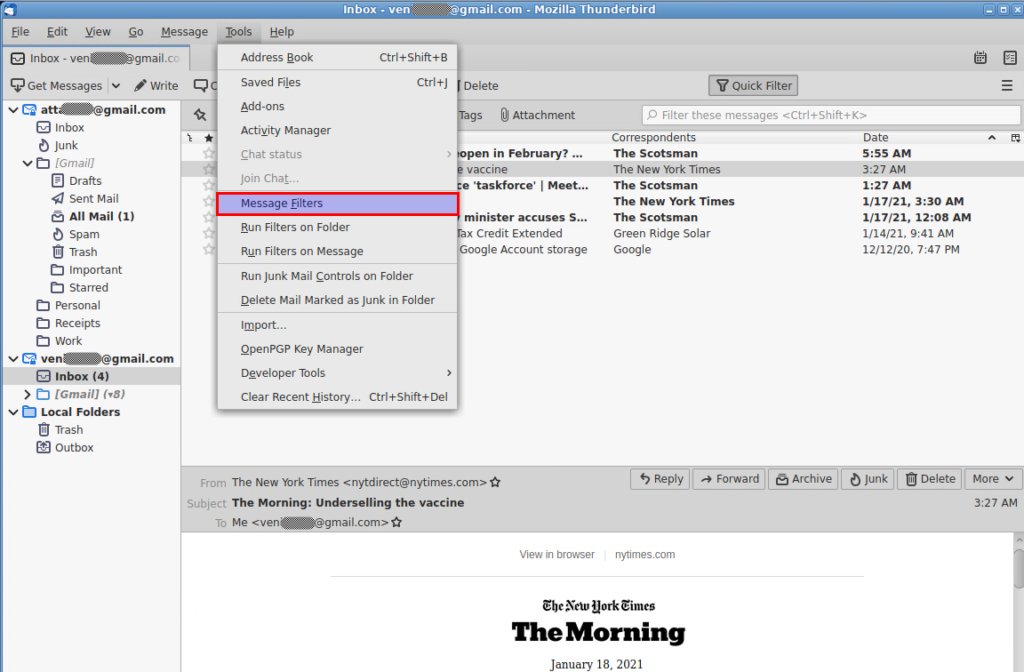
The Message Filters menu appears and is set to your pre-selected account as indicated at the top in the selection menu labelled Filters for:.
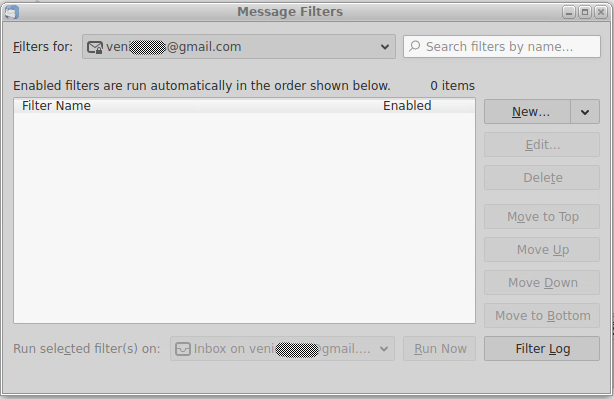
Previously created filters, if any, are listed beneath the account name in the “Filter Name” column. To the right of this list are controls that let you modify the filters selected. These controls are activated when you select a filter. More on this later.
Start creating your filter as follows:
- Verify the correct account has been pre-selected. It may be changed if necessary.
- Select New… from the menu list at the right.
When you select New you will see the Filter Rules menu where you define your filter. Note that when using New… you have the option to copy an existing filter to use as a template or to simply duplicate the settings.
Filter rules are made up of three things, the “property” to be tested, the “test”, and the “value” to be tested against. Once the condition is met, the “action” is performed.
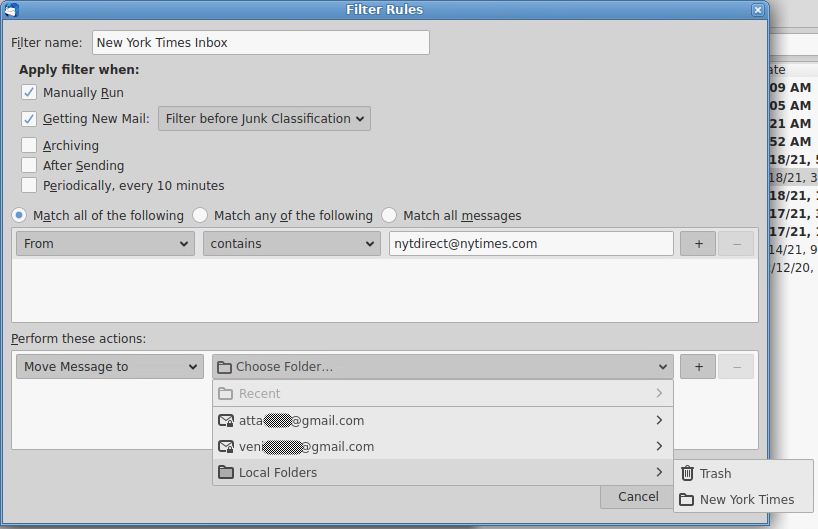
Complete this filter as follows:
- Enter an appropriate name in the textbox labelled Filter name:
- Select the property From in the left drop down menu, if not set.
- Leave the test set to contains.
- Enter the value, in this case the email address of the sender.
Under the Perform these actions: section at the bottom, create an action rule to move the message and choose the destination.
- Select Move Messages to from the left end of the action line.
- Select Choose Folder… and select Local Folders > New York Times.
- Select OK.
By default the Apply filter when: is set to Manually Run and Getting New Mail:. This means that when new mail appears in the Inbox for this account the filter will be applied and you may run it manually at any time, if necessary. There are other options available but they are too numerous to be discussed in this introduction. They are, however, for the most part self explanatory.
If more than one rule or action is to be created during the same session, the “+” to the right of each entry provides that option. Additional property, test, and value entries can be added. If more than one rule is created, make certain that the appropriate option for Match all of the following and Match any of the following is selected. In this example the choice does not matter since we are only setting one filter.
After selecting OK, the Message Filters menu is displayed again showing your newly created filter. Note that the menu items on the right side of the menu are now active for Edit… and Delete.
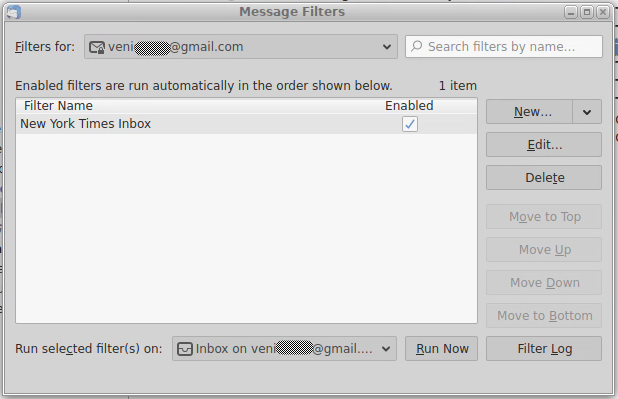
Also notice the message “Enabled filters are run automatically in the order shown below”. If there are multiple filters the order is changed by selecting the one to be moved and using the Move to Top, Move Up, Move Down, or Move to Bottom buttons. The order can change the destination of your messages so consider the tests used in each filter carefully when deciding the order.
Since you have just created this filter you may wish to use the Run Now button to run your newly created filter on the Inbox shown to the left of the button.
Filter creation based on a message
An alternative creation technique is to select a message from the message pane and use the Create Filter From Message… option from the menu bar.
In this example the filter will use two rules to select the messages: the email address and a text string in the Subject line of the email. Start as follows:
- Select a message in the message page.
- Select the filter options on the toolbar at Message > Create Filter From Message….
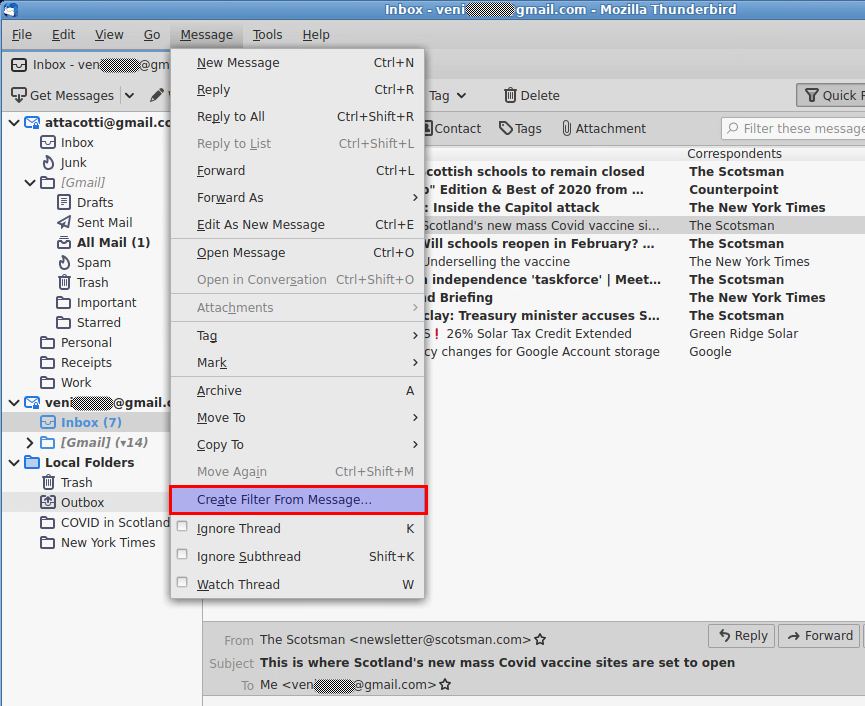
The pre-selected message, highlighted in grey in the message pane above, determines the account used and Create Filter From Message… takes you directly to the Filter Rules menu.
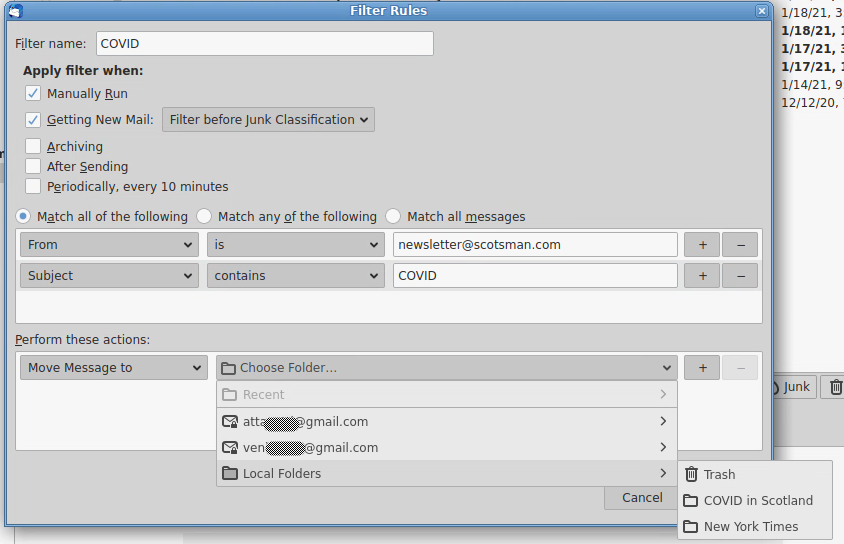
The property (From), test (is), and value (email) are pre-set for you as shown in the image above. Complete this filter as follows:
- Enter an appropriate name in the textbox labelled Filter name:. COVID is the name in this case.
- Check that the property is From.
- Verify the test is set to is.
- Confirm that the value for the email address is from the correct sender.
- Select the “+” to the right of the From rule to create a new filter rule.
- In the new rule, change the default property entry From to Subject using the pulldown menu.
- Set the test to contains.
- Enter the value text to be matched in the Email “Subject” line. In this case COVID.
Since we left the Match all of the following item checked, each message will be from the address chosen AND will have the text COVID in the email subject line.
Now use the action rule to choose the destination for the messages under the Perform these actions: section at the bottom:
- Select Move Messages to from the left menu.
- Select Choose Folder… and select Local Folders > COVID in Scotland. (This destination was created before this example was started. There was no magic here.)
- Select OK.
OK will cause the Message Filters menu to appear, again, verifying that the new filter has been created.
The Message Filters menu
All the message filters you create will appear in the Message Filters menu. Recall that the Message Filters is available in the menu bar at Tools > Message Filters.
Once you have created filters there are several options to manage them. To change a filter, select the filter in question and click on the Edit button. This will take you back to the Filter Rules menu for that filter. As mentioned earlier, you can change the order in which the rules are apply here using the Move buttons. Disable a filter by clicking on the check mark in the Enabled column.
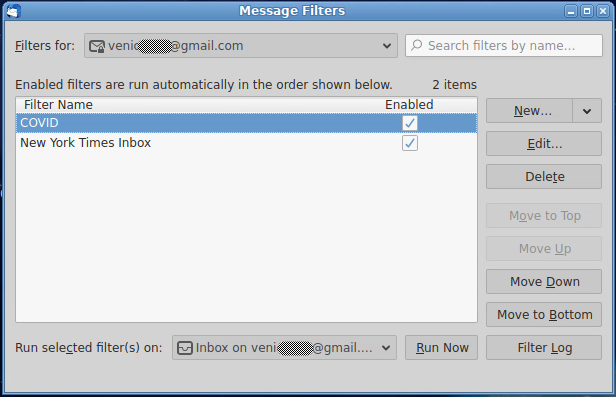
The Run Now button will execute the selected filter immediately. You may also run your filter from the menu bar using Tools > Run Filters on Folder or Tools > Run Filters on Message.
Next step
This article hasn’t covered every feature available for message filtering but hopefully it provides enough information for you to get started. Places for further investigation are the “property”, “test”, and “actions” in the Filter menu as well as the settings there for when your filter is to be run, Archiving, After Sending, and Periodically.
References
Mozilla: Organize Your Messages by Using Filters




tom
Nice one. This works the same way since ages.
If you use your own Spam-Detection you can configure it to add “[Spam]” or whatever you like to the subject and then use such a filter to move all mails where it occurs to a Spam folder.
Ian Ferguson
Thank you for your article most useful for a new Thunderbird user
wobble man
cool! try it!
VT
Kudos for supporting open source
Michael Walsh
Filters are fabulous,
One day I was telling my wife about them as we drove over to a friend’s house. She had never heard of filters before so as I was driving, I explained in very rough terms what they did and how to create them.
A week later when I looked at Thunderbird on her computer I saw 15 new folders and a bunch of new filters. She became the Filter Queen overnight. She was a professional and the filters allowed her to get Thunderbird to sort all the incoming mail from different clients based on their names.
Thank you for this article, and may many more people unlock the power of filters.