


Continuous integration in public projects is widely used. But it has limitations such as the size of the resources and the execution time. For instance, when you use GitHub actions free tier, you are limited to agents with 2cpu and 7GiB of memory and a total execution time of 2000 minutes per month. Similar limitations are used by other CI providers like Azure Pipelines or Travis CI. The mentioned CI systems are popular. But for some use cases, free tier is not enough. Fortunately, for community projects which are maintained or co-maintained by Red Hat or Fedora/CentOS projects, there is Testing Farm.
Testing Farm
Testing Farm is an open-source testing system offered as a service. Users can use Testing Farm in many ways — use CLI from the user’s local machine to create a machine for running the tests, integrate it into the project as a CI check via GitHub Actions or Packit, or just send HTTP requests to the service API with desired requirements.
The tests are defined via tmt — Test Management Tool — that allows users to manage and execute tests in different environments. In case you are interested in more details about how Fedora manages the testing via tmt check the Fedora CI documentation.
This blog post will focus on how to use Testing Farm with projects that have tests written and managed in different testing frameworks like JUnit.
Strimzi e2e tests
As a reference project we use strimzi-kafka-operator and its test suite. Test suite is written in Java and uses the Junit5 test framework. As an execution environment it requires a Kubernetes platform like OpenShift, Minikube, EKS, or similar. Due to these requirements it is not easy to run the tests with the full potential of parallel tests execution on Azure (used as the main CI tool in Strimzi organization).
How to onboard
Get the secret
As the first step, you need to get access to the Testing Farm API. To achieve that you should follow the onboarding guide which is a part of the official documentation. This secret is specific to the user and is used for authentication and authorization to the service.
Add tmt to your project
Even if users don’t use tmt for test case management, there are several parts to implement in the project to make Testing Farm understand your needs.
At first, you have to mark the root folder in your project with the .fmf directory, this can be done by using the tmt init command. For more details you can check our configuration in the Strimzi repository.
Plan
Plan for Testing Farm contains a test plan definition. This definition is composed of hardware requirements, preparation steps for creating a VM executor and specific plans. Specific plan defines selectors for tests that should be executed. As part of preparation steps we also spin-up the Minikube cluster and build and push Strimzi container images used during testing. On the bottom of the file we specify specific test plan names and its configuration for executions of specific tests defined later in this article.
You can see an example of our plan below.
# TMT test plan definition
# https://tmt.readthedocs.io/en/latest/overview.html

# Baseline common for all test plans
###########################################################
summary: Strimzi test suite
discover:
  how: fmf

# Required HW
provision:
  hardware:
    memory: ">= 24 GiB"
    cpu:
      processors: ">= 8"

# Install required packages and scripts for running strimzi suite
prepare:
  - name: Install packages
    how: install
    package:
      - wget
      - java-17-openjdk-devel
      - xz
      - make
      - git
      - zip
      - coreutils

... ommited

  - name: Build strimzi images
    how: shell
    script: |
      # build images
      eval $(minikube docker-env)
      ARCH=$(uname -m)
      if [[ ${ARCH} == "aarch64" ]]; then
        export DOCKER_BUILD_ARGS="--platform linux/arm64 --build-arg TARGETPLATFORM=linux/arm64"
      fi
      export MVN_ARGS="-B -DskipTests -Dmaven.javadoc.skip=true --no-transfer-progress"
      export DOCKER_REGISTRY="localhost:5000"
      export DOCKER_ORG="strimzi"
      export DOCKER_TAG="test"

      make java_install
      make docker_build
      make docker_tag
      make docker_push

# Discover tmt defined tests in tests/ folder
execute:
  how: tmt

# Post install step to copy logs
finish:
  how: shell
  script: ./systemtest/tmt/scripts/copy-logs.sh
###########################################################

/smoke:
  summary: Run smoke strimzi test suite
  discover+:
    test:
      - smoke

/regression-operators:
  summary: Run regression strimzi test suite
  discover+:
    test:
      - regression-operators

/regression-components:
  summary: Run regression strimzi test suite
  discover+:
    test:
      - regression-components

/kraft-operators:
  summary: Run regression kraft strimzi test suite
  discover+:
    test:
      - kraft-operators

/kraft-components:
  summary: Run regression kraft strimzi test suite
  discover+:
    test:
      - kraft-components

/upgrade:
  summary: Run upgrade strimzi test suite
  provision:
    hardware:
      memory: ">= 8 GiB"
      cpu:
        processors: ">= 4"
  discover+:
    test:
      - upgrade
To see the full version check our repository.
Tests
As a next step we need to say how to execute tests. We created a simple shell script which just calls maven command to execute Strimzi test suite. We also defined metadata for tests which specify environment variables for test suites and also other configuration like timeout, end others.
In this test metadata example you can see that we specify default env variables and configuration and specific tests override this configuration.
test:
  ./test.sh
duration: 2h
environment:
  DOCKER_ORG: "strimzi"
  DOCKER_TAG: "test"
  TEST_LOG_DIR: "systemtest/target/logs"
  TESTS: ""
  TEST_GROUPS: ""
  EXCLUDED_TEST_GROUPS: "loadbalancer"
  CLUSTER_OPERATOR_INSTALLTYPE: bundle
adjust:
  - environment+:
      EXCLUDED_TEST_GROUPS: "loadbalancer,arm64unsupported"
    when: arch == aarch64, arm64

/smoke:
  summary: Run smoke strimzi test suite
  tag: [smoke]
  duration: 20m
  tier: 1
  environment+:
    TEST_PROFILE: smoke

/upgrade:
  summary: Run upgrade strimzi test suite
  tag: [strimzi, kafka, upgrade]
  duration: 5h
  tier: 2
  environment+:
    TEST_PROFILE: upgrade

/regression-operators:
  summary: Run regression strimzi test suite
  tag: [strimzi, kafka, regression, operators]
  duration: 10h
  tier: 2
  environment+:
    TEST_PROFILE: operators

/regression-components:
  summary: Run regression strimzi test suite
  tag: [strimzi, kafka, regression, components]
  duration: 12h
  tier: 2
  environment+:
    TEST_PROFILE: components

/kraft-operators:
  summary: Run regression kraft strimzi test suite
  tag: [strimzi, kafka, kraft, operators]
  duration: 8h
  tier: 2
  environment+:
    TEST_PROFILE: operators
    STRIMZI_FEATURE_GATES: "+UseKRaft,+StableConnectIdentities"

/kraft-components:
  summary: Run regression kraft strimzi test suite
  tag: [strimzi, kafka, kraft, components]
  duration: 8h
  tier: 2
  environment+:
    TEST_PROFILE: components
    STRIMZI_FEATURE_GATES: "+UseKRaft,+StableConnectIdentities"
Run Testing Farm from command line
Finally, we can try our changes via cmd. We need to have the Testing Farm CLI tool installed and also API token. To install Testing Farm CLI follow this guide.
For example, we can run a smoke test on fedora-38 with both architectures, which means x86_64 and aarch64 just by one command.
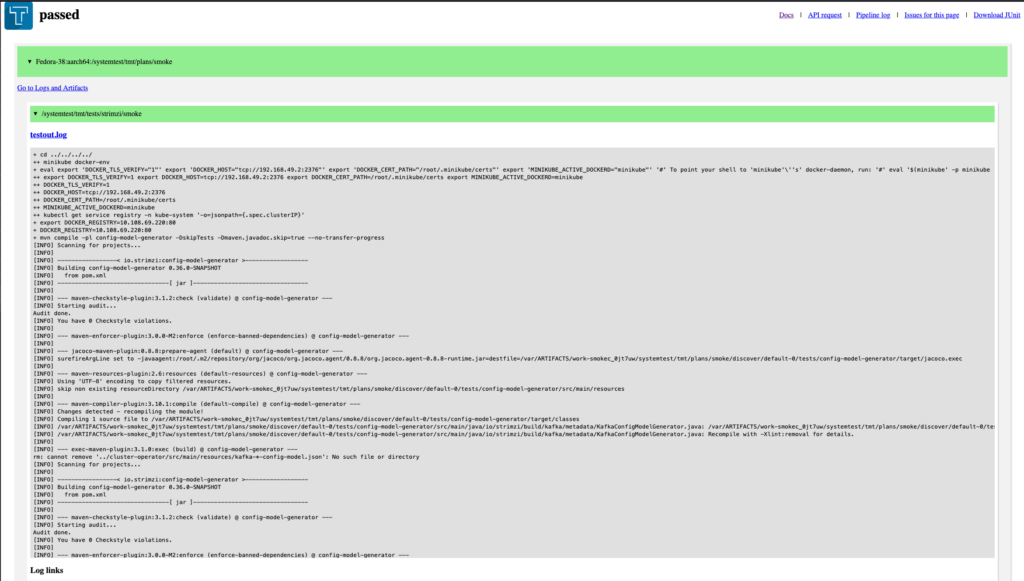
$ testing-farm request --compose Fedora-38 --git-url https://github.com/strimzi/strimzi-kafka-operator.git --git-ref main --arch x86_64,aarch64  --plan smoke

📦 repository https://github.com/strimzi/strimzi-kafka-operator.git ref main test-type fmf
💻 Fedora-38 on x86_64
💻 Fedora-38 on aarch64
🔎 api https://api.dev.testing-farm.io/v0.1/requests/*******-40ba-8a45-3c1fbe3da73a
💡 waiting for request to finish, use ctrl+c to skip
👶 request is waiting to be queued
👷 request is queued
🚀 request is running
🚢 artifacts https://artifacts.dev.testing-farm.io/*******-40ba-8a45-3c1fbe3da73a
When the test run is completed we can see results in web UI.
Packit
Testing Farm deals with resource problems. But we still need to deal with execution time limits. In Strimzi, our full regression takes around 20 hours which is insane to run on GitHub Actions and it is quite complicated to run it on Azure Pipelines. Here comes Packit service.
Packit is an open-source project aiming to ease the integration of your project with Fedora Linux, CentOS Stream and other distributions. Packit is mostly used by projects that build RPM packages. However, it can be easily used only for triggering tests on Testing Farm.
To use Packit service users should follow the onboarding guide. We are using Packit on GitHub so we just installed the application and granted access to our organization.
After finishing the onboarding, users can create a configuration file for Packit in the repository. You can see our small example below. Because we just want to run tests, we use jobs: tests but users can use different kinds of jobs and triggers. To see the full options for Packit we suggest checking the documentation or this blog post.
# Default packit instance is a prod and only this is used
# stg instance is present for testing new packit features in forked repositories where stg is installed.
packit_instances: ["prod", "stg"]
upstream_project_url: https://github.com/strimzi/strimzi-kafka-operator
issue_repository: https://github.com/strimzi/strimzi-kafka-operator
jobs:
  - job: tests
    trigger: pull_request
    # Suffix for job name
    identifier: "upgrade"
    targets:
      # This target is not used at all by our tests, but it has to be one of the available - https://packit.dev/docs/configuration/#aliases
      - centos-stream-9-x86_64
      - centos-stream-9-aarch64
    # We don't need to build any packages for Fedora/RHEL/CentOS, it is not related to Strimzi tests
    skip_build: true
    manual_trigger: true
    labels:
      - upgrade
    tf_extra_params:
      test:
        fmf:
          name: upgrade
  ###########################################################

  - job: tests
    trigger: pull_request
    # Suffix for job name
    identifier: "regression-operators"
    targets:
      # This target is not used at all by our tests, but it has to be one of the available - https://packit.dev/docs/configuration/#aliases
      - centos-stream-9-x86_64
      - centos-stream-9-aarch64
    # We don't need to build any packages for Fedora/RHEL/CentOS, it is not related to Strimzi tests
    skip_build: true
    manual_trigger: true
    labels:
      - regression
      - operators
      - regression-operators
      - ro
    tf_extra_params:
      test:
        fmf:
          name: regression-operators
.. ommited
The full .packit.yaml file is available on Strimzi GitHub.
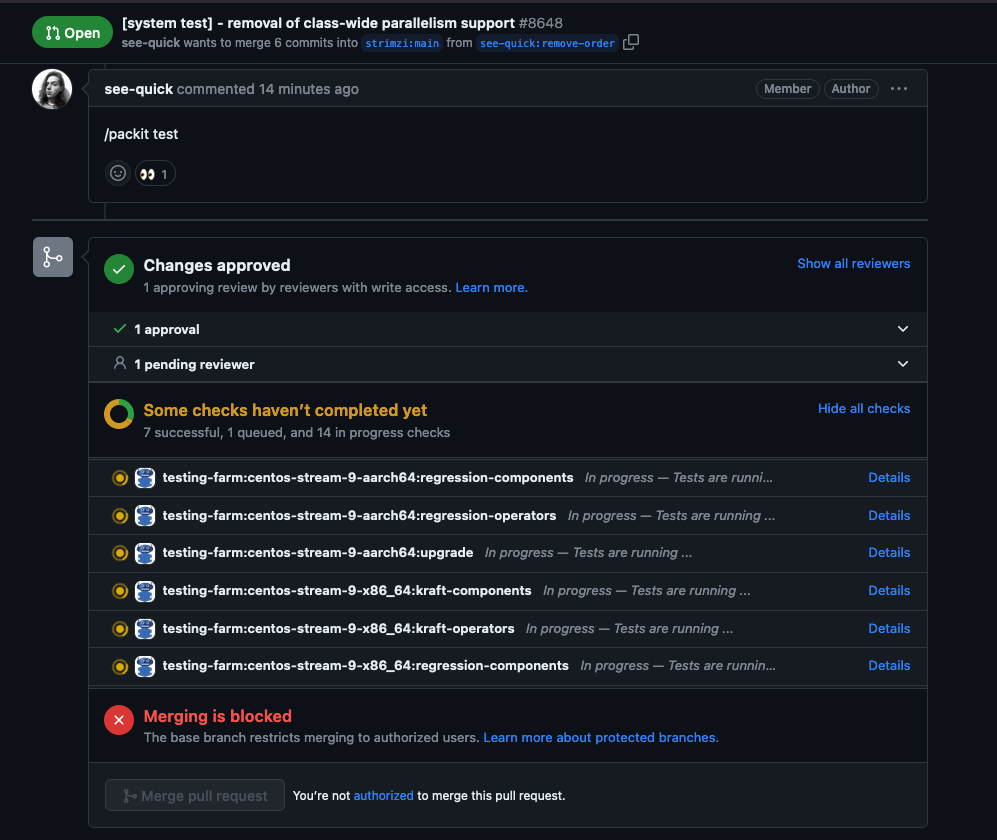
If you successfully onboard to Packit service you will see the triggered check in GitHub pull request like on the picture bottom.
Conclusion
In this article, you’ve seen how to set up and use Testing Farm together with Packit. These two services make your upstream project very easily built and tested and now nothing stops you from on-boarding and using it!

Hugo Gaudin
Is this a response to the change in Red Hat’s terms of use where they say you can’t use their RHEL source code for derivative work anymore?
Miroslav Vadkerti
Hi Hugo, no, has nothing to do with it. Maybe we should change the description, as it might be misleading to the community. Testing Farm is a testing backed used to test Fedora, CentOS Stream and RHEL and lately also other communities are finding values in it for testing their projects, so this is an example of using Testing Farm to test actually something else as the OS or a project directly integrated into it.