This is not a post about privacy, browser cookies, keeping you safe online and all that good stuff. You can find a plethora of information on that in some other articles and resources.
This post is about actual Fedora cookies and trying to put a smile on people’s faces while inspiring them to contribute to the Fedora Project.

The idea is far from being original – we’ve seen the Tux cookies images floating around the Internet, but it is a novel thing in Fedora. The idea was discussed a couple years ago with local hackerspace Tilda Center. They had a 3D printer readily available and were kind enough to offer to collaborate with us.
However, the legacy Fedora logo was not… “cookie friendly”. It had three colors that were supposed to be either fully colored or very cleverly translated into difference in cookie dough imprints (differing depth, texture or other…).
The cutter
Now, with the new logo, this task becomes much easier and we decided to go for it. Looking at the Fedora Magazine’s article on how to get started with 3D printing, I decided to attempt to create a 3D model of the cookie cutter myself, rather than waiting on someone else to do it for me.
Working with OpenSCAD was surprisingly easy and intuitive for someone who has never dealt with 3D modeling. Step by step, the logo started taking shape. The most time-saving feature was the ability to import scalable vector graphic (SVG) files. This way I got a jump start on the logo itself and just needed to shape the supporting features of the cutter.
After getting some pointers from the more-experienced people, the final shape took place:

Now, for the very experienced amongst you, you will spot a few things that could be improved. Do note that I received some of those suggestions but decided against them due to the fear of the cutter breaking, dough thickness and greasiness, and other issues.
However, I do agree that the “cutting” edges should be a bit sharper. I fixed that, post-production, with some sand-paper. (The base for holding the cutter is also too thick at 2cm, so we reduced it to 1cm before printing.)
The dough
For the ones amongst you who would like to give it a go, here is the recipe for the dough and icing. The cutter model is available here as STL and SCAD files.
900g white flour
400g sugar
6g baking soda
5g salt
3g dry white food coloring
3g dry blue food coloring
20g vanilla sugar
20g sour cream
half a skin of a lemon
4 eggs
500g margarine
200g powdered sugar
50g white chocolate

Cookies:
Remove margarine from the fridge so it would be easier to work with.
Pour food coloring from bags into a cup and make sure there are no crumbs.
Mix flour, sugar, baking soda, salt, vanilla sugar and coloring into a larger bowl.
Grind half of lemon's skin (make sure that lemon is not sprayed with pesticides).
Add sour cream, one whole egg and three egg yolks. We set eggwhites a side for glazing.
It's best to cut margarine into chunks for easier management.
Mix everything by hand, cover with foil and put it in the fridge for an hour.
Heat up the oven to 175'C (without removing the oven plate).
Then, remove the oven plate from the oven and leave it for 5 minutes to chill a bit.
This is done so the first and the other batches are exposed to the same environment.
Use rolling-pin to stretch the dough to 4mm directly on the baking paper.
Hint: it may be easier if you somehow fix the paper to the table.
Someone may hold it for you, or use small pieces of duct tape.
From my experience it's best to make three spheres and stretch them into a cylinder.
Place them on the baking paper as shown on the image and stretch them in square shape.
Keep the tip of the cutter submerged into vegetable oil so the dough doesn't stick.
After every 2-3 cutter impressions, re-dip it into oil and proceed.

| n n n |
| u u u |

Create impressions with the cutter, and remove extra dough.
Bake it on the second level in the oven for 20 minutes at 175'C, remove it and leave for 5 minutes.
We wait so the cookies could chill a bit so the don't break when removing from the oven plate.
Repeat until you use up all the dough.
Glazing:
Stir egg-whites by hand until they get white color, then add white chocolate.
Steam boil it for 8 minutes until the chocolate melts and egg-whites are thermal-processed.
Remove from the stove and add powdered sugar then stir it well.
Use single-use bags for cake decoration to apply glazing.
The consumption
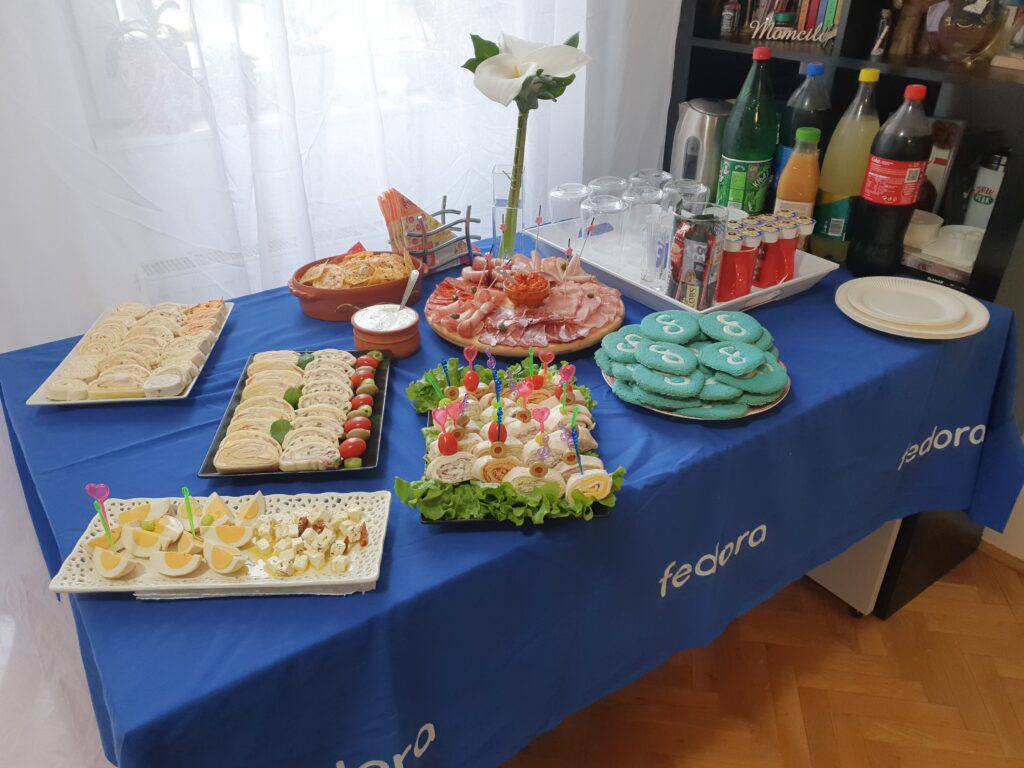
Finally, cookies are irrelevant if nobody eats them, so we organized a sprint to translate some of the Fedora sites. This time we focused on the fedoraproject.org website as it was not translated after it got an upgrade.
Since this was the first time we organized such an event, we didn’t ask for any additional support from Fedora, apart from standard swag that we dealt-out in a conference-style gift bags.


Final result: we have the fedorproject.org website available in Serbian and many translation contributors looking forward to new sprints!
Everybody involved was rather new to translation in general, but were very happy and are looking forward to new events in the future.


Roman Gherta
Congrats, looks delicious ! I remember openscad… It is unfortunate the entire CAD market is commercial nowadays
hammerhead corvette
That 400g of sugar causes my system to crash by 2pm . . .
FeRD (Frank Dana)
That’s OK, just like ejecting a stubborn CD or resetting a misbehaving router, you can stick a small pin into a hole to restart the system. Just make sure it’s attached to a syringe of insulin.
Grandpa Leslie
Wife baked up a batch, Kids ate them right off the tray as the tray was exracted from the oven.
Justin W. Flory
Wow! Looks like a great time! I wish I could have been there. Maybe I need to start planning my trip to Serbia. 🙂
Cookie Monster
Awesome. Can the recipe be made available in a standard format? See for example https://microformats.org/wiki/recipe-formats Is there a license for the recipe?
Medic Momcilo
Sure thing! If you’re up for it, or anyone else – it would be awesome! 👍
License should be Creative Commons or any license that could allow people to freely enjoy 😉
FeRD (Frank Dana)
Ugh, whyyyyyyyyy are those all XML??? Except for the Cooking for Engineers site, which uses RxOL (a format published on a website that’s been dead for 14 years). That looks like this:
<* Chicken Chasseur (Poulet Sauté Chasseur).
*chicken, 1 kg =cut up
{ *oil
*butter /and } /sauté in, till three-quarters cooked
*mushrooms, 125 g =slice /add =cook
*:chicken =remove
*white wine, 100 ml /add
*shallot, 10 g /add =reduce
*thickened rich veal gravy, 150 ml /add
*tomato sauce, 50 ml /add =simmer, 30 s
*brandy, 15 ml /add
*parsley, 10 g =mince /add
*chervil, 10 g =mince /add
*tarragon, 10 g =mince /add
*:chicken /pour over
*parsley =mince /sprinkle with>
…Couldn’t be clearer! 😐
Mark Pearson
Very awesome – I love it!
I was having a conversation just two days ago with someone recently about wanting a 3D printer but not having found an excuse/project/reason to buy one…and now I have that reason!
I’m sure my wife will agree 😀
FeRD (Frank Dana)
I have a question…
…What the heck is an oven plate? I have a cookie sheet, which I normally would use to bake cookies on, but it doesn’t live inside the oven when it’s not in use. So if I’m supposed to preheat it when I turn on the oven, I need to be told to put it inside the oven, first, before I can either “leave” it in, or eventually remove it.
Joe Jokes
That is what they mean. Perfect working knowledge of English baking terms across multiple English countries is not so common outside English countries. Recipes are not quite that prescriptive in wording, you use the context given.
FeRD (Frank Dana)
For those without a 3D printer, while “fat teardrop” is unfortunately not a common cookie-cutter shape, a lot of sets DO include both square and circular cutters, and if you’re willing to do a little tin-snip / utility-blade modification (depending whether they’re metal or plastic), that’s really all you’d need.
To prepare, choose a square cutter to be your cookie size, then take the circle cutter with the same diameter, and cut away 1/4 (90°) of the circle’s circumference. (If it’s the type without handles or a frame, it’ll probably want to lose its shape, so you’ll probably have to two-hand it back into a circle.)
Start off by using the square cutter, to shape the “bounding box” of the logo-cookie.
Then, if you’re using cutters with handles, remove the square, position the 3/4-circle at the top and right edges of the square outline, and rotate it so that the lower-left corner is centered in the gap.
If you’re using non-handled cutters, leave the square in place, and insert the 3/4-outline circle inside it, oriented the same as above. (You might even be able to just push them together and use both at once, especially if they’re metal-outline cutters.)
Either way, voilà! Fedora-logo outline cookies. Freehanding the f-infinity shape onto the top of the cookie in icing is left as an exercise to the reader.
Dorota
Hello,
could I please get the Fedora logo 3D cutter model because after writing to logo@fedoraproject.org I have got this information: This queue isn’t place for obtaining those files, I suggest you contact the author of the article!
Then after adding more information they responded(this has a tip for the author):
Thanks for the clarity! Unfortunately, this is a manual queue. We weren’t, to my knowledge, told about nor given the opportunity to consent to handle this additional responsibility.
I think a good way forward, if you’re going to email the author anyway and if you’re willing to help, would be to ask the author to remove the logo email from the article because we don’t have the capacity. I am sure he could work something out with a Fedora council to get permission to provide a download link for it to save everyone the manual effort.
Richard England
The author has made the cutter model available as stl and scad files. The email address in the article has been changed to a link to the repository for these files.