


GNS3 is an amazing tool that allows IT professionals to, quite simply, create a virtual lab. The software can virtualize or emulate a variety of systems called appliances. These appliances range from Cisco routers and switches to nodes such as Windows Server, CentOS, and Fedora. GNS3 also has the capability to utilize containers. If you’re designing and testing proof-of-concept ideas, recreating environments for troubleshooting, or want to delve into the world of network engineering, GNS3 might be for you.
As seen on their website, GNS3 is well acquainted in the enterprise world. Companies using it span from tech businesses like Intel, to scientific organizations like NASA. Even renown banks and telecom companies are included in the list. This adds great credibility to the power and reliability this open-source tool provides.
Installation
For Fedora users, GNS3 can be easily installed from the official repository. From the command-line type:
sudo dnf install gns3-server gns3-gui
The reason for the separate packages is because GNS3 can be configured as a dedicated server. This is useful for teams to collaborate while working on a project, or problem. The dedicated servers can be installed on bare-metal or as a virtual machine.
GNS3 requires a computer with virtualization capabilities. This allows the software to utilize the computer’s hardware to increase the performance when running the appliances. To use Spice/VNC as a console install the virt-viewer package.
When the installation is complete, an icon will be placed among the applications for GNS3.
Initial setup
Opening GNS3 for the first time will open the Setup Wizard. The options on the first screen allow users to either setup an isolated VM environment, run the topologies from the local computer, or to use a remote server. The examples in this article are performed on the local machine.
The next screen configures the application to connect to the local machine running GNS3 server. Here we see the path to the application installed locally on the server, host binding address, and port. These settings can be tweaked to match your setup. However, for a quick setup it’s best to accept the defaults.
Once the settings are verified, a confirmation will appear stating the connection to the local server was successful. The last screen in the wizard will provide a summary. Click the Finish button to complete the setup.
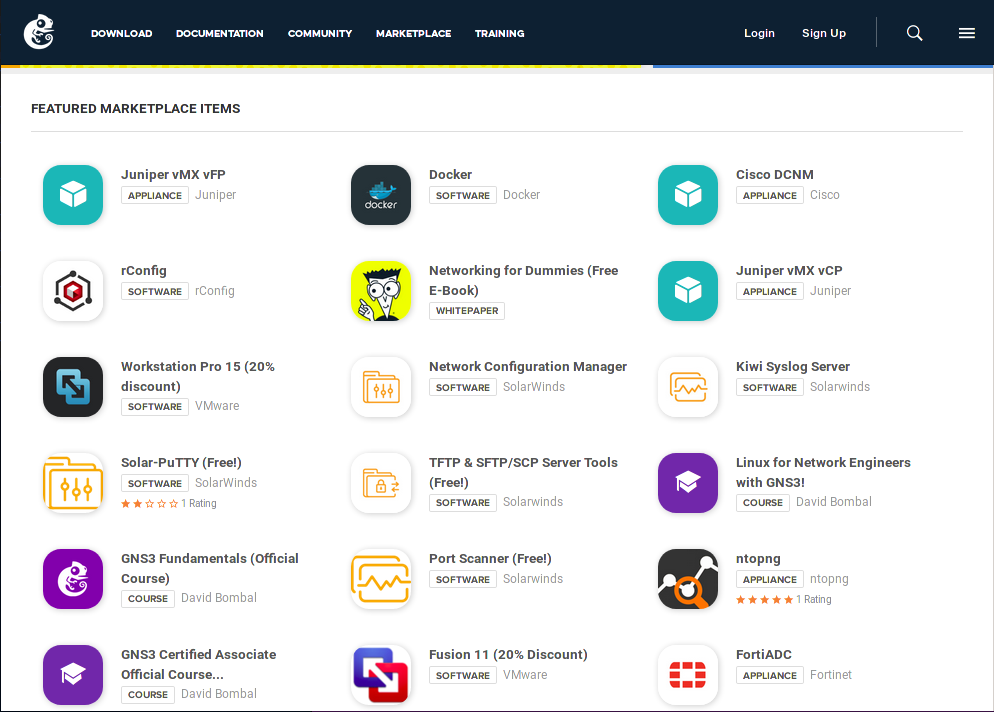
Finding appliances in the GNS3 Marketplace
Before venturing into the GUI, this would be a good time to visit the GNS3 Marketplace. The marketplace contains appliances, pre-configured labs, and software for use with GNS3. The options in the Marketplace are vast and beyond the scope of this article. However, let’s download an appliance to see how it works.
First, select the appliance you want (the examples in this article will use OpenWRT). Select the template for that appliance to download. Appliance templates are JSON files with the extension gns3a.
You can also install OS nodes without a template, or create your own. OSBoxes.org has a variety of pre-built VMWare images (VMDK) that are compatible with GNS3. For this article we’ll use the Fedora 64-bit VMWare image. You can also find images for many other distributions such as CentOS, Ubuntu, and Kali Linux.
To use Cisco appliances a service agreement or subscription to VIRL is needed to download the IOS images from Cisco. For links and guides to legally download Cisco IOS, check out David Bombal’s site at https://davidbombal.com/gns3-download-cisco-ios-images-virl-images-best-get/.
You may also need to install Dynamips which is not included in the official repos. However, a simple web search will point to the RPM package.
Importing appliances to GNS3
Now that we have some appliances let’s build a small and simple topology using the templates and images we just downloaded.
After the initial setup the New appliance template window will open. From here we can import template files like the gns3a file downloaded from the Marketplace. Other options for adding appliances without a template include IOS devices, VMs, and Docker containers.
To add the OpenWRT router, click Import an appliance template file. This will open the Add appliance wizard. Review the information on the first screen which shows the category, vendor, architecture, and KVM status for that appliance, and click Next. Now select the Server type to run the appliance and click Next. This is where we can specify whether we want to run it on a remote server, in a GNS3 VM, or on the local machine. After verifying the server requirements click Next to continue the installation.
At this point it’s time to install the image file for the OpenWRT appliance. Select the version and click the Download button. This will go to the site containing the image file and download it. This article will use OpenWRT 18.06.4 downloaded from the project’s website. If the version of the image is not in the list, click the button to Create a new version, and enter the version number (in this case 18.06.4). Select the filename and click Import to import the image. GNS3 will then ask if you would like to copy the image and decompress it (if necessary). Accept it and complete the install.
Adding appliances without a template
To add the Fedora VM downloaded from OSBoxes, click on one of the icons on the left and select New appliance template near the bottom. Select Add a Qemu virtual machine and click Next. Enter a name for the appliance (in this case Fedora 30) then click Next. Verify the QEMU binary path and input the amount of RAM to use for the VM, then select the Console type. On the next screen select New image and browse for the VMDK file. Depending on the file-size it may take a few moments. To copy/import the image select Yes and once it’s completed click Finish.
Adding and connecting nodes in GNS3
Now that we have some appliances, let’s build a simple topology with OpenWRT and Fedora in GNS3. The icons on the left represent Routers, Switches, End devices, and Security devices. The second-last shows all appliances, and the bottom option is to Add a link which connects the nodes to each other.
Click on the Routers icon and drag the OpenWRT router onto the empty workspace to the right. Click on the End devices icon and do the same for the computer node. Depending on how large the file is, it may take a few moments for the PC node to appear in the workspace. To connect the nodes, click Add a link then click on a node, select the interface (i.e. Ethernet0), then do the same with the other node (as seen in the demo below).
You can customize the consoles by going to the menu bar and selecting Edit > Preferences > General. Select the tab for Console applications and click the Edit button. From here you can choose your favourite terminal in the drop-down menu and even customize it in the text-box below.
Once everything is in place, start the nodes by clicking the green (play) button at the top. The lights in the Topology Summary section will turn green indicating the nodes are on. To open the consoles for the nodes, click the Console to all devices button to the left (it looks like a terminal icon). The Remote Viewer window for Fedora and a terminal window for OpenWRT will open.
Once complete you can turn off the nodes individually by right-clicking on the node and selecting Stop, or to stop all nodes click the red Stop button in the top bar.
Conclusion
GNS3 is a powerful piece of software with features that are beyond the scope of this article. The software is similar to Cisco’s Packet Tracer. However, Packet Tracer is a simulator with limitations to the program’s coding. GNS3 on the other hand virtualizes/emulates the nodes using the hardware’s actual OS. This provides full functionality and a closer experience to the actual hardware.
The GNS3 documentation site offers an enormous amount of resources that delve further into the workings of the application. They also offer training courses for those interested in digging deep into the workings of the software.

Oscar
vpcs isn’t available in Fedora repositories neither.
For me, it’s a no-go.
Earl Ramirez
Before GNS3 made it to Fedora official repo, I have been using nucleo from corp, everything that was required was available from there.
Oscar
Sorry, I don’t understand you. What is “nucleo”? What is “corp”? Thanks a lot
Earl Ramirez
Made a typo, I meant Cool Other Package Repo (CORP), you can find details at https://fedoraproject.org/wiki/Category:Copr and a few examples can be found at https://fedoramagazine.org/4-cool-new-projects-to-try-in-copr-for-august-2019/.
John
You download it from SourceForge: https://sourceforge.net/projects/vpcs/?source=directory
After that, move it to /usr/local/bin
MrCskvin
What’s the technology behind it. Is it just a QEMU with and interface/ GUI on top? Find it hard to believe it’s a true independent hypervisor like KVM/QEMU or the like?
Shaun Assam
Hi MrCskvin. GNS3 utilizes KVM/QEMU in Fedora as the packages are available in the repos. However for other OS’s, including Fedora, it can use VirtualBox and VMWare Workstation/Fusion/ESXI to provide these virtualization capabilities. GNS3 offers pre-built images for them on their website. If you would like more details about how it works and what’s available, check out this page from the documentation on their site at https://docs.gns3.com/1o4IX8nXISl5gb4BwoSFrUht3MeTjkzHM1TCeWAe669g/index.html
MrCalvin
Yea, I did ran trough the documentation, but I didn’t get the answer to that very basic question, what the technology behind it?
I don’t see KVM only QEMU, i.e. no CPU/RAM/IO etc. passthrough, and if it only use QEMU all is 100% emulated and must be pretty slow…..well properly fast enough for test/prototyping and the like, but not effective for production, but I might be wrong?
Are there any of the other “hypervisors” that use passthrough with GNS3 or are all 100% emulated?
But it sure is nice they have pre-builded images (wonder if I can run them directly in my KVM/QEMU setup), wonder how they managed to convince all the vendors to play along.
Catalin
Hello,
In fedora 29 the installation seems to be broken. The error message is:
gns3server[23281]: pkg_resources.DistributionNotFound: The ‘prompt-toolkit==1.0.15’ distribution was not found and is required by gns3-server
Shaun Assam
Hi Catalin,
I’m unable to recreate the issue you’re experiencing. I did a fresh install of Fedora 29 in a VM and tried installing
and
before and after performing a system update and both installed fine. I noticed the version of prompt-toolkit was version 1.0.15 in the error code you provided. python2-prompt_toolkit and python3-prompt_toolkit are currently at version 1.0.16. Try doing
and re-run the
to see if that clears up any issues for you. The updated version of GNS3 is 2.1.11-1, and the older version is 2.1.8. If there are any conflicts that may be why you’re experiencing this issue.
There’s also a ticket in Bugzilla regarding this issue at https://bugzilla.redhat.com/show_bug.cgi?id=1690958, that may be able to help you resolve this.
tp
GNS3 is useless if we have to download and install Dynamips in order to emulate cisco routers. One of the big things that makes GNU/Linux a secure system is being able to install ALL programs from the official repo. When installing software programs from unknown sources, outside the official repo, we have no way to verify the software is free from malware unless we can spend days or weeks lookinng through source code. Thats if the program’s source is even available to begin with.
[quote]
However, a simple web search will point to the RPM package.
[/quote]
You’re telling people to download potentially unsafe software…… Good going….. /rollseyes.
Paul W. Frields
@tp: Your critique is based on the mistaken assumption that all the distro package maintainers are verifying all the source code they ship. The only thing a distro package ensures you is (1) easy installability from a central source, and (2) an unadulterated copy of what ships from upstream. It does not in any way guarantee there’s no malware inside; you are trusting that upstreams are taking care of that via their developers. (This isn’t to say that packages are full of malware, either. Simply that packaging doesn’t on its own guarantee the content has been vetted for security issues.)
alzaim
Thank you so very much for this article
it couldn’t have arrived at a better time.
i’m preparing for a CCNA exam and using this tool and the GNS3-academy.
thank you!!
Nestor
Using a conventional stand, you have less adversaries while
in the palm meaning your odds of using along the jackpot improve.
brad
deciding to try ubuntu or fedora. I see it seems ubuntu has a more recent version in their repo. does anyone have experience using gns3 on both and can share the experience? Thanks.